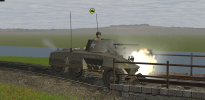
Welcome to The Few Good Men

Thanks for visiting our club and having a look around, there is a lot to see. Why not consider becoming a member?

For Want of a Final Drive AAR

Player_B

FGM Private
FGM MEMBER
Joined
Jul 26, 2022
Messages
39
Reaction score
52
Location
United Kingdom
For Want of a Final Drive
WARNING - SPOILERS FOR "CATS CHASING DOGS" SCENARIO, CMBN
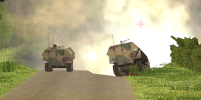
10 - Spotted.png
WARNING - SPOILERS FOR "CATS CHASING DOGS" SCENARIO, CMBN

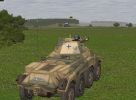
So I went up against @hmstanley again, as a follow-up encounter to Running Up That Hill. Here, I commanded a heavy armoured car company, fighting to hold the line after the failure of Operation Lüttich. The 7th Army is at risk of encirclement (and, indeed, ultimately would be in the 'Falaise Pocket'), and indeed the brief remarks "Things are looking really bleak". My unit was the only part of the division that was still mobile, and their orders were to hold the approaching US Armoured Cavalry back and if possible prevent them from taking a crossroads that would let them bypass my force. Delaying is the order of the day - this is a defence mission, for all the title suggests my pumas should be hunting the American greyhounds, and as the following events will show this is not an ideal situation for my unit.

A lot of my armoured car crews have 'green' experience, with the officers rating as 'regular'. Ancillary units such as the infantry guns, half tracks and stummels were of a higher quality, but for a lot of the key engagements it was armoured car against armoured car. The Americans had a mix of regular and veteran greyhounds, but in theory my pumas should counter that with 'thicker armour' and a 'better' (read: bigger) gun. Even a single panther would be a game-changer, but any big cats not busy hiding from Allied aircraft are most likely broken down by the side of the road and desperately trying to effect field repairs before they're left behind.
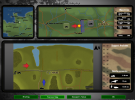
Map.png

The initial arrival point of the puma section is not ideal.
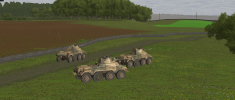
1 - Cats going hunting.png
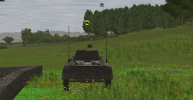
A lot of quite close terrain, although there is a rise just ahead of the house objective that would make for a passable reverse-slope defensive position. Knowing that the greyhounds are close, I bound my armoured cars forwards. The first one is able to rush behind the rise, though it's clear the Americans are watching; almost certainly a jeep. With hindsight I should have blasted the contact with HE, but I waited for the spot to resolve and for the cars to engage it themselves. They're never able to make it out though, so this suspected jeep is able to keep an eye on proceedings.
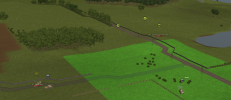
4 - Exchanging fire.png
Things go wrong when I try to move the second car up to join the first one. A greyhound crests the rise, and it's the overwatching puma that gets taken out first (perhaps the greyhound had been passed the spot by the jeep?) which leaves the second one running the gauntlet with no cover. The puma behind the rise takes out the greyhound in response, but things are about to go south very quickly.
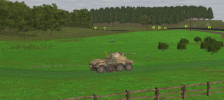
5 - Caught while moving.png
Something fires from behind the suspected jeep spot, taking out the moving puma. That was a good shot - the direction of movement was perpendicular to the shooter, and the puma was moving fast, so they led and ranged the target in a matter of seconds (if I sound envious of the greyhound crews then it's because I am). Moments later, another greyhound pops up and takes out the puma behind the rise. And like that, my first armoured car section is lost. All in a matter of minutes.
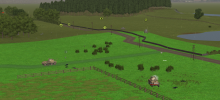
6 - Too slow on the draw.png
A bleak situation indeed. The house is clearly lost, and barring some complete reversal all I can hope for is to try and delay the Americans and stop them reaching the exit objective (I should note that both of us had played this mission before, so we had some idea of each other's forces and objectives. I deliberately didn't check though, so my memory was hazy.)
 
So, having decisively lost the first engagement, as well as any hope of delaying the Americans in time for my reinforcements to set up a second defensive line, the question becomes what did we learn today?

The first point to take away was how much slower the pumas were than the greyhounds. The greyhounds have 37mm guns, while the pumas have 50mm guns. Bigger is better, right? Well, for all the benefits 50mm confers, the pumas appear to be slower to fire and reload. This might also be because of my green troops, though I did favour the regular experience car for overwatch so the experience difference was as small as I could make it.


My spotting also appeared to be worse. A greyhound trundled over the top of the rise and was able to spot and engage one of the pumas faster than said puma could respond - and at the same speed as another stationary puma (they both had shells in the air at practically the same moment). This may well have been due to some spotting done by the jeeps, though evidence from later in the battle makes me think that there is just a substantial quality difference between our armoured car crews.

From these points, 'knife fighting' with the greyhounds is out. They're just quicker.

The final point, which I must confess I can't remember if I noticed here but was to crop up throughout the battle was the actual effects of the 37mm and 50mm shells on their targets. What I've shown here seems fairly typical for a lot of Combat Mission - a shot connects, and the vehicle is taken out (certain high-end tanks notwithstanding). In a lot of cases though, the cars were engaging with their AP ammo, and it was just going right through the target. Now, having a hole poked through your vehicle is not a pleasant experience, and certainly my crews reliably bailed out after being hit, but the car was often still mobile and capable of firing even after several hits. As I had fewer cars, and so tended to be outnumbered in most engagements, I was often not able to stay and ensure a target was dead (more on that later) while my opponent would hammer any car that didn't immediately retreat into scrap metal. I do wonder if HE would have been more effective; the front armour was around 25mm, and I don't know if the HE shells would get through that, but the AP shells were not even 'overkill' - they overpenetrated to the point of being rather ineffective at killing the target.

Having had several turns to ponder what I had learned (and watch the surviving crews, which was most of them, be gunned down by the advancing enemy), my reinforcements arrived. Only two armoured cars this time, but anything will do at this point. 7 - Reinforcements... but maybe too late.png
I had one zoom off to cover the forest path, while the other kept watch on the road. I was due more reinforcements within a variable time range, and I was fortunate that two more armoured cars arrived a mere minute later.
8 - The rest of the Zug arrives.png
With four armoured cars to work with, and this time some more distance between them and the enemy - I intended to see how some longer-ranged engagements went, where the 50mm AP's flatter trajectory [INCORRECT - see later comments] should help improve first-shot hits and where the (apparently?) better optics of the puma might help with spotting. I left the first two pumas with their original orders and set the other two up to watch my right flank.
9 - Engage at range.png
This appeared to pay off.
10 - Spotted.png
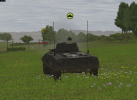
A greyhound was spotted, though it had a lucky escape as the first shot went marginally too high.
11 - Lucky escape.png
As that turn ended, that engagement ongoing, my infantry guns arrived.
12 - Infantry guns arrive.png
Now, I'd heard a little bit about British anti-tank gun and tank destroyer offensive tactics - moving up a tank destroyer to cover an area, then moving up an AT gun to occupy the same position (credit: Josey Wales). This seemed like the best way to use my infantry guns, as I doubted the greyhounds would stay still long enough to drop artillery on.

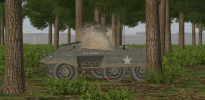
The engagement with the forest greyhound continued to develop in my favour; the puma scored a hit, and as it had suspected infantry contacts in the smoke cloud (dropped on hit or immediately before as it tried to back away) I assumed that I'd scored a kill (you can see the name of the screenshot, which I named at the time, stated as much. This was an error of assumption - and suddenly the inflated kill-counts some units report make a bit more sense.)
13 - Figures in the smoke, a kill.png
So that was a vindication of my theory - I could win engagements at range, if the enemy could be kept there. My opponent was hardly going to oblige, however.
 
Last edited:
My opponent's next move became clear as my flank guard units started seeing infantry contacts in the woods.
14 - Infantry in the woods.png
While I was fairly sure they didn't have any conventional man-portable AT, I knew they did have mortars, and my prior experience is that a mortar round can kill an armoured car if it scores a direct hit or a near-enough miss, and the half tracks are definitely at risk. To avoid that outcome, I had my car and half-tracks push forwards then retreat backwards at irregular intervals while firing on the contacts or suspected contacts. Some mortar shots got a bit close, but no vehicles were lost and the infantry gun set up to watch this approach escaped their attention.
16 - Mortar fire from troops advancing through the woods, driven back by MG and 50mm fire.png
I had also pushed some of my command teams into the woods to try and get sight on the enemy. They would provide fairly reliable spotting information for the rest of the match.
15 - Scouting officer team spots a greyhound.png
One of the pumas was also able to spot an old friend moving through the far forest. Apparently it had survived being hit (as the damage was clearly visible on the front), and my puma hit it again.
18 - Another hit.png
Unfortunately, a greyhound spotted the muzzle flash and retaliated.
19 - Retaliation.png
I was also not cautious enough when moving my infantry gun into position. It was partially concealed by the forest, and I had a puma nearby providing overwatch, but apparently the forest was too thick for the puma to see through, so a greyhound opened up on the field gun, killing most of the crew (the lone survivor abandoned the gun and was assigned to spotting duties in the forest). It did, however, continue to draw mortar fire for the rest of the match, so it's possible my opponent was not entirely clear on what they killed (or just wanted to be sure).
20 - Field gun lost.pngMore spots came in from the infantry.
21 - Greyhounds.png
22 - Another pair spotted.png
My right-most puma was now outnumbered by at least four to one... in fact, five to one, as the greyhound that had been hit in the forest turned out to be a resilient beast that was at least still mobile.
23 - It survived again.png
And unfortunately, with that many eyes and that many guns... although I moved another puma up to support, there were just too many greyhounds.

This is a good point to look at the post-penetration effects. Shown here is the puma after a single greyhound hit that went fairly cleanly through its centre of mass (you can see the exit point on the rear there. While one crew member was killed, the other three survived unharmed, as did all key components aside from the weapons control. The difference here was that my puma was a sitting duck as the crew bailed out, and was destroyed in short order by the follow-up shots (which were rapid and fairly accurate).
24 - Limited post-penetration effect.png
 
Last edited:
Now, this wasn't entirely one-sided. Having an extra puma (one further behind the hill to get a narrower angle) did mean that while the greyhounds were engaging its hapless comrade, it was free to engage targets - and one presented itself driving over the railway bridge.
25 - one casualty and a dead engine.png
Gifted with more information than my armoured cars would actually have, I was able to hear the engine give out. There was also a casualty on the crew (the driver, I believe) but they threw up a smoke screen to shield the greyhound from further fire. I did also think that would effectively block the railway bridge, but it turned out that the rails at the side weren't modelled and so I saw a jeep drive through them and later on I saw a greyhound that I was fairly sure had crossed via the bridge.

The puma was also able to fire on another greyhound, one that my spotters were able to confirm was actually knocked out by the hit.
26 - Retaliation, and a kill.png
Now, if it had been just those two greyhounds I'd have won that engagement. Unfortunately, as mentioned, there were more than twice as many, so I pulled the surviving puma back while the damaged one was left to be shot to pieces. Not a bad exchange, but not one that would win me the game. Perhaps I should have learnt the lesson to concentrate my cars (which are, after all, highly mobile), but I was too anxious about being outmanoeuvred that I didn't, and while grouping up may not have saved the battle it might have made it a closer-run thing.

Meanwhile, desperate times called for desperate measures. I was able to roll one of my half-tracks around the forest to get a side-on shot at a greyhound at short range. I had read that a greyhound has 9.5mm rear armour, while the MGs on my half-tracks could go through up to 10mm, so while I didn't know exactly what the side-armour of a greyhound was, unless I could get behind it (not likely) this was the best I was going to get.
27 - Desperate times.png
The angle didn't help, and the half-track backed away as soon as it spotted the greyhound, but it fired as it went for visible effect. Perhaps there was some minor systems damage, and if the commander had been turned out he might have been killed, but while the half-track actually survived this manoeuvre it didn't achieve the partial penetrations I was hoping for.

At this point, it was fairly clear that the enemy were preparing for a big push.
28 - The enemy prepares for a final push.png
I had two armoured cars, two stummels, an infantry gun and a few command teams and half tracks.

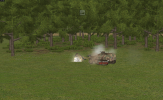
Now, I had been working on something with that infantry gun. It had exactly one anti-tank shell, and most likely one shot is all it would be able to fire. Therefore, as I had a spotter with a radio in the forest I had been setting up a fire mission on the armoured car lurking by the railway bridge. Unfortunately an infantry gun is not a mortar, and its much flatter trajectory meant that most of the shells impacted on the trees in the forest it was hiding behind rather than hitting the target. The last spotting round also fell fairly close to the greyhound, which had the discourtesy of moving just as the fire mission was called in, so while it may have scared some infantry and jeep crews lurking around there it didn't take out the greyhound.
29 - That's no mortar.png
As the greyhounds advanced, perhaps the most vexing example of the disparity in spotting ability occurred. The puma was stationary, with the commander turned out, watching the hill by the forest for a greyhound to arrive. And indeed, a greyhound did roll right onto that hill - clearly spotted by my infantry. Unfortunately the puma was oblivious, not spotting the greyhound until it had stopped, spotted the puma, turned the turret and mere seconds before it fired, by which point it was far too late.
31 - Just too slow.png

As the greyhounds had advanced so far up the map, my stummels and a couple of half-tracks were effectively stuck on the road they arrived on. I set one stummels up to watch the road and the other to peer through the hedge to watch the forest path down the side, and with the idea of trying to get it behind a greyhound as well as drawing fire from a greyhound I ran a half-track down the road at full speed before turning onto a side track, which it did just in time.
32 - Lucky escape.png
Thirty seconds later, a greyhound rounded the forest and came up against my waiting puma and field gun. This was what those two had set up there for - two-to-one, stationary and with a side-on target...
32 - Too high.png
33 - Too high again.png
Both shots high, and both taken out in turn by the greyhound. The puma didn't even spot the greyhound until it fired on the infantry gun, despite being turned out... if I sound bitter about it, this is one of the ambushes that I was rather annoyed by! But those are the breaks, and the idea of lining both my stummels up next to each other was entirely my fault...
35 - Catastrophic explosion.png
I had tried to nudge one forwards to get a better view. It did spot the greyhound, but I had set the target arc wrong and it seemed to wobble its front wheels as it thought about whether to attack the greyhound it had spotted. By the time I gave it a direct order to fire, it was too late. Unlike a puma, a stummel is packed full of explosives, so the whole vehicle exploded on the second hit - taking the other stummel with it. At which point, with only one greyhound (the survivor of the forest ambush that had been shot but successfully popped smoke and reversed away) I decided to surrender. I did have a single command squad lurking on a path by the main road, with the hope of ambushing a greyhound at close range with grenades, but that was hardly worth trying.

It was a clear victory to @hmstanley, who successfully used the terrain and massed forces to overwhelm my defences and force almost entirely favourable engagements. While I complain about the final ambush, as mentioned earlier the pumas just aren't as good at that close-range fighting as greyhounds, so in truth @hmstanley 'made their own luck' by fighting on their terms, and I was too fixated on peeking corners and hiding behind hills to try anything Teutonically proactive to try and disrupt the attack plan.

By grouping my armoured cars and pushing around the forest the same way my half-track went I could have tried a side ambush in enough force that at least one of them would have succeeded, or I could have met the greyhounds pushing from the railway tunnel in equal force from a long-range hull-down position that might have allowed me to seriously maul that unit and then wrap around to threaten the enemy force pushing up the centre and take them out piecemeal. Victory would have been challenging, especially with the greyhounds acting together and using terrain, but I would have had a better chance at it if I had used my armoured cars' mobility to take the fights that favoured me.
 
This is a great AAR. Very well done. An interesting scenario as well.

The US 37mm punches way above its light weight.

The shell is 37mm but the case length is 223mm. So there is a lot of propellant pushing that little 37mm AP shell to 2900 fps.

The German 50mm pushes a larger shell to 2740 fps.

As you correctly point out.....both guns easily punch through the enemy's armor. So the advantage probably goes to the faster firing 37mm with more experienced crews and greater numbers.

I would put Greyhounds against any armored car except the British Staghound which is my favorite.
 
The shell is 37mm but the case length is 223mm. So there is a lot of propellant pushing that little 37mm AP shell to 2900 fps.

The German 50mm pushes a larger shell to 2740 fps.
Oh, so the greyhounds actually have a faster shell and so a flatter trajectory? If only marginally. My mistake there.

Glad you liked it. I might struggle to do similar with our current game as there's just so much "People shooting from windows" and relatively little movement. I've done a few progress maps that might make for a slightly dry AAR.
 
Last edited:
Oh, so the greyhounds actually have a faster shell and so a flatter trajectory? If only marginally. My mistake there.
Yes. According to Wikipedia (take it with a grain of salt) the 37mm AP shell is faster. BUT trajectory is a tricky thing because it involves ballistic coefficients which we would need some info to calculate. The faster shell is not always the one with the flatter trajectory.

But the German shell is slower to load. That is certain because it is just bigger and you can observe it in the game.

I would bet that the Puma would do better at long range vs the Greyhound. Not sure if that was tactically an option at all for you... Probably not.
 
Thanks for the AAR player_b. It was an enjoyable fight. That said, and I’m telling on myself here, I was not pushing but plodding.

The first time I played this scenario I was also the Americans and I rushed the exits because I never felt you could get all across in 30 turns, I got whacked.

Well, that was a long time ago and what I learned was, you can get your assets off map safely with very little time left. So I advanced to contact with programmed paused units rolling up the unit rear sans 15-30 seconds. So, if something went down, I could get a bead on the firing enemy faster and kill it.

Lastly, the forest to the back of your starting Pumas is a death trap and I moved one recon element and quickly removed them. The only issue I have with this scenario is the TO&E. The assault guns really offer no value and I’d prefer to have actual recon infantry riding instead of the entire unit driving/riding the jeep and then dismounting rendering the jeep dismounted and useless (for whatever reason to use them).

Look forward to our rubber match coming here shortly. I’ll give you some ideas soon.
 
My read on the jeeps was that they were there to "just drive down that road until you get blown up". I was expecting much more aggressive use of them to bait out my pumas, as they are both faster and smaller targets while also being rather more expendable. And they have radios, so they can spot for mortars and pass information up the chain.

I will say I had better success on my first play of this scenario (as the US). I had a stand-off around the rise in front of the house, not willing to roll my greyhounds over and engage the (as far as I was aware numerically equal) pumas directly. In the end I shot one from the railway tunnel embankment and then pushed through in force - I thought I got lucky not losing any armoured cars to that. Though I was delayed, the AI Germans responded with a Mad Max-esque charge across the open field at me, which went so badly for them that I could roll up their remaining units and force a surrender without even reaching the exit point - that probably influenced my more cautious approach to playing the Germans, though to very similar result.
 
Back
Top