Welcome to The Few Good Men

Thanks for visiting our club and having a look around, there is a lot to see. Why not consider becoming a member?

Monsaint Manor (Drifter Man vs Bulletpoint DAR)

1633 hrs, Turn 93. My forces advance both on Bulletpoint Ridge and in Harfleur. There is still no opposition on the near side of the ridge, but in Harfleur I run into a mortar section HQ waiting in ambush behind a large building. No surprise anymore, I've already learned this Bulletpoint's trick to put troops behind a building, out of reach of tank fire, but I don't have any way of clearing them from there other than a frontal attack. 6 Platoon loses two men but the panicked gunner - or more accurately, a soldier who happened to inherit a Bren from a scout - takes down the section leader. Without the MP40 they should become a lot less dangerous - but still dangerous.

The numerous German casualties I am finding in Harfleur indicate that the village was defended by a whole platoon, including three Panzerschrecks, and that two squads of this platoon have likely been eliminated - for the most part by tanks before my infantry even got close. That's the way I like it. There still are many men hiding in the buildings that are out of reach, but now that two schrecks are confirmed down and the third has withdrawn, maybe I could test the waters with an armored car?
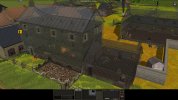
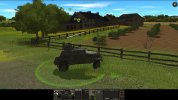
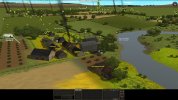
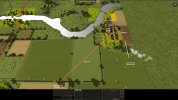
093_Harfleur.jpg

1634 hrs, Turn 94. I lose two more men in urban fighting at Harfleur in exchange for two Germans (including the third Panzerschreck). An armored car is testing waters. On the other side of the battlefield, Bulletpoint tries to take a leaf from my playbook and area fires another armored car with the Marder. It could have worked, but coincidentally I withdrew the car right in this turn because I feared the Marder might spot it. This makes me very happy because the Marder has now spent 6 HE out of 9.
 
Last edited:
1635 hrs, Turn 95. Battle for Harfleur continues and this time I take the beating. Bulletpoint is back at his best, managing to keep his MGs invisible until they fire one or two bursts... killing everybody. The gunner of the Humber III decides to peek out right now when he is 100 meters away from German infantry, which has only one possible result. How is this happening? What are armored cars for if their crews do not stay behind the armor? I have no control over this. I specifically checked that the hatch was ordered closed before confirming the turn, then watched helplessly as the gunner reared up his ugly head, literally asking the Germans to shoot it off. I'll supply another gunner - Humber III allows using anyone as crew - but that means losing more turns.

095_Humber.jpg

To add injury to injury, the annoying MG that I've been keeping under fire since ages ago, and as recently as in the last turn was seen retreating in panic, quietly sets up in the corner of the building - in LOS of four infantry teams but unseen until finished - and then opens fire, hitting two men of two teams with a single burst. It seems to be just spraying in the general direction but that's all it needs to do.

095_Harfleur.jpg
 
1636 hrs, Turn 96. In this turn the very annoying MG continues spraying and manages to get another kill before losing two men to fire of other British infantry teams along the main street of Harfleur. I had thought for a long time it only had one man remaining, but now I think it still had four, and only now it should be down to one. Nevertheless, it still shows as deployed and like most HMGs it will remain a threat until the last man is eliminated. My push into the southwest end of Harfleur has run out of steam - I lost six men here in exchange for 5 Germans - but I have made some progress. Now I am getting ready to attack the rearmost buildings with support of area firing armored cars. I re-crewed the Humber III with a crew from another car that was destroyed and I am sending it back now.

096_Harfleur.jpg

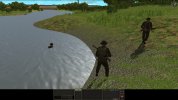
Still no activity at the river where I continue deploying the 4 Platoon. The men are enjoying the break and some are taking a swim.

096_swim.jpg
 
1637 hrs, Turn 97. More urban combat and another casualty to events beyond my control - a man suddenly stands up decides to walk into a window, gets spotted across the building and street and waits patiently until gunned down. Not much else to report. That house is full of Germans and is asking for a tank shell! I shall risk a tank to honor that request.

097_Harfleur.jpg

Edit: I found the much expected 12th German machinegun - it is near the edge of the map, behind a low hedge at Harfleur. Perfect reverse slope position. Impossible to attack from my side of the river except with mortars. All Bulletpoint's MG's are now accounted for - I think.
 
Last edited:
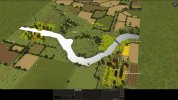
1638 hrs, Turn 98. Confident that all (?) three Panzerschrecks are down and under my control or at least observation, I move a tank into Harfleur and begin shelling the German house. For some reason the tank aims for the top floor but I should be able to adjust this in the next turn while attacking the house from the other side across the street.

098_Harfleur.jpg

An attempt to take another house fails - I lose two scouts and take down one German ammo bearer. In this latest push into Harfleur, I already lost 11 men. Bulletpoint also lost 11 that I could see. So we are about even, but I only want to see his pixeltruppen die, not mine :)
 
1639 hrs, Turn 99. Assault time at Harfleur. While the tank and armored cars pour HE and MG fire into the house with the strongest German position, three infantry teams move into the houses across the street and engage. They lose one man and take down three (one mortar ammo bearer and two ATG crewmen). The infantry in the house targeted by the tank is suppressed and I barely get to see them. My guys get a fair bit of suppression too. It is still not over at Harfleur but we are getting there.

099_Harfleur.jpg
 
1640 hrs, Turn 100. The fighting at Harfleur continues with elimination of a Panzergrenadier team for a loss of one man - a German MG34 that I spotted a few turns ago has joined the action from behind the village and is now starting to give me more trouble. I am still missing the Platoon HQ, two men of the Section HQ, and an infantry team... still a lot of firepower, probably holding on to the last building on the objective. Contacts are made on Bulletpoint Ridge: a survivor from an ATG crew is eliminated and apparently an ammo bearer team (with MG42) is driven away. A MP40 and two rifles, but no MG42, open fire at my scouts further north, near the Bridge. I want to take control of the hedgerow they are using for cover to secure access to the Bridge from this side.

100_BP_Ridge.jpg
 
1641 hrs, Turn 101. The situation at Harfleur is now more quiet as I am preparing for the final move to secure the objective. Scouts reach a large farm building at the western end of the village and engage German HMGs in the rear. The Very Annoying MG is finally taken out - the last man finally dies - but not before he scores his last kill across the map near Hill 312. I've said it before and I'll say it again: these German MGs with 6- or 7-man crews just won't die. You can kill everyone else but as long as one man survives, the full firepower of the HMG is preserved. I already have the next candidate on the other side of the river - one last man has survived shelling from mortars and tanks, and is now seen redeploying the HMG to a new position.

101_annoying_MGs.jpg

Scouts also reach the top of Bulletpoint Ridge and re-establish contact with the enemy. The second Panzergrenadier company is waiting at the next hedgerow as expected, some 160 m away. MP40 and MG42 sound contacts.
 
Good progress! It would seem you'll be able to take Harfleur and the bridge in ~20min.


I'd expect those HMGs to have high motivation, as in my experience they are very fragile if they take so many casualties. As in they bugger out after someone area fires somewhere in their direction.

At least they're not fanatics:


(although I didn't check the motivation of these troops in the editor).
Yes... bugger out... that's all I want them to do, please :)
We play on Typical, so they shouldn't be fanatic, although specific units can indeed be highly motivated. After all, they're the infamous Kugeltruppen, who looted and pillaged wine samples from across the French countryside for the collection of their master... they will now fight for him to the bitter end.

The guy in your bunker seems to be enjoying himself there.
 
1642 hrs, Turn 102. A rifle team area fires the last German building on the Harfleur objective with two Brens while an assault team is getting ready across the street. The MG34 behind Harfleur receives some medium mortar fire. At Bulletpoint Ridge I move an armored car and a PIAT team across the river to help secure the area, and I am also making use of a 2in mortar against a confirmed German position.

102_Crossing.jpg

102_BP_Ridge.jpg
 
1643 hrs, Turn 103. Seven brave Britons rush into a building opposite to the last German stronghold in Harfleur and engage the German platoon HQ and an ammo bearer team (?) there. Considering the amount of automatic fire coming their way (3 Stens, 1 Bren + 2 Brens area firing) the Germans put up quite a fight, but at the end there is only one remaining. I am lucky to avoid any losses.

I am still missing one PzG team and also the Company HQ. Where are they? Perhaps they are hiding at the Bridge?

103_Harfleur.jpg

The MG34 hit by mortar fire in the previous turn is seen buggering out - also one man remaining - while another one-man HMG tries to area fire my positions at Harfleur. Fortunately there is too much foliage in the way and few rounds make it through.
 
1644 hrs, Turn 104. Harfleur has fallen! The last three Germans on the objective are eliminated, but I lose one man to long range HMG fire. The attention now moves to the Bridge objective and the terrain on the other side of the river that I want to secure. Apart from the three HMGs on the right edge of the map in the image below (two are reduced to one-man teams), I have contacts with three panzergrenadier squads and what appears to be remnants of the antitank platoon (ammo bearers). The Company HQ and PzG team west of Harfleur are assumed enemy forces - that's what should be left of the first company at this point.

104_Overview.jpg
 
1645 hrs, Turn 105. I make a risky move and advance with one rifle team to the first tall hedgerow after the Bridge. It pays off, the Germans have already been under heavy fire from mortars and Brens and are breaking. The last "proper" (i.e. more than 1 man) HMG team by the edge of the map is also breaking under fire from a Sherman on Hill 312.

I found by chance that a Firefly tank (10 Troop HQ) is in a position from which it can area fire the ground in front of the last Marder. Well, there is a lot of trees in between, but what do I have to lose? I still have enough tank HE and the end of the battle is near. The Firefly has no LOS on the Marder position directly, though, which is a good thing - the Marder can't see back. Right? Right.

It can see everything, of course. None of the rounds from the Firefly finds its intended target (most explode in the trees). In the last seconds of the turn I can hear the Marder crew say "Feindpanzer" and the barrel moves. Yes, at 840 meters I can see and hear that, this is Combat Mission, the most realistic WWII tactical simulation ever :) So I have the chance to pull the Firefly out. I just hope it's not going to be one of those one shot kills.

Situation update, 1645 hrs. With only 15 minutes remaining (plus any extra time we may get) we are entering the endgame. I am in good position to secure the objectives I planned to get after the initial moves convinced me that trying to get everything is futile. Coincidentally, I broadly followed the initial plan (take the Crossing via Farine and Hill 312 and approach the Bridge from the south). I have advanced 1100-1150 meters from the starting line and taken 4 objectives - Farine, Hill 312, Crossing and Harfleur. The Bridge should come next. With Bulletpoint's defenses after the Bridge breaking down, the chance for a German counterattack before the closing bell are small, but I must stay on my guard and keep pushing forward.

105_Bridge.jpg

My opponent has estimated one Panzergrenadier company - slightly dented by this time - 5 more or less functional HMGs and one Marder. A small number of assorted troops is expected on the Bridge objective. His casualties are estimated at 223 men. I lost 109 men. 5 tanks and 7 armored cars were destroyed and one Sherman disabled. I still feel in good shape, but the infantry is getting heavy as the same number of Brens is getting concentrated among a diminishing number of soldiers. But it's good to see and hear all this automatic fire raining on the Germans from all directions - it has effect. I only have 38 mortar rounds left - that's 8% ammo.

Estimated score 513:486 in my favor (200 objectives + 313 casualties for me, 300+186 for Bulletpoint).

105_Overview.jpg
 
Last edited:
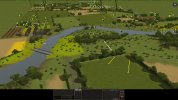
1646 hrs, Turn 106. The Firefly "Feindpanzer" reverses out of sight before the Marder can line up his shot. I notice that the Firefly already had a tentative contact and LOS on the Marder location. This wasn't the case the turn before, so I think it was the HE exploding on trees between the Marder and the Firefly that reduced the volume of foliage in the way, clearing up the LOS.

I make some new friends from the second panzergrenadier company - they introduce themselves with volleys of incoming MG42 fire and my guys get pinned down (one of them quite literally, I regret to say). This allows the retreating Germans - who are probably just a company 2IC team and a MG34-carrying ATG bearer - to escape safely. Nah, I would get you eventually if I had one more hour of time and if the map wasn't infinite. This way you can reach the next hedgerow, and then the next and the next, I guess like in the real war.

106_Bridge.jpg
 
Last edited:
1647 hrs, Turn 107. Bulletpoint floods the first hedgerow after the bridge with area fire from three MG42s. No casualties, but the four guys who reached there are constantly pinned down. With the clock running out, Bulletpoint can afford to waste some ammo and keep me at bay. No problem - I don't need to be at the hedgerow, I just need the Germans not to be there, and this was achieved, at least for now. However, it could also be a preparation for a counterattack. Bulletpoint sure has a squad or two he can throw in.

1648 hrs, Turn 108. No dramatic new developments - counterattack is probably not in the works, Bulletpoint just wants to use the ammo before time expires. I confirm that the three HMGs by the edge of the map total four men. Yes, four. But they still represent three deployed HMGs, usually area-firing a building or a concentration of my troops in the woods. They may retreat for a minute when under fire, but in the next turn they are deployed again and firing away... they do not cause much damage, but I can't advance across open ground when they are active. I managed to outflank one and hope to deal with the other two using a Firefly tank, which I moved into Harfleur for this purpose.

107_Bugger.jpg

1649 hrs, Turn 109. German area firing with LMGs has stopped, and the "undead" HMGs are suppressed. The only fire is coming from a squad further in the back. I've put my first feet on the Bridge objective and no Germans seem to be holding it, but I stay on my guard... where is that Company HQ? A Panzerschreck is spotted in the back, moving from the road into hedgerows, but it poses no threat there. Hard to say what my opponent is up to there.
 
Last edited:
Back
Top