Welcome to The Few Good Men

Thanks for visiting our club and having a look around, there is a lot to see. Why not consider becoming a member?

Round Two AARs

dkchapuis

FGM Company Sergeant Major
FGM MEMBER
Joined
Mar 6, 2022
Messages
443
Reaction score
386
Age
48
Location
Oklahoma! Oklahoma! Oklahoma! Oklahoma!
Website
www.youtube.com
Hope Sly you dont mind a new thread for Round 2 AARs specifically.

did anyone find a good spot for the 88s? i dont feel like i did. Between the 3 guns, I got 1 HT kill, although sspoom did say that he felt like he took to long to kill them. So it does seem like the threat of them did me some good.

My gun locations were below:

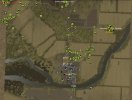
Combat Mission Fortress Italy Screenshot 2023.04.21 - 02.00.22.39.png
 
I put one of my guns in about the same location as the right-most of yours at the bottom there (don't have access to screenshots at the moment but will post once the battle is done) and encountered a strange issue where once the game started the gunner climbed down and would not re-mount the gun. They kept getting spots but no matter what I tried they would not fire the gun. Very strange. Ended up abandoning it.
 
Yep had the same LOS issues, checked sightlines on the guns before placing them and all was fine, once in the game two of them couldn't see a thing.

The one 88 that did manage to have four targets available at one time, fired once, detonated a Sherman..... and then couldn't see the rest of the targets because of the huge plume of dust due to the conditions being so dry.
Unsurprisingly the gun died the following turn, as expected.

Of the other two guns, one died without ever firing a shot (apparently the bushes which block LOS don't work the same in reverse), and the other one managed to bag a single half track.
I had the exact same issue with the guns. LOS checked out on setup but then failed once game started.
 
Sounds frustrating. I played against @Spoogles, and he had far better luck with his.

The first one I encountered was positioned along side an angled building on the NE edge of the village. A second was positioned in front of the few buildings on the NE portion of the map, and the third was in a low spot under a couple of trees on the west edge of the map.

During my setup, I took a guess as to where they would be, and directed my mobile mortar platoon to fire smoke rounds to obscure each of the three suspected positions. Only the 88 on the NE portion of the map was correct. On turn three a single shot, from the 88 located at the NE edge of the village, came through the woods in front of my setup zone. The shot went through one mortar HT, into a second, and the resultant explosions took out the third mortar HT, and the mortar platoon's HQ track. Not a good start for me. A few turns later, a shot from the same 88 took out one of my M8 HMCs that was also still in my setup zone behind the woods. Later in the game, a shot from the 88 on the West map edge took out a relatively full HT trying to cross from east to west along the south side of the map. Later still, the 88 located in the NE map area killed an HT that was behind a wall near the south center of the map. That shell continued on, and also slightly damaged the tracks on one of my Shermans, causing 2 crew casualties.

I tried to use a lot of smoke, and not have my AFVs sit still too long by giving them fire and move orders, but most of their shots where going over the heads of the 88 they were firing at. I eventually found some firing locations where they could concentrate the smoke rounds effectively, and then mass HE fire took them out once the smoke cleared.

I did manage to get a minor victory, but most of my success came after the 88s were taken care of.
 
I too encountered some strange LOS issues, the only gun that actually killed anything first spotted some HTs in the woods WAY back at the edge of the map somehow (roughly where your LOS line is going in the screenshots above @dkchapuis) and got a shot off that unsurprisingly hit a tree. That gave his position away and he was mortared for a few turns but survived, recovered and took out a M8 GMC before getting annihilated by M4s and mortars on the next turn.
 
Re my AAR- Not much to say other than thank the battle ended sooner than later....a few more turns and I would have been wiped out for sure. I hung on with my fingernails. I had same issue with 88s not hitting much. Only one survived the battle and only had a few vehicle kills (no Shermans). But I think the threat of them made my opponent more cautious. If he had known what I knew, he would have rolled me faster. Anyway, the hightlite of the entire battle for me was my ambush of a platoon on the west woods area. In less than two minutes, I managed to wipe out over 20 Americans with a loss of only 1 soldier (panzerchreck team member). I had a split squad, a 1/2 squad and a schrek team in the woods. Here are some screen shots- I took out the trees for better view....classic ambush! In the end, i was able to withdraw the remaining men back to the town.


This is my initial set up right when the 1/2 tracks were being unloaded.

A 1 Initial set up.jpeg
Here are the Americans being unloaded- additional 1/2 tracks came in and a full platoon was sent into the woodsA 2 Unload 1.jpeg
I moved up me meager force to intercept and try to make as much havoc as possible...suicide mission for me in my mindA 3 Moving up.jpeg
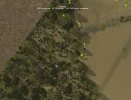
The trees and bushed were thick here, as you all know....so from Americans perspective they can't see anything when entering the woodsA 4 Folage.jpeg
Ambush! Initial contact is made with my shreck team and a 1/2 squad....A 5 Ambush.jpeg
Grenades are the major factor....thrown into the mist of the running squadsA 7 Ambush 3.jpegA 8 Grenades1.jpegA 9  Grenade 2.jpeg

Even the shcreck team pistol did some damageA 10 Pistol power.jpeg
The carnage was complete- in less than 2 minutes I stopped his advance in the west- all on a shoe-string budgetA 11 Left group carnage.jpeg
However, in the end, I barely hung on....88s were useless and he had so much armor that in time, I would have been ground down anyway. Great game... final disposition and AAR Total: Draw
 
Based on the initial U.S. setup, my plan was to make the West side of the town my main axis of advance. The walls, and lack of windows overlooking that side of the town made this the logical approach. I just needed to cross the map near the South edge, and turn to the North, and avoid the 88 that I fully expected to be positioned deep down the town's main street. I used smoke to accomplish that, but as I mentioned in my earlier post, @Spoogles 88 wasn't there. Its actual position on the NE edge of the town, delayed my east-west march, making my end game somewhat hurried and less effective. With the bulk of my forces going In that direction, capturing the flank objective was fairly easy.

Also, I planned to have the U.S. reinforcements follow the lead force, but they came in just north of the wooded area that screened my starting force. and Spoog's 88 on the NE side of the town was still intact, although its LOS was obscured by smoke that was laid just before their arrival. About half the replacement infantry was able to get in those woods, and subsequently get to the south map edge to cross the map, and join the initial force on the West side, but the rest of the replacement force had to get into the concealment of the swampy wooded area to their north, and approach the town on the east side. This actually turned out well, as they helped to clear German units for the east side of objective A, and almost accomplished the same for objective B.

With all the forces provided to the U.S. player, it was a fun game with lots of firepower, and smoke options, and one or two mistakes/setbacks (see my earlier post regarding what happened to my mortar platoon) didn't prevent the U.S. player from continuing to press the attack.

@Spoogles played it well with some good locations for his 88s and HMG teams. He kept his units hidden, making for some devastating ambushes, and even devoted some forces to forward positions to further slow the attack. Well played!
 
Back
Top