Welcome to The Few Good Men

Thanks for visiting our club and having a look around, there is a lot to see. Why not consider becoming a member?

CMBN Round #1 AAR's

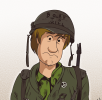
I got beat black and blue by @Raging Al using the Polish Paras. After reading the briefing and looking at the map I was hoping to be able to set up a kill zone around the bridge with secondary one somewhere along road leading to where the Poles exit zone was. I usually do a quick bit of snooping around on my opponent to see if there are any clues about what kinda player they are. A found this disturbing picture while trying to find some intel on Ragin AL
BN rag al.png Though it was not clear if this was an actual picture of him or if this was the leader of some kinda underground club Al is involved with. I moved on to trying to find some intel on the enemy force and found this picture of them.
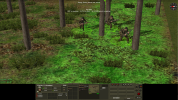
FW para model.png The briefing informed me that the Poles would have an edge in automatic weapons so I would likely not fare well in any close quarter fire fights. My research seemed to confirm this. Appartly one of my my poor German pixel troops took this pic during the battle shortly before he was gunned down
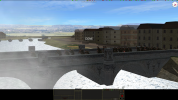
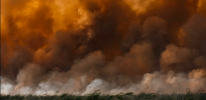
FW..Paras.png The briefing also told me the Poles had arty support and it would likely start falling on the first turn. The briefing was very correct on both these points. For the majority of the game I had very accurate arty falling on my positions. Making it impossible to make any sort of movement to either suppress the enemy or retreat from them to get out form under the instense small arms fire they were cosntantly sending my way . The only view I had of the two killzones I hoped to set up looked like this most of the timeF.W bridge.png
At some point during the game I was watching the replay of a turn a family member came into the room and asked if I was ok. Yeah fine I said just playing my game. They took this picture of me and commented that my game must not be very fun
Screenshot (888).png
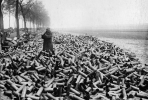
I remember thinking that my whole force was going to die unless I could find a way to either move against the Polish positions and get some more angles to open fire on them or retreat and regroup and try to cut them off on the bridge BUT the arty was keeping me contantly pinned in place unable to move and doing some killing on its own... After the Poles made their escape we found where one of their arty positions had been. One of the very few survivors of the battle took this picture of it
FW arty shell.png

All jokes aside. Al played a really good game. The bolt action rifles a lot of my guys are armed with are horribly outgunned by the sub-machine guns a lot of his guys had. I badly need to move to get more angles to return fire on him. This would help counter the his advantage in rate of fire. But the seemingly constant arty fire he had on me made it impossible move. He had me in a tough spot and i never could find a way out of it. If you play long enough u know that every now and then you are gonna get clobbered in a game...... Not much you can do but say congrats to your opponent and try to win the next one.... So Congrats AL.. Good Game... I am looking forward to kicking round 2 off
 
Thanks, @SlySniper it was a very exciting battle.
It was also a good example of: "Sometimes when you think you are hurting really bad, the other fella is getting it worse." I was stunned at the casualty count (and the few remaining troops) for the Germans in my game with @Probus .
I had enormous difficulty with the flak halftracks and the bridge, and a huge number of Poles died crossing the bridge in the face of cannon fire. I wasted smoke up front trying to predict the German effort - I was wrong, and dearly missed the wasted smoke later. Generally, I did a lot of detrimental things at the start because I allowed myself to feel panicked instead of waiting to see solid information on enemy dispositions before taking large actions.
Probably the worst/stupidest thing I did was not realizing the tiny squad mortars had smoke bombs until about halfway through. It's been ages since I've played CMBN and not sure I've ever played with the Polish paras. I'll have to pay more attention next time.
Thanks Probus - especially for the turn rate!
 
Yeah no doubt the Poles have the advantage in this one. I used all 4 of my mortars to smoke the bridge at start. With so many TRPs I didnt think there was a need to turn 1 hit the enemy. Wait time later is only 3 mins. Also better to wait to see where enemy troops are rather than guessing and wasting shells.

The smoke worked well as I only took few losses crossing the bridge. A very important weapon the Brit/Pole Paras have is the 51mm mortar for every single squad. This comes with smoke and is pretty accurate at putting it wherever you want it. This was the Poles best friend in this one!

I quickly realized the other side was mostly a ghost town since I ran into only 2 sniper teams, a HMG, and 2 AA HTs. Safe bet if there was more, most players would have moved them up to defend the bridge crossing. So therefore I pushed hard and eventually wiped out the two HTs.

So now I owned this side and moved in to setup ambushes for the eventual enemy reinforcements. My guess (trying to enter Slys clever mind) :geek: was that they would come into play at the Northwest corner woods. I was wrong but was close enough to get good results.

Overall a very fun battle for the Poles. A tough challenge for the Germans to stop the Crack para Poles. But the AA HTs and that damn Wirblewind help level the playing field. Great fun for sure, thanks @SlySniper looking forward to the next round. (y)
 
On the start I positioned my German troops on the assumption enemies were on the other side of the road with the goal to concentrate my forces and try to gain fire superiority immediately. Given that according to the briefing we were outnumbered this had some risk, but better than probing forward under artillery fire while allowing the enemy to withdraw in the meantime.

The initial firefight went very well, seemed like my two companies faced off against 2-3 platoons of enemy troops in forward positions. With these being cleared with low casualties on my side I felt this changed the numerical superiority to my side.
Also because I observed a couple of vehicles waiting to cross the bridge under the smoke screen that had been laid down. The smoke screen limited my options for the units on the other side of the bridge, I was fortunate to have already gave an area target order across the bridge with the single MG42 on the other side so that it could keep firing through the smoke. One of the other MG42s was also setup to lay down suppression/denial fire on the bridge.

I moved both halftracks on the other side to a position on the river bank so that they could support my infantry while having LOS on the entry to the bridge (which wasn't smoke off).
After supporting the initial firefight the wirbelwind also moved towards a place where it could rake the bridge with fires and perhaps catch some vehicles trying to cross.

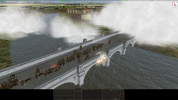
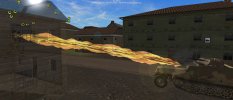
At that moment fortune seemed to favor my troops as we spotted a big mass of bodies moving on the bridge, with the Wirbelwind and halftrack in position to delete them of the face of the earth :).

Combat Mission Battle For Normandy Screenshot 2024.02.05 - 16.37.47.34.png

However, one thing I learned in this battle is that Bridges offer great protection against Wirbelwind quad 20mm HE :D.


Combat Mission Battle For Normandy Screenshot 2024.02.05 - 16.50.46.79.png

Anyway, the crossing was still quite bloody as the MGs on my vehicles and the crew served MG-42s did good work.

After this I cleaned up this side on the bridge, while KGPanther was able to exit most of the units that made it into the smoke out of the map. Somehow I forgot to turn on 'locations' (alt-L) and thought the Polish exit was in the NE corner, so i had setup some overwatch on a road which I thought they had to cross. But it turned out they didn't need to cross the road :D.
Although I'm not sure how much I would have been able to do against the Polish forces anyway, I guess they had mostly reached the exit objectives already when my reinforcements arrived.

The Polish artillery did cause quite a number of casualties on my side, although I was lucky that most of my troops weren't moving at the moment it arrived. I hadn't expected it so early after the smoke barrage and there were no spotting rounds (TRPs obviously, in hindsight). However the barrage lasted a minute or two so I could just wait it out and press the attack again.

A first minute long lasting barrage to interdict/deny approaches for the Germans in combination with smoke on the bridge entry/exit would have been the best option I guess.

Anyway, good game!
 
Last edited:
Yeah no doubt the Poles have the advantage in this one.
Well then I was a terrible commander. I got everyone killed. Every last man.

I did not get from the briefing that there could be guns on the bridge, other than from across the bridge, from the jump. I smoked the other side of the bridge so I could rapidly cross a force to hold the other side. They got right to the edge of the bridge before the Wirbelwind opened up on them. I cancelled their move orders and tried to pull back. Many died.

After that disaster I could not deal with that thing - my men kept getting taken out trying to get to it. Smoking it may have helped but by the time I got that going I was getting killed from multiple other angles. I was loosing every firefight going. I have no idea how anyone managing the Poles won a fight flight let alone the battle.

At that point a real commander would have surrendered because escape was hopeless. Since that is not allowed I tried as much smoke as I could muster and rush the bridge.

Everyone died.

No doubt the Germans have a massive advantage in this one.
 
Well then I was a terrible commander. I got everyone killed. Every last man.

No doubt the Germans have a massive advantage in this one.
Well, you are actually correct , just depends on how you want to look at it.

Out of 13 battles, Only 3 poles managed to exit more than half their men.
As to how I had the scoring in the game, only 4 poles had winning results.

2 poles lost every man.
5 poles lost over 80% of their man.

So , yes, the Germans can be seen as the side with the Advantage.

but as for saying the poles had the advantage In their favor, they had better small arms fire power.
They for sure had enough arty to do with it as they will, and it could put a real hurt on the Germans and could mask their retreat rout. it just depended on how the player used it.

The Germans had two main advantages, first was the terrain, the enemy had to move through dangerous areas, if caught and exposed, heavy losses would happen.

Then mix that with some units that could pour just that type of firepower on them if they were exposed.
As the German, it was the best feeling in the world to see the quad open up on infantry.
 
I played the battle as the german and watched my opponant do everything correct.

He smoked the bridge so well, even my area fire did not work.

He also picked the perfect location to drop arty to pin the major portion of my german forces, thus buying him some time for excape.

he also had piat crews in good locations. that did a great job of taking out my Armor.

Even with that, he still lost 40 % of his men. It was no easy task for the poles - Period.
 
Well then I was a terrible commander. I got everyone killed. Every last man.

I did not get from the briefing that there could be guns on the bridge, other than from across the bridge, from the jump. I smoked the other side of the bridge so I could rapidly cross a force to hold the other side. They got right to the edge of the bridge before the Wirbelwind opened up on them. I cancelled their move orders and tried to pull back. Many died.

After that disaster I could not deal with that thing - my men kept getting taken out trying to get to it. Smoking it may have helped but by the time I got that going I was getting killed from multiple other angles. I was loosing every firefight going. I have no idea how anyone managing the Poles won a fight flight let alone the battle.

At that point a real commander would have surrendered because escape was hopeless. Since that is not allowed I tried as much smoke as I could muster and rush the bridge.

Everyone died.

No doubt the Germans have a massive advantage in this one.
Well I must admit, as Sly pointed out, the numbers/results do indeed point to a German advantage. So dont sweat it! Clear sign of a great H2H scenario! (y)

I too wasnt sure about rushing the bridge at the start. But I figured it could be pretty bad if something unexpected were to be watching it. Sure enough a AA HT was there. Wiped out my scout team hunting across it.

Also I knew it was gonna be smothered in smoke in a few mins anyway. No point in the risk. But on the flipside of that. This could give the Germans more time to rush more troops to the bridge. Decisions decisions... oh how we live and die by them. :eek:
 
I did not. I was more worried about getting my guys off the board than taking out the reinforcements, so although I had some men at that intersection to cover my retreat, it was not nearly as complete as yours and this guard only held up his men briefly, taking out about 2x their numbers before being overwhelmed. I feel I probably was too eager to exit and left quite a few points on the board by retreating in 13 minutes, but 179 poles lived to see another day because of it.
 
Well I must admit, as Sly pointed out, the numbers/results do indeed point to a German advantage. So dont sweat it! Clear sign of a great H2H scenario! (y)

I too wasnt sure about rushing the bridge at the start. But I figured it could be pretty bad if something unexpected were to be watching it. Sure enough a AA HT was there. Wiped out my scout team hunting across it.

Also I knew it was gonna be smothered in smoke in a few mins anyway. No point in the risk. But on the flipside of that. This could give the Germans more time to rush more troops to the bridge. Decisions decisions... oh how we live and die by them. :eek:
Same here. I wasn’t going to rush the bridge without knowing what the Germans had covering it from both sides and before smoke could take effect. That was the correct decision as there were two AA HT’s and a couple of HMG’s on the far side which opened up in the first minute. I was able to deal with these in the first few turns and then I could move my vanguard across the bridge, under cover of smoke, to start setting up blocking positions along my exit route.

Completely agree with you on the para smoke mortars as well. They had one per squad which can be split off with a Bren team. They are fired like a rifle which gives them great accuracy (they can be fired from indoors as well) and they were priceless for me in providing smoke coverage around the bridge whilst my dedicated arty were carrying out HE missions around the various TRP’s.

@Shady Side’s HT’s claimed 70 casualties between them, but my crack PIAT teams accounted for five and got a gun kill on the other one in the second to last turn.

Knowing I missed best score by two points is especially frustrating considering I had a three man team completely enter the exit zone with a second remaining on the clock, just too late to register the green exit arrows and the points……… But well done to The Jackal for top dog score (y)
1707215046955.png
 
Same here. I wasn’t going to rush the bridge without knowing what the Germans had covering it
On turn one, I smoked the bridge from three directions and sent both Bren carriers across with some snipers and Piat teams. In the process they took care of a Jerry infantry team located in the big building at the foot of the bridge. I also staged a full platoon to cross on turn two. At the end of turn one, there was no AA track in sight of the bridge. So, figuring the earlier the better, my smoke cover wouldn't last forever, and that those staged troops had taken two casualties from infantry contacts on the other side of the river, it seemed that the smart thing to do was to send them across. About 10 seconds into turn 2, the German AA track turned the corner looking straight down the road to the bridge. Just about that same time, the platoon HQ stepped onto the bridge leading his full platoon following close behind. Their objective was to take up positions along the length of the bridge to provide covering fire for the main body that was to follow. It was his last command. The men from the two Bren carriers never saw the HT. They were too busy scurrying up the steps to their cover positions. After 1 minute and 45 seconds the last 5 survivors of the doom platoon crawled back off the bridge led by their new platoon leader, some guy with a rank of e-zero. Was the ugliest thing that I had ever experienced.

The rest of the game played out pretty well. My guys took out the AA HT, and the other three AFVs that were on the map from the start. We kept the smoke going, and got a fair number of men across until the Jerry reinforcements arrived.

All around, it was a fun game. It was just that two minute ugly that spoiled the fun.

Good game @laurent!
 
Seems like I always disagree with the majority opinion but from my point of view the Poles had a very clear edge based on the amount of arty support with plenty of TRPs and all the SMGs for the short range firefights that would make up the majority of the game. On turn1 I gave area fire orders to most of my units for 30to45 seconds on all the buildings across the street from them since the briefing warned they could be there. Before the turn was over I had heavy accurate arty fire landing on all of my starting positions. That paired with all the sub-machine guns the Poles had kept me completely pinned for the entire game. My half tracks did have some very powerful guns on them. But they are incapable of making tight turns and painfully slow at making wider turns which was something I did not fully appreciate until most of them were dead. Having got them killed trying to move them into better firing positions or just get them away from the arty. Between the arty fire and the huge edge in small arms fire my units were pinned during every order phase. It might sound like an exaggeration or sour grapes but I promise it is neither one. Almost every order phase almost ever single one of my units had a suppression gauge in the red. So almost all my guys were cowering and most all the Poles I had eyes on were either firing or ready to fire. My guys did fight back. Late in the game ammo was a huge problem for most of my surviving units. But medicing up ammo takes time especially when getting pinned intermittedly during the turn. Trying to move them to open up more angles of fire is the only way I could think of to help overcome the rate of fire advantage the Poles had but moving them out of their starting locations was almost certain death. Yet the only other thing they could do was stay where they were and continue to lose the ongoing firefight with the units across the road from them. AL periodically pulled some units off the firing line to evac them. I was between a rock and a hard place all game. AL stopped artying me just long enough to create a humongous smoke screen on the other side of the bridge which he kept suplemented with smoke mortars and smoke grenades from his squads... He did not set up the same ambush that meateater did but he did have a blocking force set up that bottled up my reinforcements..........

To my eye he turned in a near flawless plan that was very well executed. The combo of arty and better small arms perfectly complimented each other pinning me in place while consistently whittling my numbers down and the lower my numbers got the more the small arms edge showed...... Leaving my halftracks in place early on might have helped some... but maybe not... The later stages of the games I did feel some pressure to move to try to cut off the some of the stragglers I knew were still moving. This caused me some more losses then probably were necessary but also probably netted a few more kills, probably a net negative for me though. The game was entering desperate times and it was the last of the desperation moves I had.

I have been beaten up in a lot of CM games. This was one of the more thorough beating I have taken though. I was very surprised at the final score. The game said it was a draw (no it definitely was not) I was surprised at the total amount of damage I had done to AL's force at the end of the game though. I assume there were a lot of turns where my guys knocked off 2or3 of his that usually went unseen by my guys aside from my W-bird which I knew had got a couple good licks in. It was a very tough game. Looking forward to round 2!!
 
Last edited:
Well, talking about challenging situations that I might give you. I worked on the round 3 battle a few nights ago,. I can already hear the comments I am going to get from some poor players that just cannot believe what they are going to be asked to do.

My idea of fun is to make you feel dread, or pride when you manage to get things to work out for you. I want some emotional attachment to the battle.
 
My idea of fun is to make you feel dread, or pride when you manage to get things to work out for you. I want some emotional attachment to the battle.
Almost all the fun ones are hard and almost none of the fun ones are easy........

I understand wanting some emotional attachment to the games but lemme ask do u also aim for emotional damage?? (asking for a friend)
 
Back
Top