So for the last few months two things have dominated my life. A heavy workload (projects timelines hit the pointy end, budget season here in Australia and a tender all at the same time), and my latest spend fest keeping Amazon and Book Depository alive with a large book order has been slowly devoured.
I've always known bits and pieces about the Moro River Campaign but I did a book order and picked up a good number of titles from the NZ and Canadian viewpoints of the battle and been slowy getting through them. Wish there was something as comprehensive from the German point of view.
Anyway this was Monty's last campaign in Italy before departing to prepare for D-Day. It caught my attention for a number of reasons:
- The atrocious weather and trying desperately to launch an offensive in horrible conditions.
- Even this early in the war there was suggestions that 'Jerry Was Done in Italy' after Salerno. Very similar with what was to occur later around the planning for Market Garden.
- The variety of forces involved, but they were virtually equal in strength as they went into the December battles along the Adriatic coast.
- Interestingly many of the same forces involved here would be moved and fight again at the later Cassino battles.
- Though Cassino is the more famous, some units here like the NZ division lost more troops here than in that more famous battle a few months from now.
- The siege / WW1 nature the battle turned into as the weeks of December 1943 went on.
Anyway I was planning some sort of campaign but decided instead to focus on making some maps and maybe a scenario or two down the line, especially for the Kiwi's at Orsogna. I felt the Gustav Line module with only 1 NZ scenario was a little unfair, given their involvement in the theatre.
The maps below are what I have been working on. Yellow boxes have been started, in both cases the map scaling and elevation work are done. Red boxes are on the to do list as I really like the engagements that occurred there. Note a couple of maps or scenarios from this region have already been done by others.

Yellow (Ithikial) - San Leonardo. Canadian attack and hold against Panzergrenadiers and Panzer support over open ground. A squadron of Canadian Shermans went in and owing to the poor weather only five made it to the town itself with the supporting infantry.
Red - Cider Crossroads. Surprised this hasn't been done yet. Unless I'm missing something...

Yellow (Ithikial)- Orsogna. The bane of the 2nd NZ Division. Between the 3rd of December right through until they left the line the Kiwi's couldn't break into this town despite almost having it surrounded at one point. The citadel on a cliff's edge limited viable approaches and allowed the 26th Panzer and 1st Fallschrimjager to hold them at bay. A handful of NZ troops even mutinied over continued assaults against it towards the end.
Red North - Arielli. German held for most of the time that cut the Orsogna - Ortanna road limited the ability for Armour to move in from the west to assist the Canadians on the coast. If Orsogna fell was a the likely next major defensive line. Also a launch pad for German assaults against the Kiwi's. Originally taken by the 5th British Division.
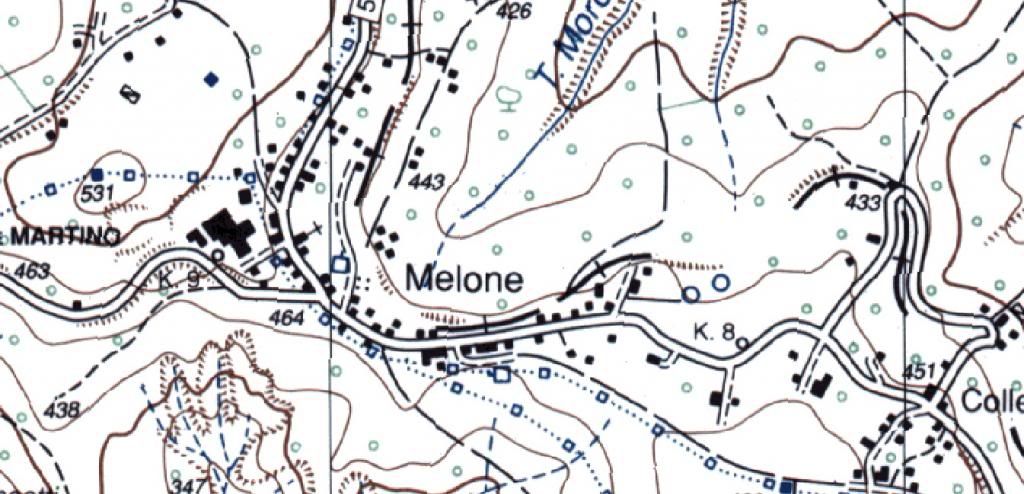
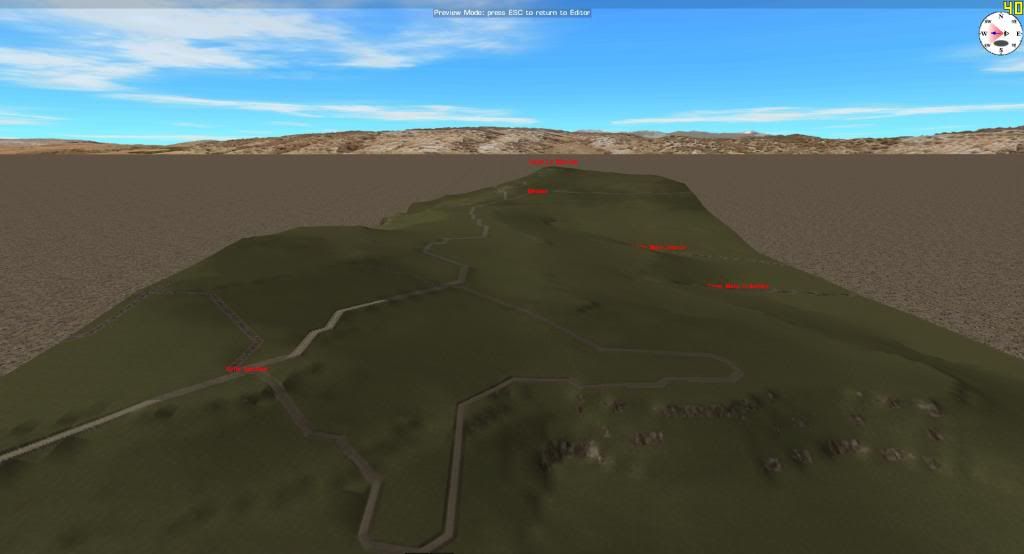
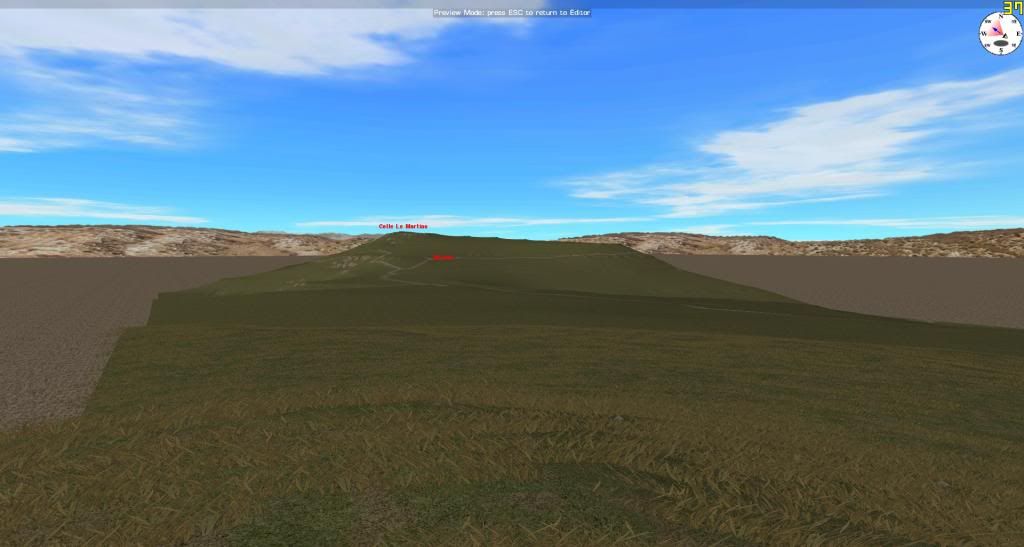
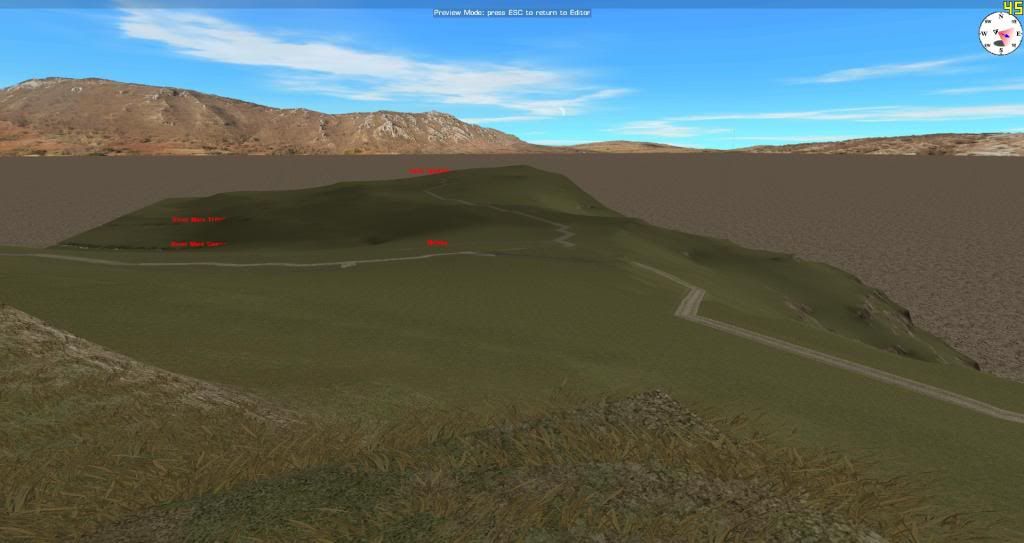
Green South (Mad Mike) - Melone. Allies never seriously wanted the town as they focused on Orsogna. Germans again managed to hold it throughout the campaign, forcing British Paratroopers and NZ Armoured forces to hold troops here to keep the Germans from exploiting their position. Though the Germans never really had the desire or ability to do so.
Anyway in game pics soon but yeah my eyes are bigger than my stomach. Anyone wants to pitch in and help please let me know.")
I've always known bits and pieces about the Moro River Campaign but I did a book order and picked up a good number of titles from the NZ and Canadian viewpoints of the battle and been slowy getting through them. Wish there was something as comprehensive from the German point of view.
Anyway this was Monty's last campaign in Italy before departing to prepare for D-Day. It caught my attention for a number of reasons:
- The atrocious weather and trying desperately to launch an offensive in horrible conditions.
- Even this early in the war there was suggestions that 'Jerry Was Done in Italy' after Salerno. Very similar with what was to occur later around the planning for Market Garden.
- The variety of forces involved, but they were virtually equal in strength as they went into the December battles along the Adriatic coast.
- Interestingly many of the same forces involved here would be moved and fight again at the later Cassino battles.
- Though Cassino is the more famous, some units here like the NZ division lost more troops here than in that more famous battle a few months from now.
- The siege / WW1 nature the battle turned into as the weeks of December 1943 went on.
Anyway I was planning some sort of campaign but decided instead to focus on making some maps and maybe a scenario or two down the line, especially for the Kiwi's at Orsogna. I felt the Gustav Line module with only 1 NZ scenario was a little unfair, given their involvement in the theatre.
The maps below are what I have been working on. Yellow boxes have been started, in both cases the map scaling and elevation work are done. Red boxes are on the to do list as I really like the engagements that occurred there. Note a couple of maps or scenarios from this region have already been done by others.

Yellow (Ithikial) - San Leonardo. Canadian attack and hold against Panzergrenadiers and Panzer support over open ground. A squadron of Canadian Shermans went in and owing to the poor weather only five made it to the town itself with the supporting infantry.
Red - Cider Crossroads. Surprised this hasn't been done yet. Unless I'm missing something...

Yellow (Ithikial)- Orsogna. The bane of the 2nd NZ Division. Between the 3rd of December right through until they left the line the Kiwi's couldn't break into this town despite almost having it surrounded at one point. The citadel on a cliff's edge limited viable approaches and allowed the 26th Panzer and 1st Fallschrimjager to hold them at bay. A handful of NZ troops even mutinied over continued assaults against it towards the end.
Red North - Arielli. German held for most of the time that cut the Orsogna - Ortanna road limited the ability for Armour to move in from the west to assist the Canadians on the coast. If Orsogna fell was a the likely next major defensive line. Also a launch pad for German assaults against the Kiwi's. Originally taken by the 5th British Division.
Green South (Mad Mike) - Melone. Allies never seriously wanted the town as they focused on Orsogna. Germans again managed to hold it throughout the campaign, forcing British Paratroopers and NZ Armoured forces to hold troops here to keep the Germans from exploiting their position. Though the Germans never really had the desire or ability to do so.
Anyway in game pics soon but yeah my eyes are bigger than my stomach. Anyone wants to pitch in and help please let me know.
Last edited: