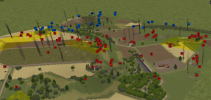
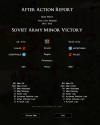
So after a... less than stellar performance around the town of Schweben, I jumped back in time to 1979 to fight @Cargol for a hill somewhere in West Germany. This time in daylight, and in the year which does favour the USSR, so credit to my good opponent for being game for that. I've since been pointed to 1980 as a 'good year' to use, as there's plenty of fun kit but not too many thermal sights around, but that will be for another time.
I assembled another Motor-Rifle Battalion, with one T-62 tank company, two BMP-1 companies, and one infantry company with their BMP-1s stripped out and replaced with lorries. This economising allowed me to bring along 12.7mm-cannon hinds (with an air controller), 122mm howitzers, and both 120mm mortar platoons on-map, plus two AA vehicles, so once again I'm bringing most of a motor-rifle battalion. I pushed the tanks up to 'crack', which is perhaps a bit cheeky of me given that I took almost everything else at regular (a few veteran spotters aside). With hindsight I think I should have stuck with veteran tanks, and if I wanted them to perform better then I should have picked better tanks.
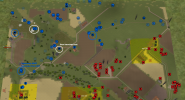
Once again, the plan I set up was not entirely in line with Soviet doctrine; the map had two hills and a ridge that held commanding views of most of the objectives. My read was that of the four objectives, the Americans had a better claim on three of them - one as a natural 'home' objective that was entirely exposed to the main hill, and two on their side of the central hill. I'd have difficulty taking those if the Americans could get their infantry set up in the objectives with tanks and ATGMs covering from the ridge or the far hill, so my main principle was to fight the enemy as far forwards as possible. No defensive position they could adopt could be better than that, I judged, so once again throwing my battalion into an all-in attack from the off. The tank company would advance onto the hill in company line and engage any US forces that try to advance onto the hill or the ridge, while the BMP companies push forwards to take positions as far forwards as possible. The lorry company would set up on the 'home objective' as a reserve... or a final backstop should everything go disastrously wrong (as it did in Schweben).
The artillery was planned to support this. I had initially pencilled in howitzer strikes on the far hill while all the mortars bombarded the ridgeline, but in the end I decided to use the howitzers to smoke up half of the ridgeline (meaning that if the enemy tanks rolled up to the ridgeline through the orchard and took hull-down positions en masse I'd only be engaging around half of them) while one of the 120mm mortars hit the forested sunken area at the base of the hill, where I predicted the US infantry would stage prior to moving onto the objective. One 120mm mortar platoon was held read to fire, as being on-map meant they had decent response times from my spotters (who were going forward with the companies).

In all this, I judged 'Objective 1' to be the one most critical to success. I was most likely going to take higher casualties than my opponent, so in the 60/40 split of points casualties/objectives I would need to get ahead on objectives. My more ambitious aims were to hold three objectives (1, 3 & 4) while forcing the US off the ridge (with objective 2 at the end) by fire alone. Well, in an ideal world I'd catch the US forces 'on the hop' and destroy so much of their force they'd surrender or could be pushed right back into their deployment zone, but that seemed rather unlikely.
With the plan set, it was time for kick-off.
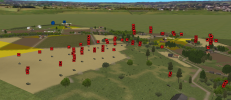 I will say... one thing I enjoy is the sheer scale of a Motor-Rifle Battalion. Being more used to one or perhaps two companies, and maybe a platoon of tanks, having this much fairly low-value metal to throw around in bulk is really fun.
Now, this was about the point where things went really wrong in my last battle, so I was pleasantly surprised when my tanks met the enemy without reporting it via smoke signal. TOW vehicles were moving into hull-down positions on the ridge (as expected), and my tank company actually got off the first shots.
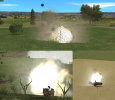
They destroyed one of the older ones before it could even fire, I think, and while they missed the ITOW and it was able to take out an T-62, and when an M60 rolled into the open it was destroyed before it could take out any tanks either, so I'll take that as an exchange. In that moment I did get a glimpse of just how potent stacking the numerical odds in your favour can be... but it was not to last. Having charged forwards and taken a good engagement... I stopped the company. They sat on the hill while the BMP companies sped forwards onto objectives 3 and 1, and I even pushed a BMP platoon forwards towards objective 2. This was, perhaps, a mistake. I stress the perhaps because this was a window in which I had near complete freedom of manoeuvre for my BMP companies; anything trying to engage them would need to do so under the watchful eyes of my tank company, so I was confident the tanks would be the first target while the infantry secured the objectives and dug in. And target the tanks the Americans did.
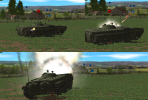
One thing less obvious at the height these images are taken from is the terrain on the top of the hill. While it looks like a steeper ascent on my side into a gentle downward slope on the US side, the hilltop wasn't completely smooth and getting the company line right along the crest was a bit of a challenge as there was a gentle slope upwards towards the peak on the right flank of the tank company. This meant that while I'd ensured they all had a good view of the ridge, each tank's view of the far hill ('Good vantage point') was a bit spotty, and at around the five minute mark US infantry had set up there and just down from the ridge with their dragon launchers, and suddenly things went a bit wrong.
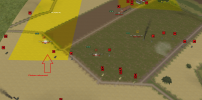
I was especially annoyed at myself because this had been something I'd thought of, and I'd considered setting up a pre-planned fire mission to hit the far hill at the five minute mark - around 30 seconds too late for the tanks shown, sure, but as @Cargol was a sneaky devil and set up using the buildings to narrow the angles (and only expose them to a few tanks rather than the whole company), they were very vulnerable to 120mm or 122mm dropping on their heads.
Meanwhile, my opponent also had ideas about pre-planned artillery. They correctly guessed that I'd be putting troops on (or sending them through) my home objective, but by using what looked like either a 'light' or 'harass' mission over a wide area, it just wasn't intense enough to really worry me. I did ask my lorries to live a little dangerously, driving them through the barrage even after I'd seen it (and even having suspected it would happen in advance!) and they got through with just one driver wounded by shrapnel through the window by a near miss and a grenade launcher team member killed as they ran across the open - not bad given that I sent a whole company into or through there.
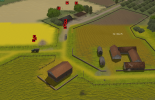
To be clear, I'd never risk that with some armies, but if there's one thing I'll give myself credit for it's a willingness to accept casualties as the Soviets (even if I do need to give myself some 'inspirational guidance' in the plan with statements like "Cannot win without offensive action, disregard casualties" to remind myself of the overall plan and why I'm willing to take them). Perhaps the lorried infantry didn't need to be in position right then, but I was a bit worried a US platoon might zip through the area between objectives 1 and 2 that wasn't covered by my tanks and push into the dense forested area where they would be a pain to push out, so I wanted a defence set up to stop them before they could threaten my home objective or interfere with the second BMP company that was taking a more circuitous route around the hill towards objective 2.
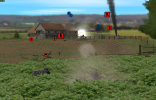
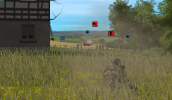
Speaking of the BMP companies, the reason I say that perhaps I mishandled the tanks is what I was able to accomplish with the mechanised infantry. By the eight minute mark I was 2/3 of the way up the map, having taken a hamlet between objectives 1 and 2 and so cut off the aforementioned route hidden below the guns of my tanks. I was starting to get an idea of where my opponent's forces were, and this would be the case for most of the game - one piece of terrain I hadn't thought about but proved to be very useful was a large building on the ridge (you can see my infantry and BMP by it below, middle, furthest right) and along with my forces in objective 1 (who were surprisingly good at getting glimpses of enemy units through the trees) and my teams set up in buildings on the right side of the hill (see the automatic grenade launcher) in a small cluster of buildings near the bottom) I had good intelligence on where the enemy were massing. This proved useful for shuttling troops around to prepare for US assaults.
I also spotted a small valley I decided to push some infantry into - there they would be in a safe, defensible position where they could strike at either objective 2 or a large building that US troops had set up a dragon in. Neither would be a great assault by itself, but if combined with another element it would give a really nice L shape on either.

Having called in the idle 120mm mortars on objective 2 when I saw infantry moving in, and finding no intervening forces, I decided to push my lorried and BMP infantry into a dismounted assault on objective 2, with the BMPs dashing between terrain to keep out of sight of the US forces set up on the far hill (which included a starship, which I admit I had forgotten about - while the normal M60s aren't too scary to infantry in cover, the starships do lob some sizable HE shells around, so with my depleted tank force hiding from the regular M60s, TOWs and dragons, they were actually quite scary for my infantry (it's hard to tell the difference between a starship shot and a 155mm shot!)
You will also note that, once again, I have split my tank company. This is a bad idea, I knew I shouldn't do it... but I did it anyway. Always remember - taнковый together strong. I'm just too used to splitting off a couple of capitalist NATO tanks with their bourgeois optics and antisovetchina independent tactical decision-making to cover an approach. So I was reduced to effectively one tank platoon on the rear of the hill and a couple of stragglers hiding on the forward slope...
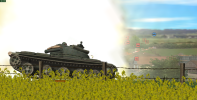
...make that just one tank platoon on the rear of the hill then. A lucky hit from a vulcan must have detonated some ammo, as the T-62 went off like a bomb. The same vulcan sprayed the other tank as well, wiping out all external systems (including what optics they had) and I had it reverse away up the hill showing its front armour to the vulcan... right into the sights of an M60. That second one was on me, I admit, but I was seriously impressed with how effective those vulcans are. A while later they shredded the top floor of a house, killing the RPG team up there, and several times in the battle they would completely strip a vehicle's subsystems with a single burst or wipe out an infantry unit. It did mean that when my surviving hinds came around again (of the four, one was shot down in the first pass) there wasn't much AA fire in return - a lot of the vulcans had used up their ammo, and the US MANPADS are really quite pathetic. Still, I'd say they had more impact taking out tanks and infantry than my cannon-only hinds, though if in the second pass some ATGM- or rocket-armed hinds had turned up then it might be another story.
Fast forwards a bit, and my infantry assault on objective 2 went really well. It didn't perfectly coincide with the 120mm mortar barrage, but the BMPs that successfully dodged the US AT assets were able to lay down suppressive fire, while the infantry moved in on the far side of the slope from the US position on the far hill, meaning they advanced with almost no US fire on them. Indeed, if the details of the terrain on the central hill was a cause of the loss of my tanks, the details of the terrain on objective 2 proved key to taking it with infantry. Even though two US rifle squads were dug in there, I believe I took fewer casualties assaulting those buildings than the US lost defending them - the artillery and BMP fire support were definitely key, as was the position of my fire support that forced them to stay in the back buildings out of my line of fire, but it's a good reminder that while US infantry is generally a lot better than Soviet infantry, combined arms can still win with fewer casualties.
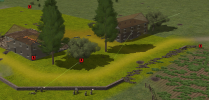
Meanwhile, in my infinite wisdom, I decided to split my remaining four-strong tank platoon in two. Two would go up onto the ridge - if they could get good positions to pop out from behind the buildings, they could deal with the US position on the rear of the far hill (with many ATGMs but not a huge number of regular M60s, so some shoot-n-scoot could greatly limit the ability of those units to return fire). Unfortunately the tanks were slow getting up to the building, and one was taken out by a dragon, so only one made it up to the position. It was working... until it coincided with an M60 rolling up a closer hill just outside its fire arc (even though the tank saw the M60, it didn't engage, so that's also on me) and the T-62 was hit just as it was reversing away. If even two tanks had made it up there, never mind three or four, it would probably have been a different story, but by this point I'd split the tank mass so far that it was fighting these one-on-one battles that the US tanks are better at.

My other two tanks had taken up position in the hamlet between objectives 1 and 2 - there one would actually spot an M60 up on the far hill, fire first, hit it in the hull... and not kill it. The driver / engine was knocked out, and the vehicle popped smoke, and the M60 spotted the T-62 first as the smoke cleared and destroyed it. Meanwhile the other T-62 actually survived a dragon hit to the turret, and then a Starship making a mad dash forwards at top speed, spotting it in some fraction of a second and putting a shell right below the gun barrel, knocking out the main gun and the coaxial but taking an RPG hit to its main gun in return (it also survived to smoke and roll away).
With my tank force out of the picture, the US armour was able to roll into dominating positions to cover their infantry assault on the objectives. I held all of them at that point, although some US infantry advanced onto objective 3 with little opposition due to how covered it was. I tried to run the surviving BMP onto the slop of the far hill, but it was taken out - I think by an M60, but it never made the spot. With only an officer and an automatic grenade platoon holding it (and with no good positions to fire on the approaching infantry until they reached the cluster of buildings), the US infantry mopped up my forces there - though not before the heroic platoon commander killed one of the US troops approaching from one side of the building, and was down to his last mag suppressing the survivors as US troops kicked in the door on the other side of the room and gunned him down. Heroic conduct, that - a real pity I didn't have a squad backing him up.
Yes, those are the wrecks of many BMPs. I'll be honest, the BMP-1 was very unimpressive in this game. They did a good job suppressing the US forces in objective 2, but for the most part they refused to use their cannons on any US armour, even an M113 (which they would reverse away from when spotted!) Instead they would (in the rare cases they wouldn't reverse away) engage with the ATGM, accounting for a couple of kills, but generally being little better than armoured taxis. I have seen them do better at the NTC when they have the space to work, as this short range is as bad for their ATGMs as it is for the US TOW, but this battle set fairly firmly in my mind that I want dismountable ATGMs for their greatly reduced infantry profile and either BTRs for budget armoured transport or BMP-2s if I want something with teeth. I won't say that I'll never use the BMP-1 if I need an infantry-support gun, but I suspect (as with the T-62s, in fact) that I'm not handling them very well and that's why they suffer such appalling losses.
Still, for all the burnt-out hulks littering the battlefield, my infantry had got where they needed to go - the objectives, and now I needed to hold them for just over half an hour. With the US armour reduced but still mostly operational, there was still everything to play for.
I assembled another Motor-Rifle Battalion, with one T-62 tank company, two BMP-1 companies, and one infantry company with their BMP-1s stripped out and replaced with lorries. This economising allowed me to bring along 12.7mm-cannon hinds (with an air controller), 122mm howitzers, and both 120mm mortar platoons on-map, plus two AA vehicles, so once again I'm bringing most of a motor-rifle battalion. I pushed the tanks up to 'crack', which is perhaps a bit cheeky of me given that I took almost everything else at regular (a few veteran spotters aside). With hindsight I think I should have stuck with veteran tanks, and if I wanted them to perform better then I should have picked better tanks.
Once again, the plan I set up was not entirely in line with Soviet doctrine; the map had two hills and a ridge that held commanding views of most of the objectives. My read was that of the four objectives, the Americans had a better claim on three of them - one as a natural 'home' objective that was entirely exposed to the main hill, and two on their side of the central hill. I'd have difficulty taking those if the Americans could get their infantry set up in the objectives with tanks and ATGMs covering from the ridge or the far hill, so my main principle was to fight the enemy as far forwards as possible. No defensive position they could adopt could be better than that, I judged, so once again throwing my battalion into an all-in attack from the off. The tank company would advance onto the hill in company line and engage any US forces that try to advance onto the hill or the ridge, while the BMP companies push forwards to take positions as far forwards as possible. The lorry company would set up on the 'home objective' as a reserve... or a final backstop should everything go disastrously wrong (as it did in Schweben).
The artillery was planned to support this. I had initially pencilled in howitzer strikes on the far hill while all the mortars bombarded the ridgeline, but in the end I decided to use the howitzers to smoke up half of the ridgeline (meaning that if the enemy tanks rolled up to the ridgeline through the orchard and took hull-down positions en masse I'd only be engaging around half of them) while one of the 120mm mortars hit the forested sunken area at the base of the hill, where I predicted the US infantry would stage prior to moving onto the objective. One 120mm mortar platoon was held read to fire, as being on-map meant they had decent response times from my spotters (who were going forward with the companies).

In all this, I judged 'Objective 1' to be the one most critical to success. I was most likely going to take higher casualties than my opponent, so in the 60/40 split of points casualties/objectives I would need to get ahead on objectives. My more ambitious aims were to hold three objectives (1, 3 & 4) while forcing the US off the ridge (with objective 2 at the end) by fire alone. Well, in an ideal world I'd catch the US forces 'on the hop' and destroy so much of their force they'd surrender or could be pushed right back into their deployment zone, but that seemed rather unlikely.
With the plan set, it was time for kick-off.
 I will say... one thing I enjoy is the sheer scale of a Motor-Rifle Battalion. Being more used to one or perhaps two companies, and maybe a platoon of tanks, having this much fairly low-value metal to throw around in bulk is really fun.
Now, this was about the point where things went really wrong in my last battle, so I was pleasantly surprised when my tanks met the enemy without reporting it via smoke signal. TOW vehicles were moving into hull-down positions on the ridge (as expected), and my tank company actually got off the first shots.

They destroyed one of the older ones before it could even fire, I think, and while they missed the ITOW and it was able to take out an T-62, and when an M60 rolled into the open it was destroyed before it could take out any tanks either, so I'll take that as an exchange. In that moment I did get a glimpse of just how potent stacking the numerical odds in your favour can be... but it was not to last. Having charged forwards and taken a good engagement... I stopped the company. They sat on the hill while the BMP companies sped forwards onto objectives 3 and 1, and I even pushed a BMP platoon forwards towards objective 2. This was, perhaps, a mistake. I stress the perhaps because this was a window in which I had near complete freedom of manoeuvre for my BMP companies; anything trying to engage them would need to do so under the watchful eyes of my tank company, so I was confident the tanks would be the first target while the infantry secured the objectives and dug in. And target the tanks the Americans did.
One thing less obvious at the height these images are taken from is the terrain on the top of the hill. While it looks like a steeper ascent on my side into a gentle downward slope on the US side, the hilltop wasn't completely smooth and getting the company line right along the crest was a bit of a challenge as there was a gentle slope upwards towards the peak on the right flank of the tank company. This meant that while I'd ensured they all had a good view of the ridge, each tank's view of the far hill ('Good vantage point') was a bit spotty, and at around the five minute mark US infantry had set up there and just down from the ridge with their dragon launchers, and suddenly things went a bit wrong.

I was especially annoyed at myself because this had been something I'd thought of, and I'd considered setting up a pre-planned fire mission to hit the far hill at the five minute mark - around 30 seconds too late for the tanks shown, sure, but as @Cargol was a sneaky devil and set up using the buildings to narrow the angles (and only expose them to a few tanks rather than the whole company), they were very vulnerable to 120mm or 122mm dropping on their heads.
Meanwhile, my opponent also had ideas about pre-planned artillery. They correctly guessed that I'd be putting troops on (or sending them through) my home objective, but by using what looked like either a 'light' or 'harass' mission over a wide area, it just wasn't intense enough to really worry me. I did ask my lorries to live a little dangerously, driving them through the barrage even after I'd seen it (and even having suspected it would happen in advance!) and they got through with just one driver wounded by shrapnel through the window by a near miss and a grenade launcher team member killed as they ran across the open - not bad given that I sent a whole company into or through there.

To be clear, I'd never risk that with some armies, but if there's one thing I'll give myself credit for it's a willingness to accept casualties as the Soviets (even if I do need to give myself some 'inspirational guidance' in the plan with statements like "Cannot win without offensive action, disregard casualties" to remind myself of the overall plan and why I'm willing to take them). Perhaps the lorried infantry didn't need to be in position right then, but I was a bit worried a US platoon might zip through the area between objectives 1 and 2 that wasn't covered by my tanks and push into the dense forested area where they would be a pain to push out, so I wanted a defence set up to stop them before they could threaten my home objective or interfere with the second BMP company that was taking a more circuitous route around the hill towards objective 2.
Speaking of the BMP companies, the reason I say that perhaps I mishandled the tanks is what I was able to accomplish with the mechanised infantry. By the eight minute mark I was 2/3 of the way up the map, having taken a hamlet between objectives 1 and 2 and so cut off the aforementioned route hidden below the guns of my tanks. I was starting to get an idea of where my opponent's forces were, and this would be the case for most of the game - one piece of terrain I hadn't thought about but proved to be very useful was a large building on the ridge (you can see my infantry and BMP by it below, middle, furthest right) and along with my forces in objective 1 (who were surprisingly good at getting glimpses of enemy units through the trees) and my teams set up in buildings on the right side of the hill (see the automatic grenade launcher) in a small cluster of buildings near the bottom) I had good intelligence on where the enemy were massing. This proved useful for shuttling troops around to prepare for US assaults.
I also spotted a small valley I decided to push some infantry into - there they would be in a safe, defensible position where they could strike at either objective 2 or a large building that US troops had set up a dragon in. Neither would be a great assault by itself, but if combined with another element it would give a really nice L shape on either.

Having called in the idle 120mm mortars on objective 2 when I saw infantry moving in, and finding no intervening forces, I decided to push my lorried and BMP infantry into a dismounted assault on objective 2, with the BMPs dashing between terrain to keep out of sight of the US forces set up on the far hill (which included a starship, which I admit I had forgotten about - while the normal M60s aren't too scary to infantry in cover, the starships do lob some sizable HE shells around, so with my depleted tank force hiding from the regular M60s, TOWs and dragons, they were actually quite scary for my infantry (it's hard to tell the difference between a starship shot and a 155mm shot!)
You will also note that, once again, I have split my tank company. This is a bad idea, I knew I shouldn't do it... but I did it anyway. Always remember - taнковый together strong. I'm just too used to splitting off a couple of capitalist NATO tanks with their bourgeois optics and antisovetchina independent tactical decision-making to cover an approach. So I was reduced to effectively one tank platoon on the rear of the hill and a couple of stragglers hiding on the forward slope...

...make that just one tank platoon on the rear of the hill then. A lucky hit from a vulcan must have detonated some ammo, as the T-62 went off like a bomb. The same vulcan sprayed the other tank as well, wiping out all external systems (including what optics they had) and I had it reverse away up the hill showing its front armour to the vulcan... right into the sights of an M60. That second one was on me, I admit, but I was seriously impressed with how effective those vulcans are. A while later they shredded the top floor of a house, killing the RPG team up there, and several times in the battle they would completely strip a vehicle's subsystems with a single burst or wipe out an infantry unit. It did mean that when my surviving hinds came around again (of the four, one was shot down in the first pass) there wasn't much AA fire in return - a lot of the vulcans had used up their ammo, and the US MANPADS are really quite pathetic. Still, I'd say they had more impact taking out tanks and infantry than my cannon-only hinds, though if in the second pass some ATGM- or rocket-armed hinds had turned up then it might be another story.
Fast forwards a bit, and my infantry assault on objective 2 went really well. It didn't perfectly coincide with the 120mm mortar barrage, but the BMPs that successfully dodged the US AT assets were able to lay down suppressive fire, while the infantry moved in on the far side of the slope from the US position on the far hill, meaning they advanced with almost no US fire on them. Indeed, if the details of the terrain on the central hill was a cause of the loss of my tanks, the details of the terrain on objective 2 proved key to taking it with infantry. Even though two US rifle squads were dug in there, I believe I took fewer casualties assaulting those buildings than the US lost defending them - the artillery and BMP fire support were definitely key, as was the position of my fire support that forced them to stay in the back buildings out of my line of fire, but it's a good reminder that while US infantry is generally a lot better than Soviet infantry, combined arms can still win with fewer casualties.

Meanwhile, in my infinite wisdom, I decided to split my remaining four-strong tank platoon in two. Two would go up onto the ridge - if they could get good positions to pop out from behind the buildings, they could deal with the US position on the rear of the far hill (with many ATGMs but not a huge number of regular M60s, so some shoot-n-scoot could greatly limit the ability of those units to return fire). Unfortunately the tanks were slow getting up to the building, and one was taken out by a dragon, so only one made it up to the position. It was working... until it coincided with an M60 rolling up a closer hill just outside its fire arc (even though the tank saw the M60, it didn't engage, so that's also on me) and the T-62 was hit just as it was reversing away. If even two tanks had made it up there, never mind three or four, it would probably have been a different story, but by this point I'd split the tank mass so far that it was fighting these one-on-one battles that the US tanks are better at.

My other two tanks had taken up position in the hamlet between objectives 1 and 2 - there one would actually spot an M60 up on the far hill, fire first, hit it in the hull... and not kill it. The driver / engine was knocked out, and the vehicle popped smoke, and the M60 spotted the T-62 first as the smoke cleared and destroyed it. Meanwhile the other T-62 actually survived a dragon hit to the turret, and then a Starship making a mad dash forwards at top speed, spotting it in some fraction of a second and putting a shell right below the gun barrel, knocking out the main gun and the coaxial but taking an RPG hit to its main gun in return (it also survived to smoke and roll away).
With my tank force out of the picture, the US armour was able to roll into dominating positions to cover their infantry assault on the objectives. I held all of them at that point, although some US infantry advanced onto objective 3 with little opposition due to how covered it was. I tried to run the surviving BMP onto the slop of the far hill, but it was taken out - I think by an M60, but it never made the spot. With only an officer and an automatic grenade platoon holding it (and with no good positions to fire on the approaching infantry until they reached the cluster of buildings), the US infantry mopped up my forces there - though not before the heroic platoon commander killed one of the US troops approaching from one side of the building, and was down to his last mag suppressing the survivors as US troops kicked in the door on the other side of the room and gunned him down. Heroic conduct, that - a real pity I didn't have a squad backing him up.

Yes, those are the wrecks of many BMPs. I'll be honest, the BMP-1 was very unimpressive in this game. They did a good job suppressing the US forces in objective 2, but for the most part they refused to use their cannons on any US armour, even an M113 (which they would reverse away from when spotted!) Instead they would (in the rare cases they wouldn't reverse away) engage with the ATGM, accounting for a couple of kills, but generally being little better than armoured taxis. I have seen them do better at the NTC when they have the space to work, as this short range is as bad for their ATGMs as it is for the US TOW, but this battle set fairly firmly in my mind that I want dismountable ATGMs for their greatly reduced infantry profile and either BTRs for budget armoured transport or BMP-2s if I want something with teeth. I won't say that I'll never use the BMP-1 if I need an infantry-support gun, but I suspect (as with the T-62s, in fact) that I'm not handling them very well and that's why they suffer such appalling losses.
Still, for all the burnt-out hulks littering the battlefield, my infantry had got where they needed to go - the objectives, and now I needed to hold them for just over half an hour. With the US armour reduced but still mostly operational, there was still everything to play for.

