Welcome to The Few Good Men

Thanks for visiting our club and having a look around, there is a lot to see. Why not consider becoming a member?

Angriffe der Grenadiere - playtest 2

Kandu

FGM Colour Sergeant
FGM MEMBER
Joined
Apr 19, 2021
Messages
352
Reaction score
361
Location
London Ontario Canada
It is 16:00, June 6th 1944. The 505th PIR has secured the eastern end of the La Fiere causeway, bridge and manor (Manoir Le Roux rather than La Fiere Manor). A dozen or so troopers of the badly scattered 508th temporarily held Cauquigny at the western end but were driven out by a strong German counter-attack at noon (01). As the Germans consolidate for an assault across the causeway they lay harassing fire on the American positions at the eastern end (02). In the midst of the fire, survivors of the German attack on Cauquiny scatter , Capt. Swartzwalder taking his company NW to the orchard where Lt. Col. Timmes is dug in. The remnant of Lt. Taylor's platoon is getting caught fleeing back across the causeway in this scenario (04). Historically, he got caught wading across the flood as his men were cut off from the causeway. Less than a handful survived the crossing.
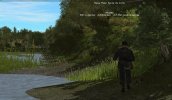
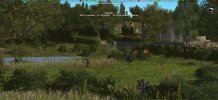
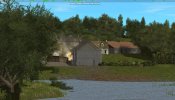
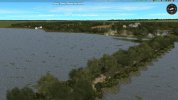
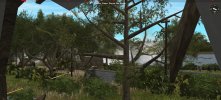
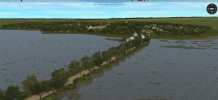
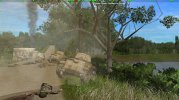
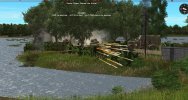
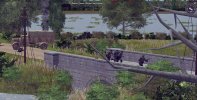
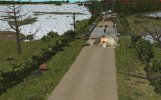
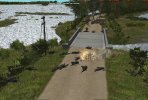
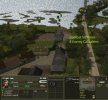
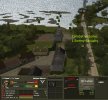
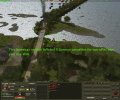
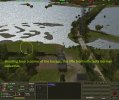
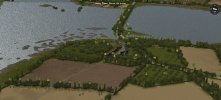
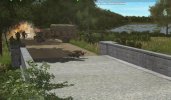
Image 01: The German view from Cauquigny farm across the flood to the American position.
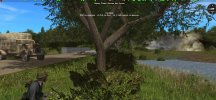
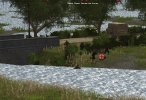
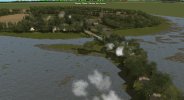
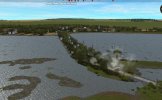
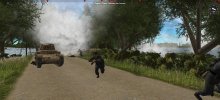
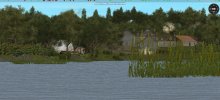
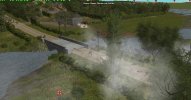
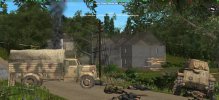
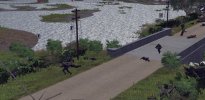
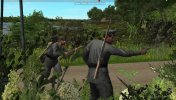
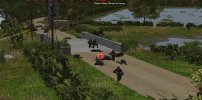
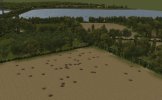
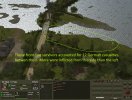
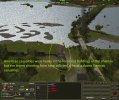
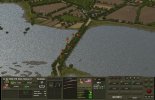
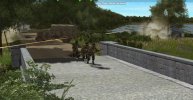
Image 02: Harassing fire falls near Le Manoir Leroux, on top of Lt. Taylor's fleeing troopers.
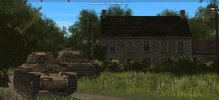
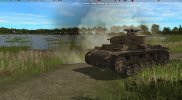
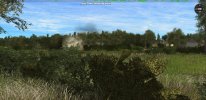
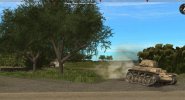
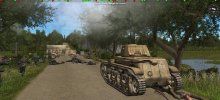
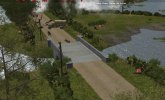
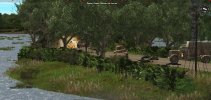
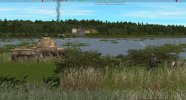
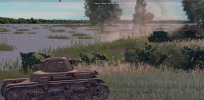
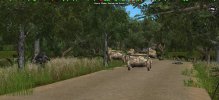
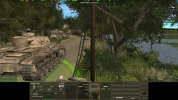
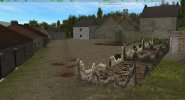
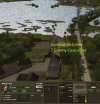
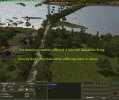
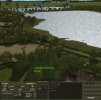
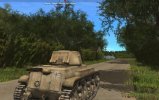
Image 03: A Renault 35 Beutepanzer from 100 Panzer Ersatz und Ausbildungs Abteilung is spotted on the road just back of Cauquigny.
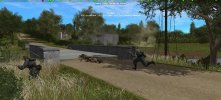
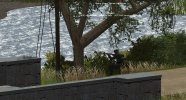
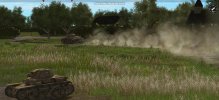
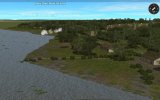
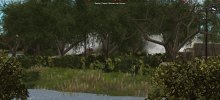
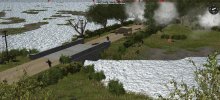
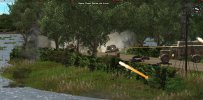
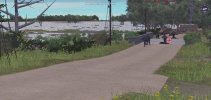
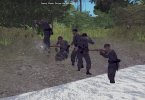
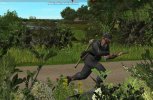
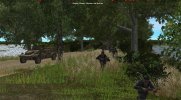
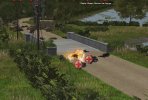
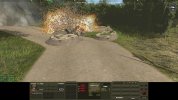
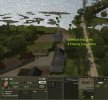
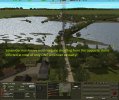
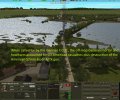
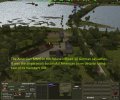
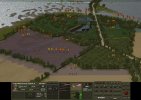
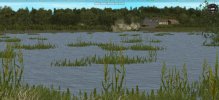
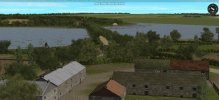
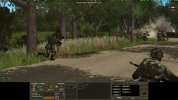
Images 04, 05 and 06: Lt. Taylor's men under mortar and MG fire from multiple MGs as they reach the bridge at the American position. They leave behind a half dozen casualties on the causeway.
 

Attachments

  • 01.jpg
    01.jpg
    116.6 KB · Views: 41
  • 06.jpg
    06.jpg
    116 KB · Views: 28
  • 05.jpg
    05.jpg
    98.7 KB · Views: 20
  • 04.jpg
    04.jpg
    158 KB · Views: 21
  • 03.jpg
    03.jpg
    101.2 KB · Views: 21
  • 02.jpg
    02.jpg
    148.3 KB · Views: 26
Last edited:
A few minutes into the action as a drizzle of harassing fire falls all over the American side of the Merderet flood both sides push recon teams to more favorable positions to gather intel on each other's deployments. Not that it matters overly much, the German assault has only one route - the hell of the causeway. The American team and two German Beutepanzers at Cauquigny crossroads (one Renault R35 and one PzKwIII) mutually spot each other and the armor takes the American team under fire.

a07: Two Beutepanzer move forward to fire on the American positioins, a Renault R35 and PzKw III.
A08: A German patrol is spotted moving cautiously forward along the berm of the causeway.
A10: An American section is spotted on the extreme right of the American postion, moving into a farm building there, and taken under fire by the two Beutepanzer.
 

Attachments

  • a07.jpg
    a07.jpg
    363.9 KB · Views: 17
  • A08.jpg
    A08.jpg
    346.9 KB · Views: 15
  • A10.jpg
    A10.jpg
    493.4 KB · Views: 12
Last edited:
Unnoticed by the American paras, a German platoon had been sneaking across the causeway. The Americans had earlier detected what they thought was just a recon team, were taken by surprise when a platoon sized combat group popped up near the bridge and a single German section revealed itself on the American side of the bridge, having crawled across unnoticed.

The Americans, who had been keeping their heads down during the light harassing barrage now manned their positions and brought fire to bear on the nearby Germans, inflicting half a dozen casualties.

A portion of the German platoon decided to take up firing positions on the piece of land just their side of the bridge (50 German V.P.) and some either wandered off into the water beside the bridge accidentally or on purpose - thinking to wade across to the American side. Those that entered the water were surprised to find themselves unable to cross the Merderet River, unlike the shallow flood that they had been negotiating beside the causeway up to this point.

The German attack was well coordinated with mortar, machinegun and fire from the German armour all hitting the American occupied buildings overlooking the bridge while the Germans pressed their attack.

POSTER'S NOTE: The images posted in this report are views of the German actions as 'known' to the American troopers. American positions are purposely not shown so as not to reveal them to my opponent at this time. They will be added after the action concludes.
 

Attachments

  • a12.jpg
    a12.jpg
    457.9 KB · Views: 11
  • a13.jpg
    a13.jpg
    436.3 KB · Views: 9
  • a14.jpg
    a14.jpg
    444 KB · Views: 7
  • a15.jpg
    a15.jpg
    429 KB · Views: 7
  • a16.jpg
    a16.jpg
    476.8 KB · Views: 9
  • a17.jpg
    a17.jpg
    346 KB · Views: 11
  • a18.jpg
    a18.jpg
    334.6 KB · Views: 14
Last edited:
i wish i could have snuck a few more up there before they got noticed.... that 2 man scout team went further than ordered...... and that team that decided to swim for it did that on their own to...... i knew the river was not fordable....

like the first time i had a different plan going into this than it has turned out... i think i have a better shot at this one but this is a tough nut to crack
 
Last edited:
After dropping some smoke on the road up the hill to block fire from the orchard on the hill, down the length of the road onto the bridge, a single German section made the attempt to rush the nearest manor but was shot down just before reaching his objective.

After that the Germans paused to bombard the right side of the American front line which had the best lines of sight to the causeway and was troublesome for the advancing Germans. While the bombardment pinned the American paras, more Germans were spotted crowding onto the causeway in preparation for the final assault.

a19: Birdseye view from the German lines.
a20: German ground view of the American right front line from the 'island' just off the bridge.

With 'trees on' and 'icons off' it is difficult to assess the effect of the bombardment. (players may turn trees off and icons on)
 

Attachments

  • a19.jpg
    a19.jpg
    354.9 KB · Views: 7
  • a20.jpg
    a20.jpg
    410.2 KB · Views: 8
Half way through the scenario, with a little over 30 minutes remaining, the German barrage intensifies and falls heavily deeper into the American positions. Any movement by the Americans now is too risky (a21).

The German PzKw III and one Renault R35 are spotted racing towards the causeway and I assume they are moving onto the causeway to support the imminent German assault (a22 & a23).

The next turn proves my assumption wrong as they appear to be merely shifting their positions to the German right to bring my left flank under fire. It is from here that I have the best view of the Germans concentrating near the bridge (a24).

On my far right the Germans have laid a small smoke screen on the assumption that I may have spotters on the farm buildings or hedgerows in the area able to overwatch the causeway (a25 & 26).
 

Attachments

  • a21.jpg
    a21.jpg
    228.2 KB · Views: 5
  • a22.jpg
    a22.jpg
    410.6 KB · Views: 6
  • a23.jpg
    a23.jpg
    363.1 KB · Views: 6
  • a24.jpg
    a24.jpg
    350.1 KB · Views: 6
  • a25.jpg
    a25.jpg
    356.6 KB · Views: 5
  • a26.jpg
    a26.jpg
    331.1 KB · Views: 11
While the German bombardment continues to force the American paras to keep their heads down, a smoke screen is placed to cover the advance of at least one of the Renault R35 Beutepanzer across the causeway to the bridge and takes the paras under close fire. The Germans make an attempt to dash across the bridge and at least one Panzerschreck team makes it across but the next minute they are shot down attempting to cross the road to the farm buildings. In the initial attempt to storm the bridge, the paras count at least seven German casualties.
 

Attachments

  • CM Normandy 2022-08-11 20-21-13-46.jpg
    CM Normandy 2022-08-11 20-21-13-46.jpg
    364.4 KB · Views: 9
  • CM Normandy 2022-08-11 20-23-07-17.jpg
    CM Normandy 2022-08-11 20-23-07-17.jpg
    410.1 KB · Views: 9
  • CM Normandy 2022-08-11 20-25-55-11.jpg
    CM Normandy 2022-08-11 20-25-55-11.jpg
    412.2 KB · Views: 9
  • CM Normandy 2022-08-11 20-26-45-33.jpg
    CM Normandy 2022-08-11 20-26-45-33.jpg
    416.4 KB · Views: 9
  • CM Normandy 2022-08-11 20-29-52-34.jpg
    CM Normandy 2022-08-11 20-29-52-34.jpg
    376.4 KB · Views: 8
  • CM Normandy 2022-08-11 20-30-59-63.jpg
    CM Normandy 2022-08-11 20-30-59-63.jpg
    359.7 KB · Views: 8
  • CM Normandy 2022-08-11 20-58-48-00.jpg
    CM Normandy 2022-08-11 20-58-48-00.jpg
    335.1 KB · Views: 7
  • CM Normandy 2022-08-11 21-00-30-80.jpg
    CM Normandy 2022-08-11 21-00-30-80.jpg
    627 KB · Views: 7
  • CM Normandy 2022-08-11 21-01-47-13.jpg
    CM Normandy 2022-08-11 21-01-47-13.jpg
    360 KB · Views: 10
not sure why they put me in mind of the old ones from CMBO....been time since i played it though.....i remember it put them on your control panel..... and did not show all the guys on map
 
For the past 5 to 6 minutes the air has been buzzing with hot lead. From the time the first German Renault R35 came up the German infantry has been making intermittent and what appears to be unco-ordinated attempts to cross the bridge to the American side. While some advance, others fall back. A second Renault pulls up behind the first and pours grapeshot into the foremost buildings of the chateau overlooking the bridge. During the advance of the second Renault, a few American mortar bombs explode on the causeway around the tank and among the scattered German infantry. While the Germans at the front pour fire into the American postions, half a dozen schwere Machinegewehr positions, a third Renault and the Panzerkampfwagen III continue to fire into the American positions from the German side of the Merderet flood.
 

Attachments

  • 01.jpg
    01.jpg
    336.9 KB · Views: 5
  • 02.jpg
    02.jpg
    455.8 KB · Views: 5
  • 03.jpg
    03.jpg
    508.4 KB · Views: 5
  • 04.jpg
    04.jpg
    461.2 KB · Views: 5
  • 05.jpg
    05.jpg
    440.1 KB · Views: 5
  • 06.jpg
    06.jpg
    404.1 KB · Views: 5
  • 07.jpg
    07.jpg
    390.5 KB · Views: 8
With 14 minutes left in the scenario, what appears to be the final German push to assault the American positions and retake the chateau at the eastern end of the La Fiere causeway. Survivors of four German sections, numbering 8 or 9 grenadiers, successfully dash across the bridge and deploy both left and right of the roadway. They lose only two men in the assault. More troops are moving up rapidly further back on the causeway, some transported on officers' Kubelwagen. Machinegewehr and Granatwerfer teams have also pushed forward and taken new positions along the causeway proper. The armour on the western shore appear to have not yet run out of ammunition.
 

Attachments

  • 01.jpg
    01.jpg
    473.1 KB · Views: 5
  • 02.jpg
    02.jpg
    427.3 KB · Views: 5
  • 03.jpg
    03.jpg
    562.4 KB · Views: 5
  • 04.jpg
    04.jpg
    300.9 KB · Views: 6
  • 05.jpg
    05.jpg
    413.8 KB · Views: 6
  • 06.jpg
    06.jpg
    379.6 KB · Views: 7
  • 07.jpg
    07.jpg
    375.2 KB · Views: 7
  • 08.jpg
    08.jpg
    410.5 KB · Views: 7
  • 09.jpg
    09.jpg
    435.7 KB · Views: 8
Immediately on the heels of the last turn and with 12 minutes left in the scenario, all the forces that the German Kommandant can muster within reach of the bridge are pushed forward with orders to make one last effort to capture the chateau or at least to secure both sides of the bridge. The PzKfw III also moves forward to support this last thrust.

Fortunately for the American paras, they are able to move their last mortar with 20 rounds of HE foward into a direct fire postion overlooking the bridge. This was a bit of bad luck turned to good for the Americans. Earlier in the battle they had attempted to expend these rounds using indirect fire from their original position to the rear, but the officer in charge of spotting was repeatedly suppressed by German fire, resulting in the mortar ammo never being expended.

The mortar rounds fell perfectly onto the the road turning the German assault into a massacre as they stubbornly pushed into (never through) the American fire instead of going to ground and delaying their attack.
 

Attachments

  • LA00.jpg
    LA00.jpg
    247.3 KB · Views: 3
  • LA01.jpg
    LA01.jpg
    443.1 KB · Views: 2
  • LA02.jpg
    LA02.jpg
    383.4 KB · Views: 2
  • lA03.jpg
    lA03.jpg
    398.2 KB · Views: 2
  • LA04.jpg
    LA04.jpg
    335 KB · Views: 2
  • LA05.jpg
    LA05.jpg
    403.2 KB · Views: 3
With German casualties piling up on the road, their Kommandant requested and was granted a truce to collect their wounded and fall back. What follows are the battle results and a bit of analysis. As the American player, I found the German artillery and mortar shoots the most troublesome and the main cause of my casualties.

Three moments were particularly disconcerting for me. The first came around 15 minutes into the scenario when the sole American anti-tank gun which LOS to the bridge, was knocked out by German indirect fire straddling the bend in the road at the top of the hill (trouble 02). Fortunately, the anticiapted German armor assault across the bridge failed to materialize. The second worry came when the first German assault team popped up unseen on my side of the river. (screen shots posted earlier). They went unseen because every team in my force was in foxholes or buildings in 'Hide' mode with short arcs of fire to prevent revealing their positions. The third came later in the scenario when I was moving my engineers forward and a German barrage caught them perfectly on the move. This unfortunate event lasted a number of turns.

I was fortunate that the German barrage on the American front line had been light, since at least half of my troopers were dug-in forward and in the buildings of the chateau. Fortune smiled on me a second time when a rather heavy German barrage fell well to the rear of my forces where none had ever been deployed (P06). German artillery against the Chateau had been light, seemingly it was never a serious target. Had it been, then more of the walls would have been breached exposing the defenders. P04 shows the single building wall that collapsed. the smaller sheds to the far rear, and the whole of the garden stone wall were also brought down.
 

Attachments

  • P01.jpg
    P01.jpg
    105.7 KB · Views: 3
  • P02.jpg
    P02.jpg
    162.6 KB · Views: 5
  • P03.jpg
    P03.jpg
    149.3 KB · Views: 5
  • trouble 02.jpg
    trouble 02.jpg
    228.3 KB · Views: 5
  • P06.jpg
    P06.jpg
    242.8 KB · Views: 4
  • P04.jpg
    P04.jpg
    452.5 KB · Views: 3
  • P05.jpg
    P05.jpg
    330.3 KB · Views: 5
Last edited:
I decided to have a post-battle look at how effective individually elements had been. After the battle, clicking on individual unit icons of either side will bring up a text in the lower left hand corner of the screen and inform the viewer how many enemy casualties that unit inflicted. Units which are KIA and have disappeared from view, are no longer accessible for this information.

I found the following to be extremely revealing:
The seven German heavy machineguns firing constantly into the American positions from the German side of the river inflicted in total ONLY ONE American casualty.
Similarly bad results were revealed by examining the German tanks (see images below) with only the PzKfw III inflicting 7 American casualties.
The German F.O.O. directing the German off-map artillery and mortar fire fared best, causing 23 American casualties plus the loss of the American anti-tank gun.

As for the American teams, those positioned on the front-line's right flank inflicted more casualties than their compatriots on the left due to having better LOS to the causeway.
The American teams in the forwardmost buildings of the chateau performed well in total as did the mortar that had been brought forward near the end-game.
 

Attachments

  • P07.jpg
    P07.jpg
    225.5 KB · Views: 5
  • P08.jpg
    P08.jpg
    226 KB · Views: 4
  • P09.jpg
    P09.jpg
    235.5 KB · Views: 4
  • P10.jpg
    P10.jpg
    241.6 KB · Views: 4
  • P11.jpg
    P11.jpg
    428.4 KB · Views: 4
  • P12.jpg
    P12.jpg
    418.8 KB · Views: 4
  • P13.jpg
    P13.jpg
    438.4 KB · Views: 4
  • P14.jpg
    P14.jpg
    473 KB · Views: 4
  • P15.jpg
    P15.jpg
    401.9 KB · Views: 3
  • P16.jpg
    P16.jpg
    435.5 KB · Views: 4
Last edited:
And a few more.

In SUMMARY I would say it was a near run things. Events that I suspect might have turned the battle in favour of the Germans would be: (1) if the heavy barrage that fell behind the American position had fallen more favourably, (2) if German smoke had been laid more heavily and on the American front line and if (3) the German armor had pushed forward sooner and also expended their AP rounds to shoot through the stone buildings. German MG fire had almost no effect against the stone buildings.
 

Attachments

  • P17.jpg
    P17.jpg
    443.9 KB · Views: 4
  • P18.jpg
    P18.jpg
    479.3 KB · Views: 4
  • P19.jpg
    P19.jpg
    508.4 KB · Views: 4
  • P20.jpg
    P20.jpg
    347.3 KB · Views: 4
Last edited:
At Start:
At the start of the scenario German forces only slightly outnumbered the American. The German advantage lay in the wealth of heavy machineguns, off-map artillery and mortar support and three Renault R35 Beutepanzerwagen plus one PzKfw III. The American had fewer MMG and one A/Tk gun with no off-map support.

THANK YOU: To Shady Side for play-testing the scenario with me that resulted in further refinement of the scenario victory conditions.

Start01.jpg: The American starting force and deployment zone
Start02.jpg: The unfortunate American platoon caught fleeing across the causeway (towards the viewer)
Start03.jpg: My American deployment
Start04:jpg On turn one the fleeing Americans' access to the bridge is blocked by German mortar fire and they decide to run the gauntlet.
 

Attachments

  • Start01.jpg
    Start01.jpg
    438.4 KB · Views: 4
  • Start02.jpg
    Start02.jpg
    380.2 KB · Views: 4
  • Start03.jpg
    Start03.jpg
    467 KB · Views: 4
  • Start04.jpg
    Start04.jpg
    149.7 KB · Views: 4
Hi there... here is a short little AAR from the other side of the bridge....
It is a tough mission to win but I believe I had a win within reach. The last arty mission I called in got the fire for effect but all the rounds were around 100 to 150m off target. I do not know if those rounds landing on target would have tipped the scales to my side or not but the game felt really close in that moment and rapidly turned into a slaughter after. But that is the end of the the story that starts here.
It is an infantry attack over a causeway which is effectively a bridge the enemy side gives me the impression of coming out of a funnel into the open with very little cover with strong buildings overlooking my right flank, a bocage lined road straight ahead with a curve in it that gives the enemy a very nice covered arear to fire from and a bocage lined road that opens up on the left that again offers some really good cover for them to fight from. Most of the bridge is exposed to flanking fire though there is some cover through the waist of the bridge. The enemy side is typical bocage Normandy landscape but with a twist the are several large hills in the patch work hills the appear flat when looking at them form my side of the flooded river.. those hills are not good places for the enemy to fight from but offer some really good cover from arty fire he can press into the bocage to his front and have a nice big earthen shield to his back making him safe for almost all arty fire except a direct hit in his foxhole.
In rounded off numbers I have 1 company and 1 platoon of infantry 1 weapons platoon and a platoon of tanks but 3 of them are the older 37mm cannon french tanks and a "medium" tank but it only has a 50mm cannon 2 batteries of 105mm arty 2 batteries 107mm mortars off map 1 battery 81mm off map and 2 tubes of 81mm on map mortars. That is probably enough to batter down the building complex on the right but they may not be occupied and leveling them opens up a bocage lined field with potentially more enemy guns having line of sight to the end of the bridge.

I started with the assumption that most of his front lines would only be thinly held waiting out the customary opening arty barrage with the bulk of his force scattered towards the rear of the map waiting for my assault to start and then jogging into position and waiting on me at the end of the bridge with aimed rifles and evil grins on their faces.. So the plan is to open with a short sharp bombardment trying to catch a few of his frontline guys and have a strong probe start across the bridge to get his front line positions behind the bocage to expose themselves suppress them with long range MG fire from tanks and MG crews and try to KO them with on map mortars hoping to KO a few of those teams I had a long medium intensity fire plan the was designed has a 3 sided box to cut off his reinforcements from rushing to the front and hopefully concentrating his defense in those untouched buildings which make awfully big targets for most of my tanks HE ammo and MG crews firing thru walls that having got my infanty into a strong place and the repel his counter attack once my arty shield ran out of ammo...........

What threw a HUGE monkey wrench in that plan was about a platoon and a half making it all the way across the bridge without being noticed..... They were to far out on a limb to pull back and not strong enough to stay there unsupported... This was both a huge problem and golden opportunity getting that many guys in that spot basiclly free was not something i considered might happen.... problem was the whole time i am moving the rest of my guys up and building fire support he is sneaking reinforcements into already more strongly held front lines than I anticipated but i was able to build up if not fire superority for a few turns something very close to it the last of my 105s was set to a linear mission cutting across the road dead to my front has a lot of reinforcments were cutting across in and into the flanking bocage fields the barrage was not aimed to kill the teams shooting at me dead in front... as much as it was supposed to blind them and cut off the teams trickling in but the fire mission missed long most of my sneaky platoon was out of ammo or very near it so nothing to do but try one last charge with car drivers, officers, cooks clerks ammo bears..... most of whom died in a hail of American lead at the end of the bridge..... I think the second part of my plan would have worked if the first part had not worked way way way better than i ever thought it would....lol....

it made for an interesting game and i wanna thank kandu for it.....
 
Back
Top