


Trying to remember my old CMBN password so I can get some earlier battles to film. In the meantime, a short World Of Warships video.
You are using an out of date browser. It may not display this or other websites correctly.
You should upgrade or use an alternative browser.
You should upgrade or use an alternative browser.
DoubleD's Gallery
- Thread starter DoubleD
- Start date
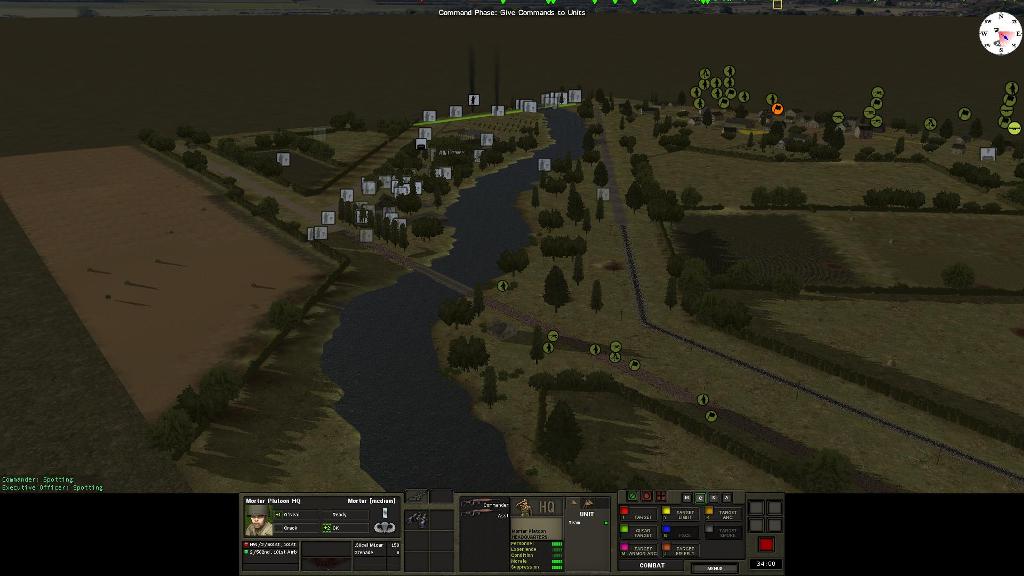
And now from something different. I've started working on using Panzer Campaigns to try and act as the operational game play to support CM's tactical action. It's work in progress, but I thought I'd do some simple AAR's along the way. It's single player, so still a lot of balancing to work on.
The PzC Campaign I'm using is the intro, 'Getting Started'. It's 6 turns long and I plan to use this to work out how to combine, if possible, PzC and CM in a single player experience.
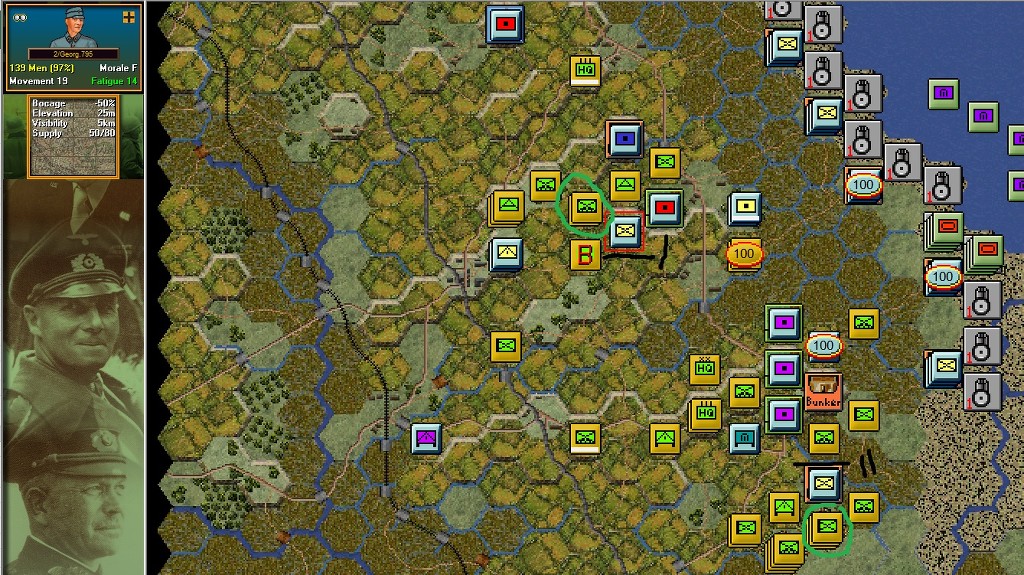
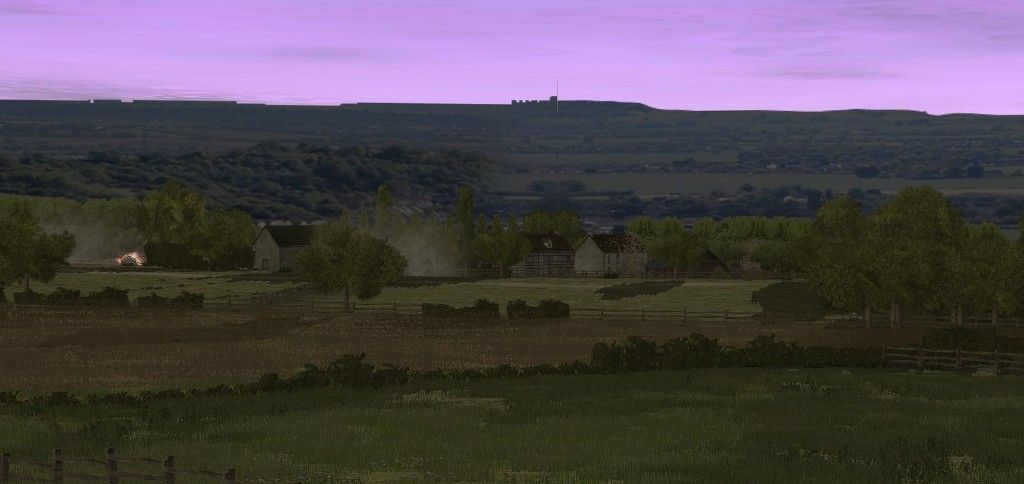
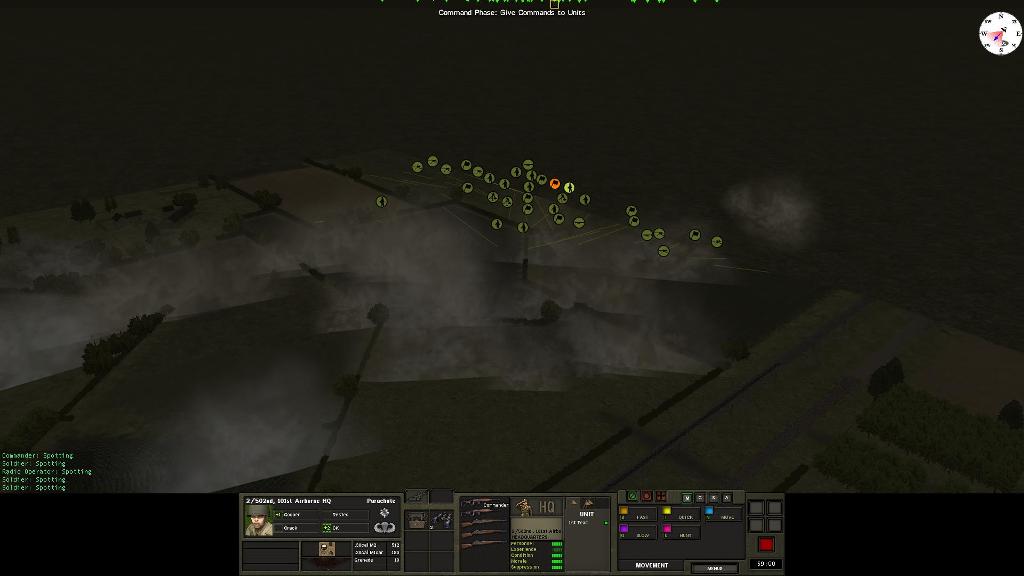
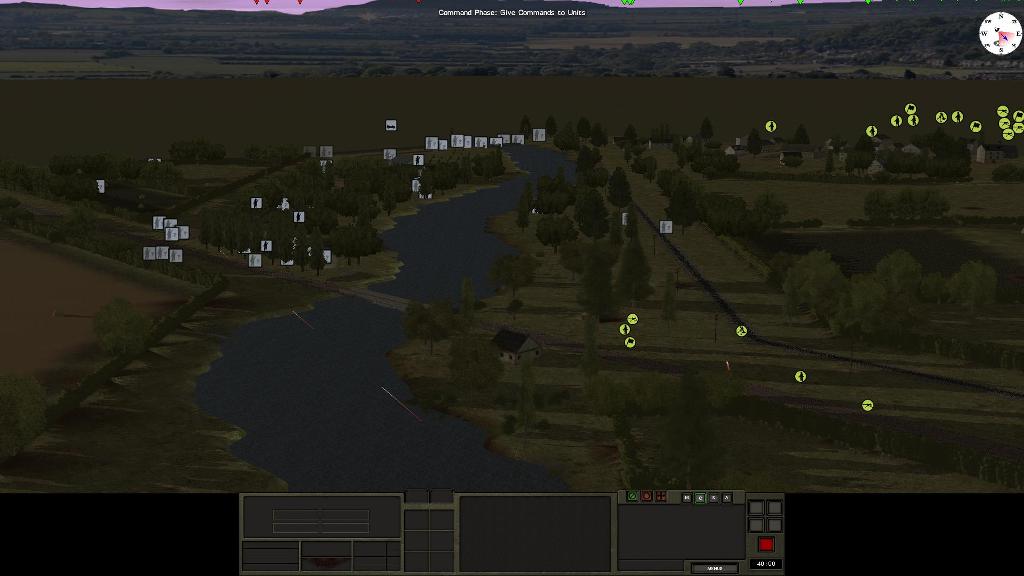
The start see's me in control of the 101st Airborne landings, behind the lines of Utah beach. I'm to direct the 101st too secure 4 strong points, causing as many casualties as possible, and get the US VII Corp onto the beach and setup the initial beach-head. I'm in the second turn, 6 am - 6th June 1944. VII Corp has just started landing, and the 501, 502 and 506 are now on the attack. At the initial drop in, turn one, I lost around 1,500 men, and F Company from 2/502 was decimated by the Ost Company, of the Georgian 795th.
I have two battles planned to play out in CMBN. The first in hex 11-6; L Coy 3/502 PIR, 101st Airborne, with support from the 337th AB Arty, will seek revenge against Ost Company, Georgian 795th. The second in hex 16-11; G Coy 2/502 PIR and Heavy Weapons 2/501 PIR will attack the 1s/I/GR. 919, from the 709th Inf. Div.. 919th is dug into a bunker complex and has support from a Werfer Company with 6 guns.
Once those two battle are run, I shall adjust the current game setup to reflect the results, play a couple more PzC moves and then let the AI run the Axis turn.
The PzC Campaign I'm using is the intro, 'Getting Started'. It's 6 turns long and I plan to use this to work out how to combine, if possible, PzC and CM in a single player experience.
The start see's me in control of the 101st Airborne landings, behind the lines of Utah beach. I'm to direct the 101st too secure 4 strong points, causing as many casualties as possible, and get the US VII Corp onto the beach and setup the initial beach-head. I'm in the second turn, 6 am - 6th June 1944. VII Corp has just started landing, and the 501, 502 and 506 are now on the attack. At the initial drop in, turn one, I lost around 1,500 men, and F Company from 2/502 was decimated by the Ost Company, of the Georgian 795th.
I have two battles planned to play out in CMBN. The first in hex 11-6; L Coy 3/502 PIR, 101st Airborne, with support from the 337th AB Arty, will seek revenge against Ost Company, Georgian 795th. The second in hex 16-11; G Coy 2/502 PIR and Heavy Weapons 2/501 PIR will attack the 1s/I/GR. 919, from the 709th Inf. Div.. 919th is dug into a bunker complex and has support from a Werfer Company with 6 guns.
Once those two battle are run, I shall adjust the current game setup to reflect the results, play a couple more PzC moves and then let the AI run the Axis turn.
Last edited:
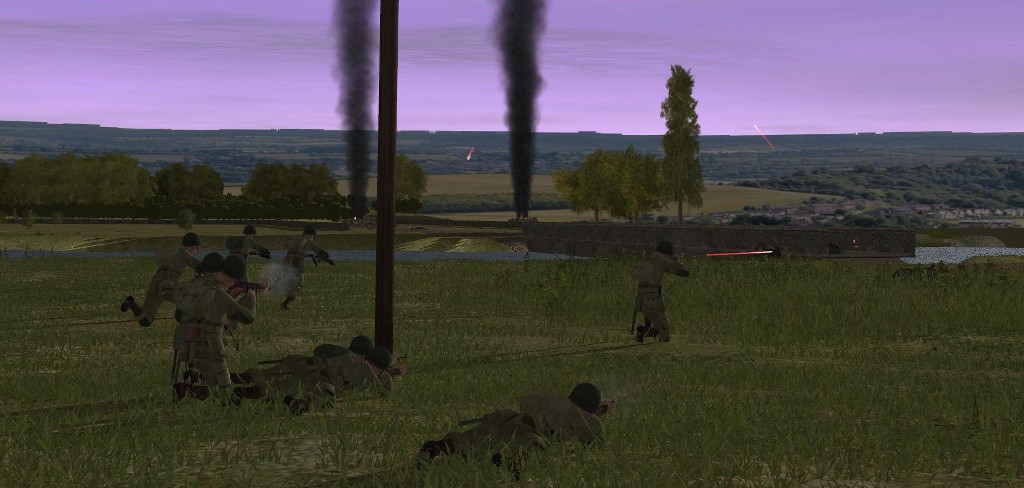
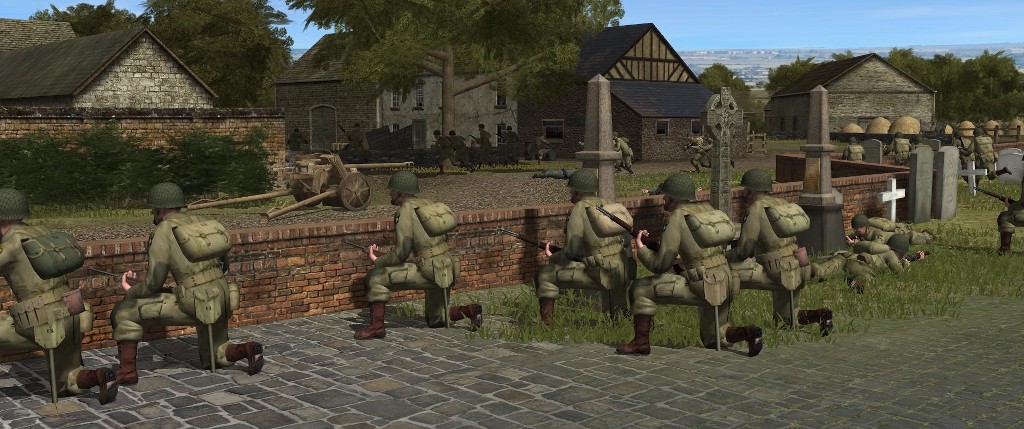
AAR for the first battle - the 502nd versus the 795th
The 502nd are at almost 100% strength; 133 crack, well motivated troopers ready to fight. The Georgian 795th are at 100%, 127 men, but poorly trained conscripts with poor mediocre leadership.
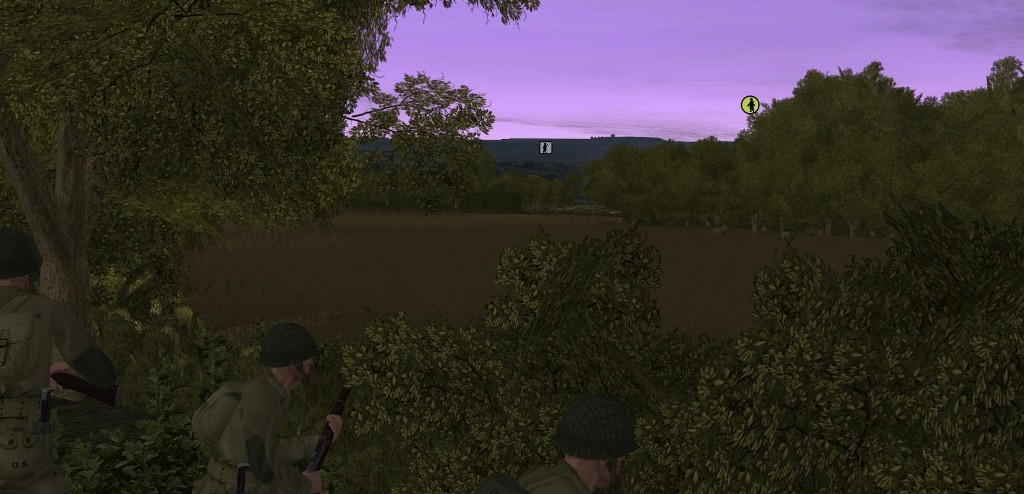
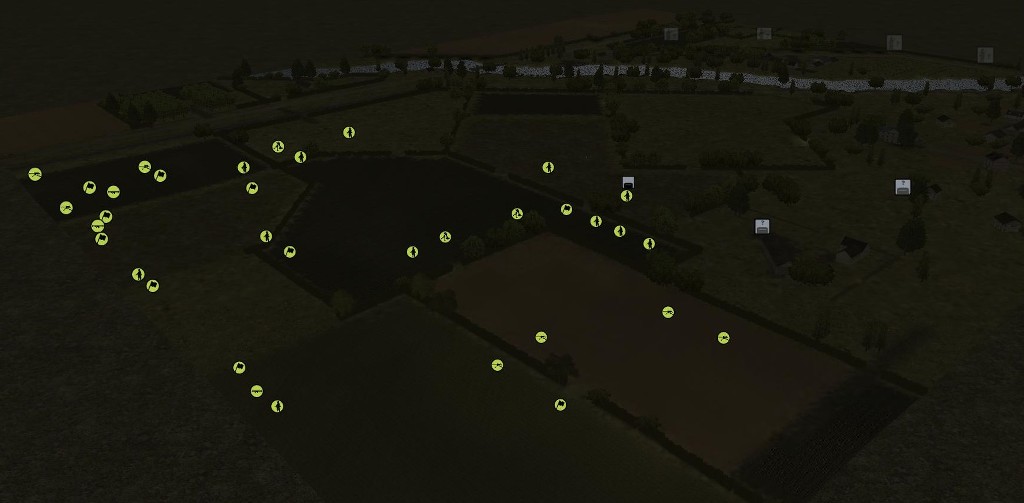
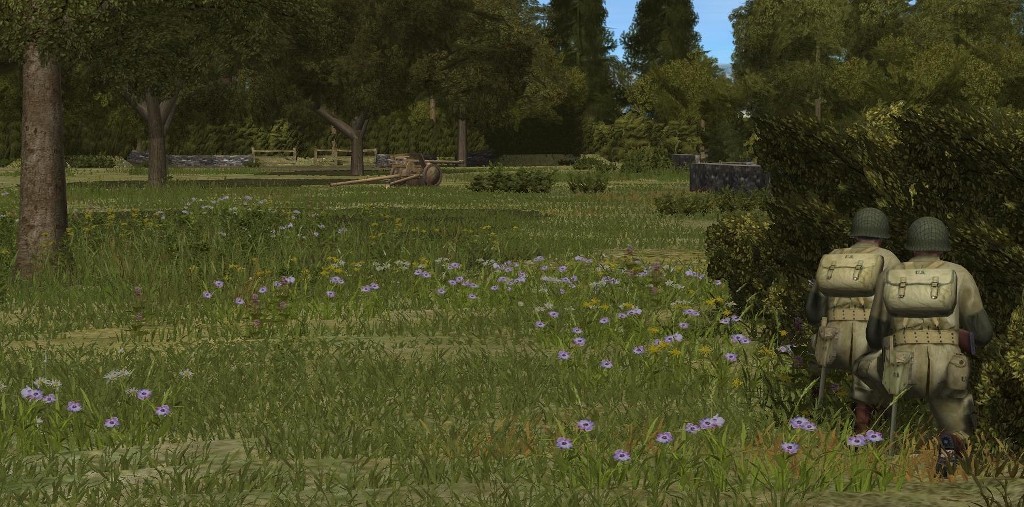
I kick off from HAT with 3 objectives, and the plan is simple. 3rd Platoon will take the green path, flank the right and take objective **, 1st Platoon will follow the blue path and secure objective *, with 3rd Platoon taking objective ***. I have 75ml howitzers in support which I plan to use before I assault objectives * and ***.

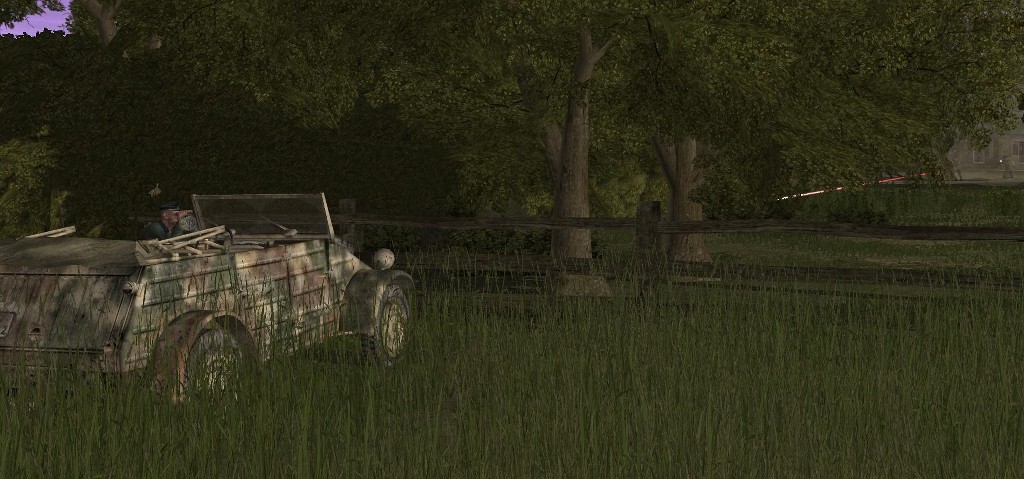
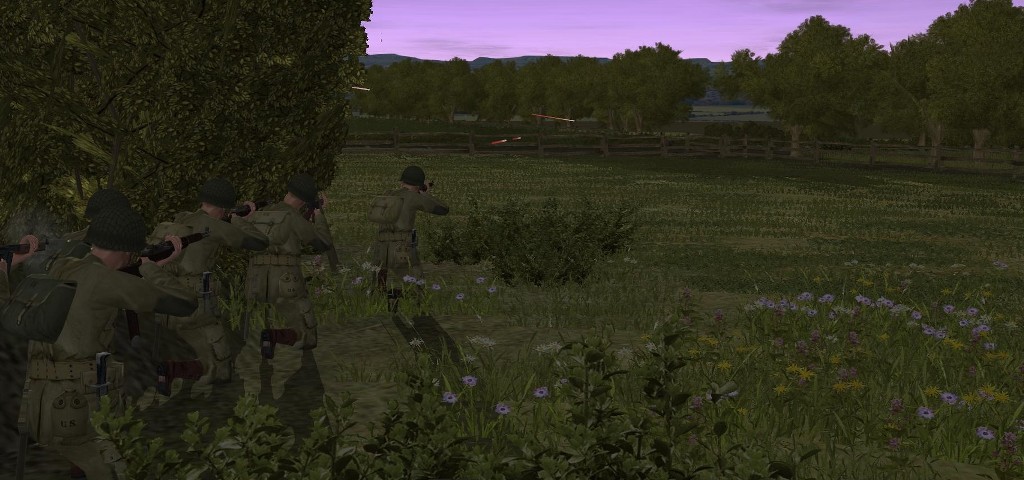
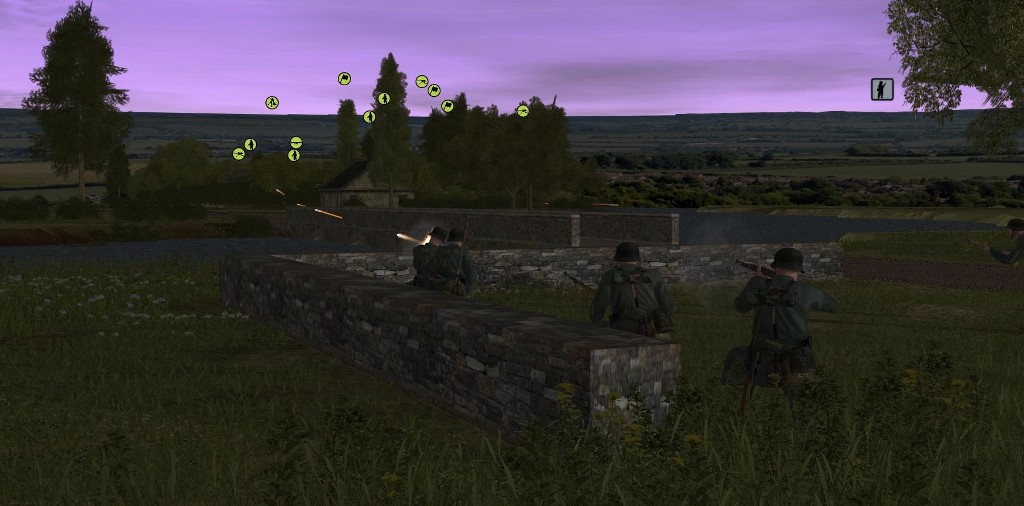
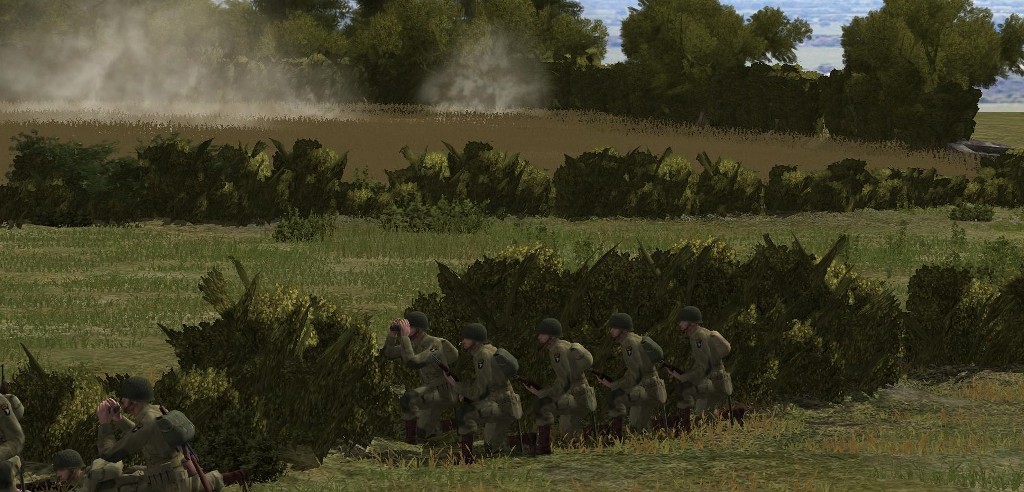
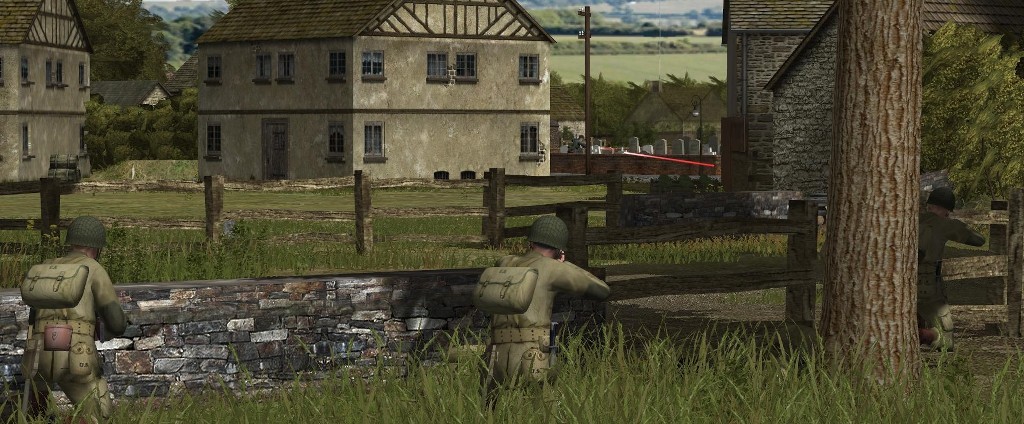
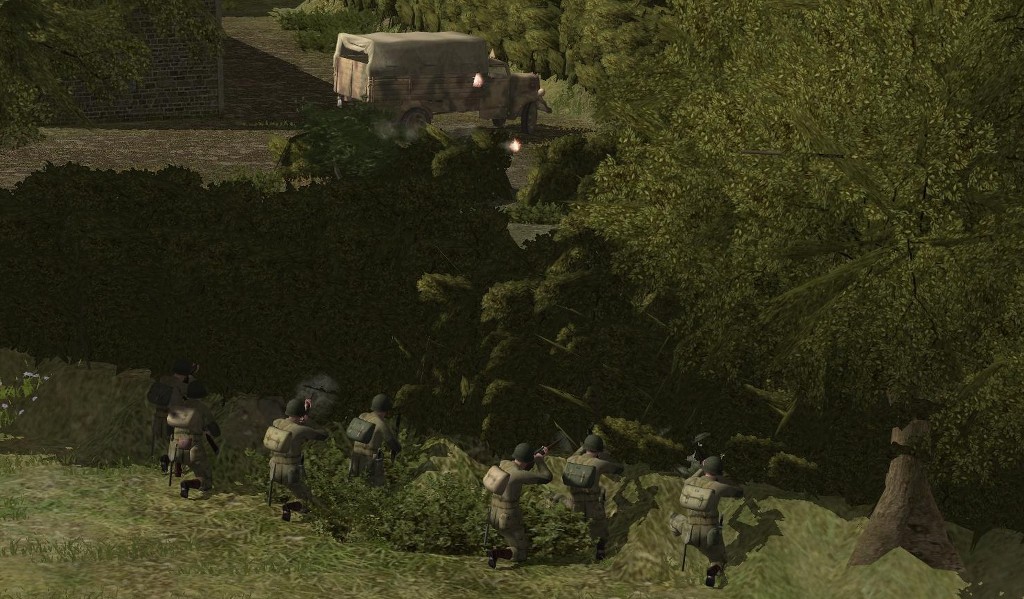
3rd Platoon immediately start moving forward on the right flank. Lieutenant Peterson is in command, he's keen and wants to get at the Georgians.
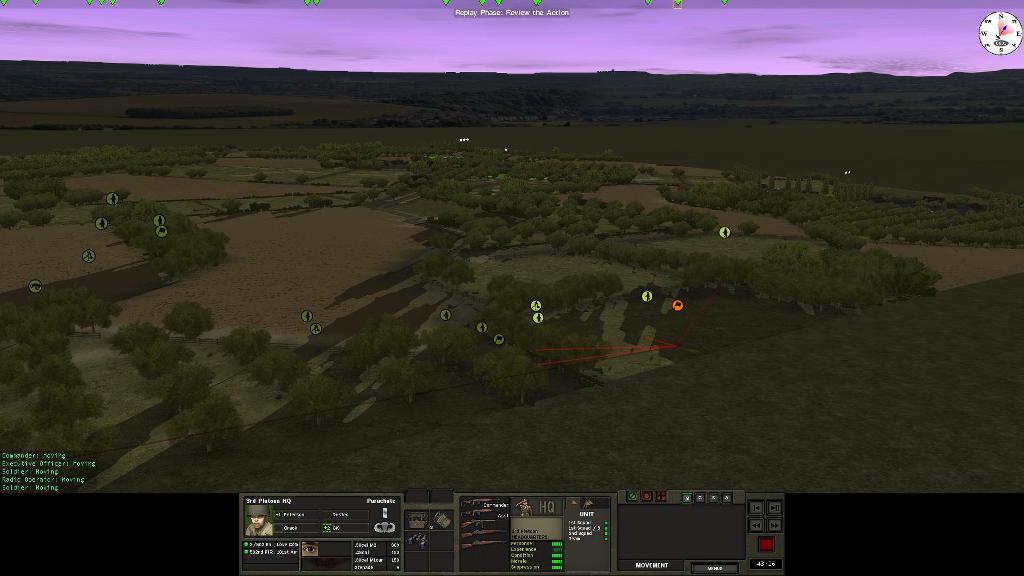
I bound the squads forward, covering each other. They're holding fire, I want to get as close as possible before I open up.
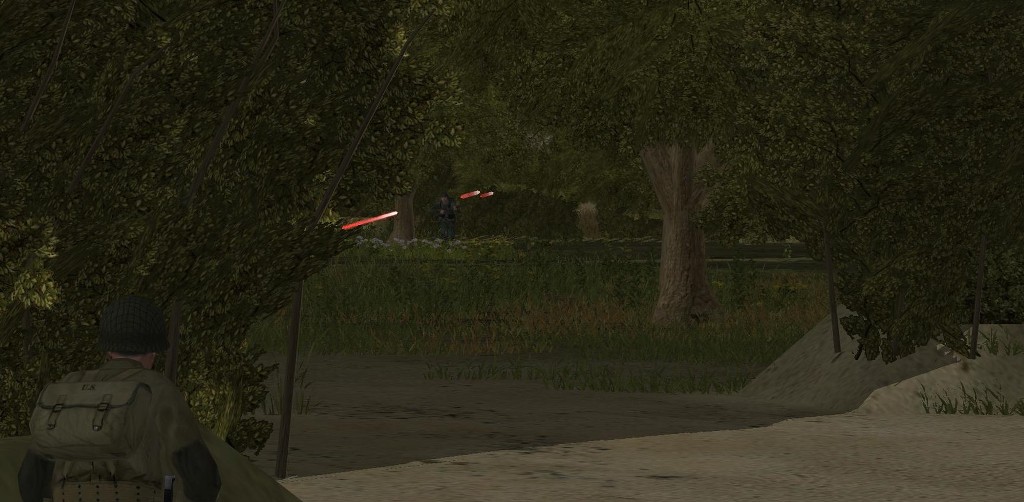
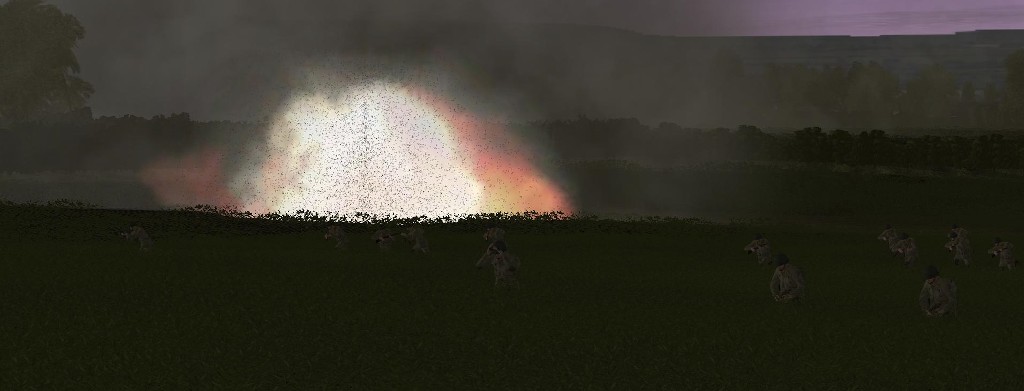
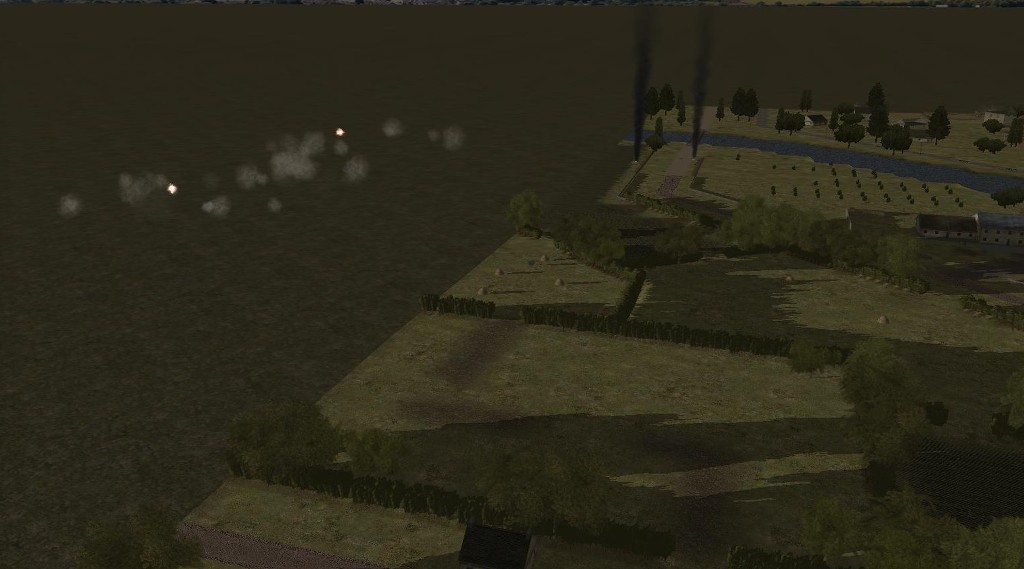
Btn calls in the first arty strike, along the red line. It'll take about 10 minutes to come in, by that time I plan for 3rd and 1st Platoons to be attacking.
1st Platoon at overwatch B, they get the first sighting as 3rd Platoon advance to flank objective **
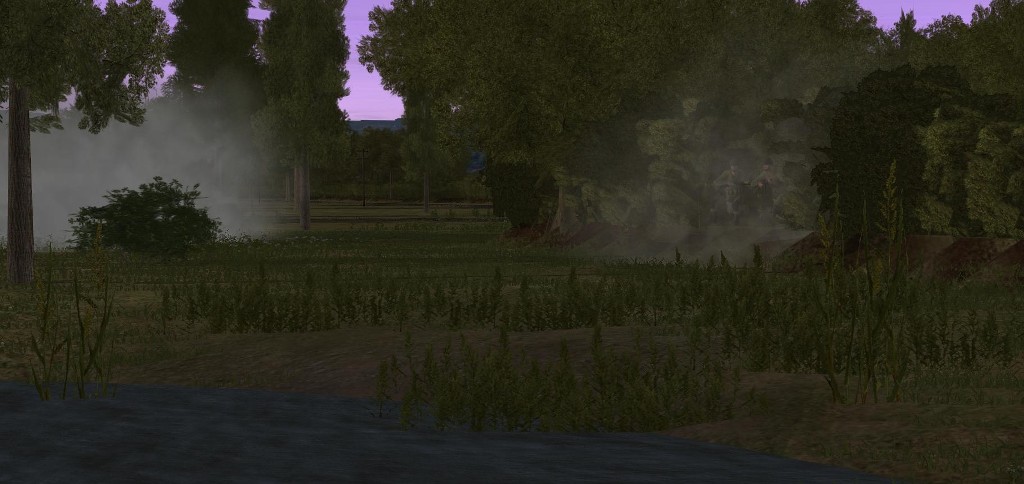
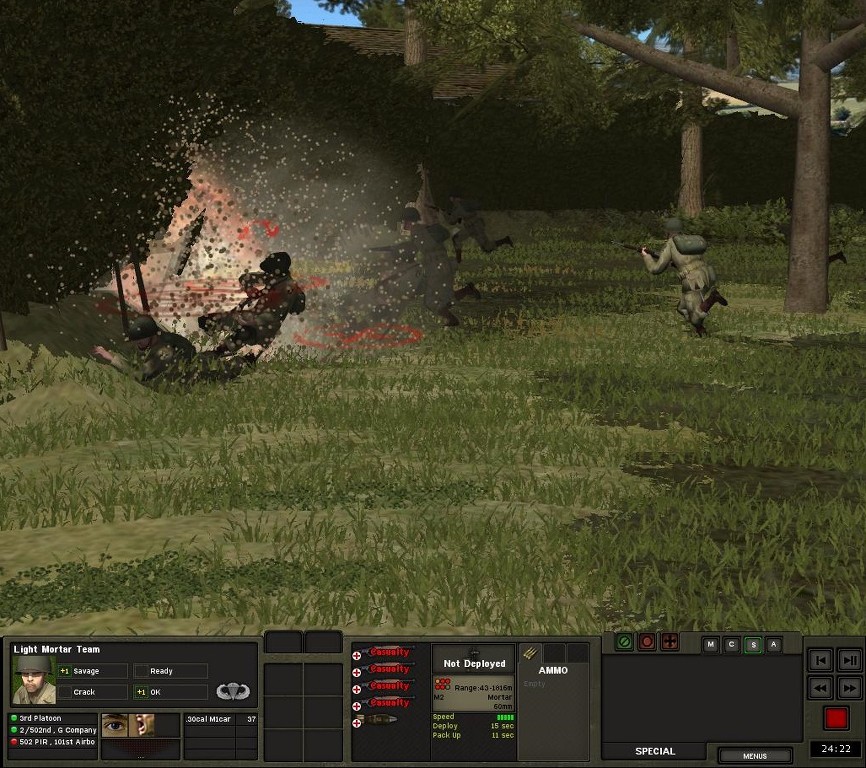
And without any delay, the mortar team lay some 60mm rounds onto the targets location. The first rounds land and the battle has started. 1st Platoon continue to push forward, I want them to reach the south west side of the compound as quickly as possible to prevent delaying the rest of the advance.
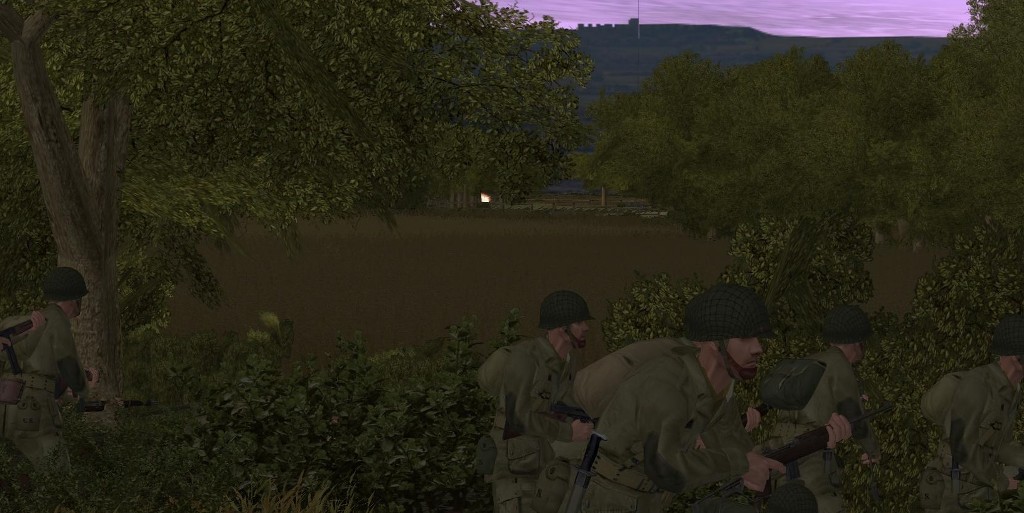
(1st Platoon advance by laying down suppression fire)
The 502nd are at almost 100% strength; 133 crack, well motivated troopers ready to fight. The Georgian 795th are at 100%, 127 men, but poorly trained conscripts with poor mediocre leadership.
I kick off from HAT with 3 objectives, and the plan is simple. 3rd Platoon will take the green path, flank the right and take objective **, 1st Platoon will follow the blue path and secure objective *, with 3rd Platoon taking objective ***. I have 75ml howitzers in support which I plan to use before I assault objectives * and ***.
3rd Platoon immediately start moving forward on the right flank. Lieutenant Peterson is in command, he's keen and wants to get at the Georgians.
I bound the squads forward, covering each other. They're holding fire, I want to get as close as possible before I open up.
Btn calls in the first arty strike, along the red line. It'll take about 10 minutes to come in, by that time I plan for 3rd and 1st Platoons to be attacking.
1st Platoon at overwatch B, they get the first sighting as 3rd Platoon advance to flank objective **
And without any delay, the mortar team lay some 60mm rounds onto the targets location. The first rounds land and the battle has started. 1st Platoon continue to push forward, I want them to reach the south west side of the compound as quickly as possible to prevent delaying the rest of the advance.
(1st Platoon advance by laying down suppression fire)
Last edited:


CM really needs a strategic/operational overlay. 
AAR continued
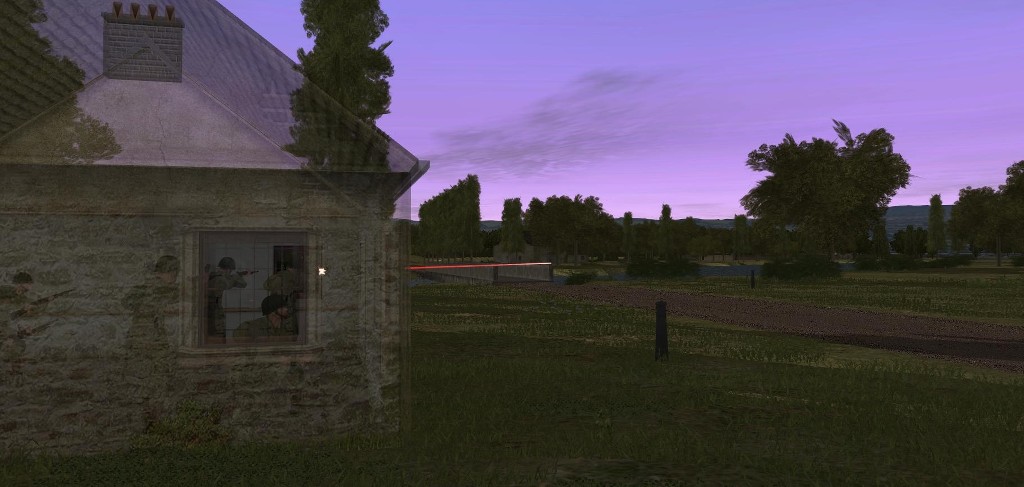
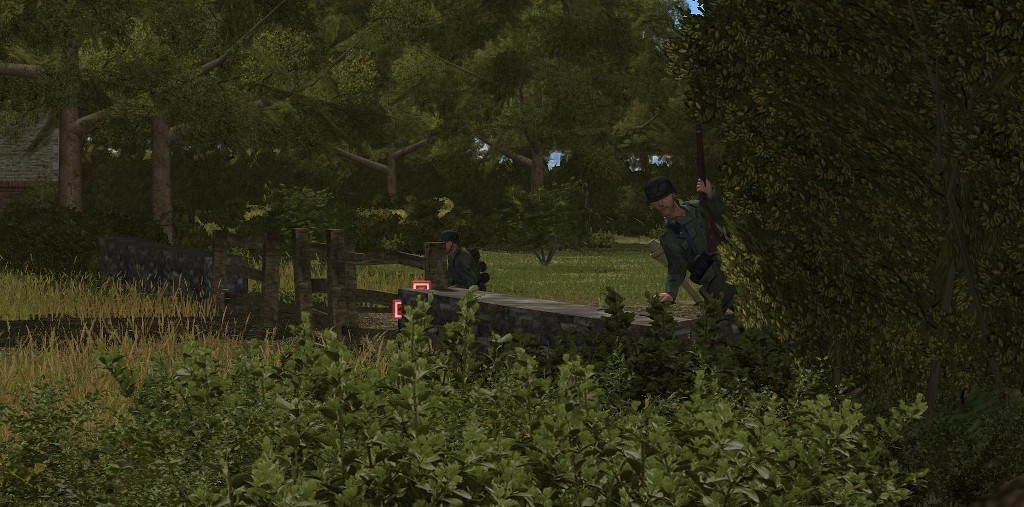
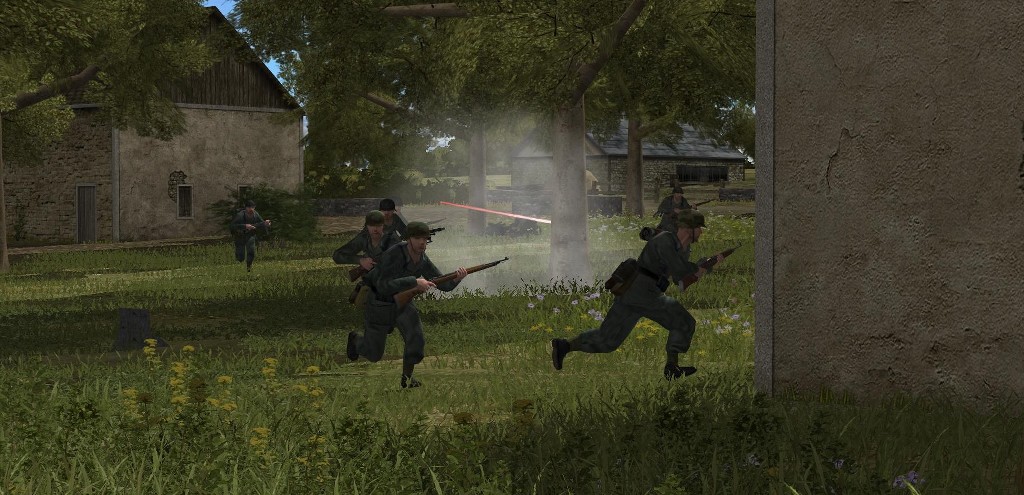
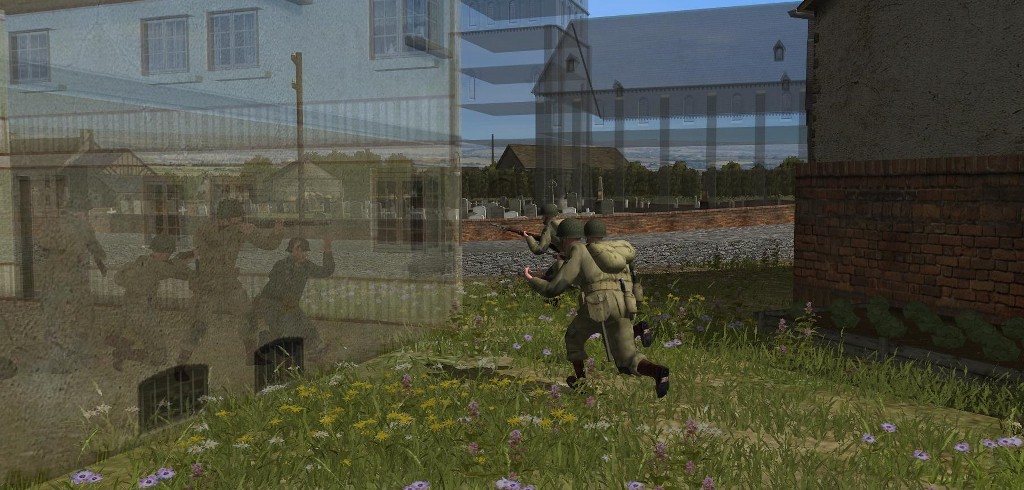
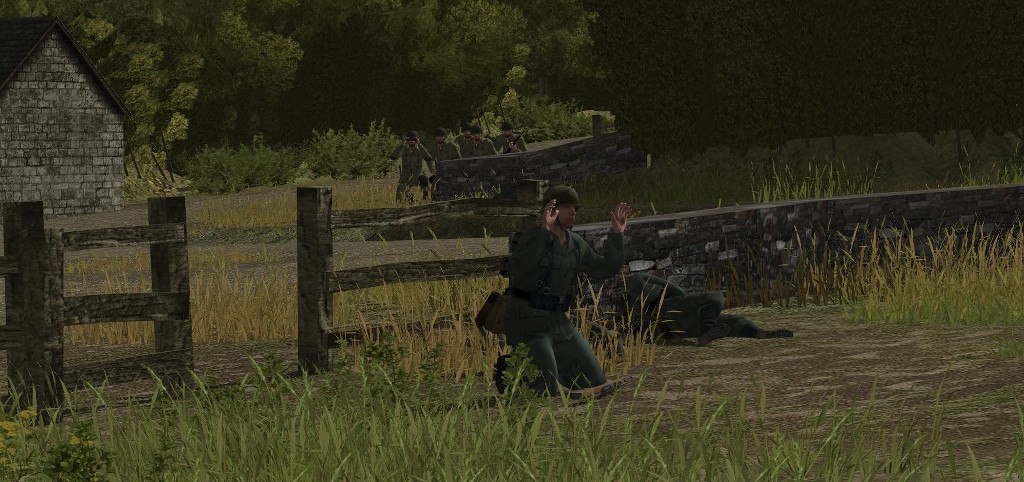
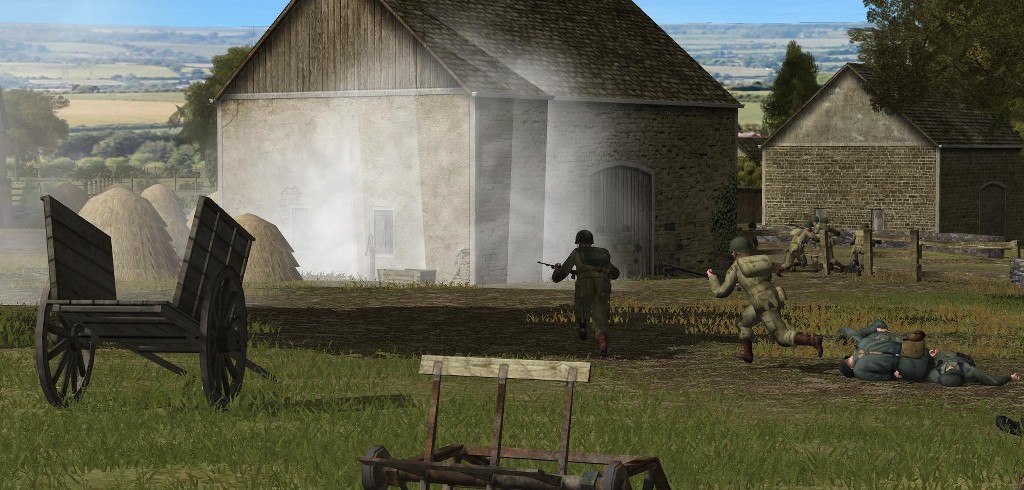
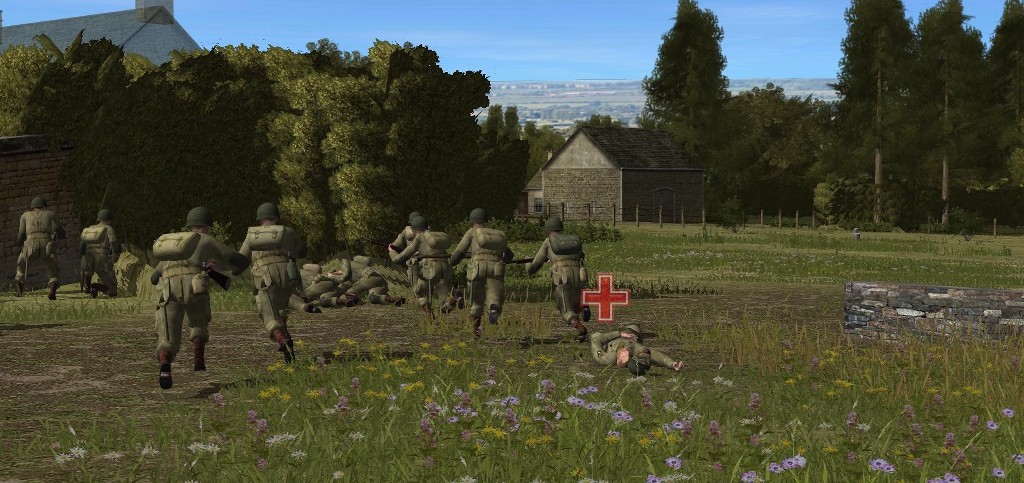
I'd only seen one minor contact with the 795th as 3rd Platoon breached into the compound at objective **. I ordered two teams to breach, blasting through the walls into the buildings that fronted into the compound. Both sets of charges blew at the same time and the teams rushed in. I expected them to be met with a hail of bullets, but nothing. They swept into the compound and I started to think that I'd set something up wrong with the battle.
As the lead fire-team from 1st Squad came out the far side of the courtyard they got eyes on a staff car. Catching the Germans as equally surprised as the Para's, 1st Platoon opened fire
(not sure how the Germans didn't hear the charges)
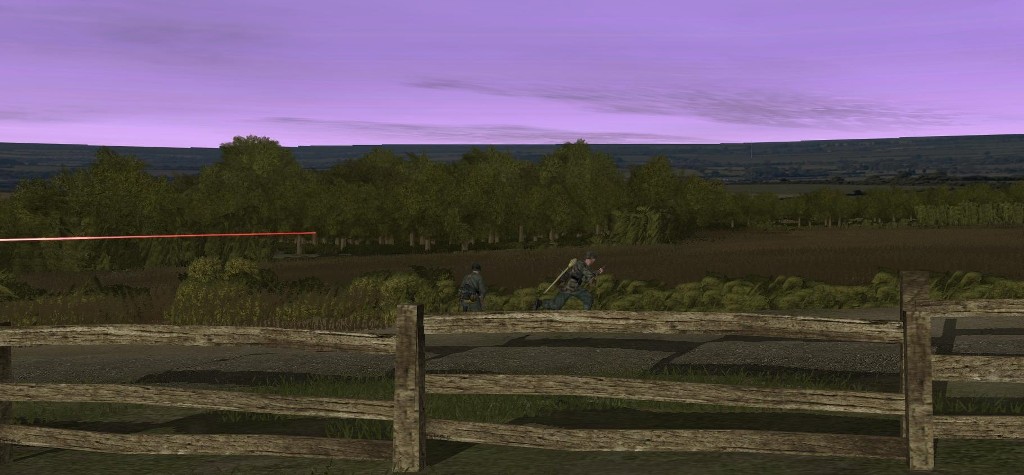
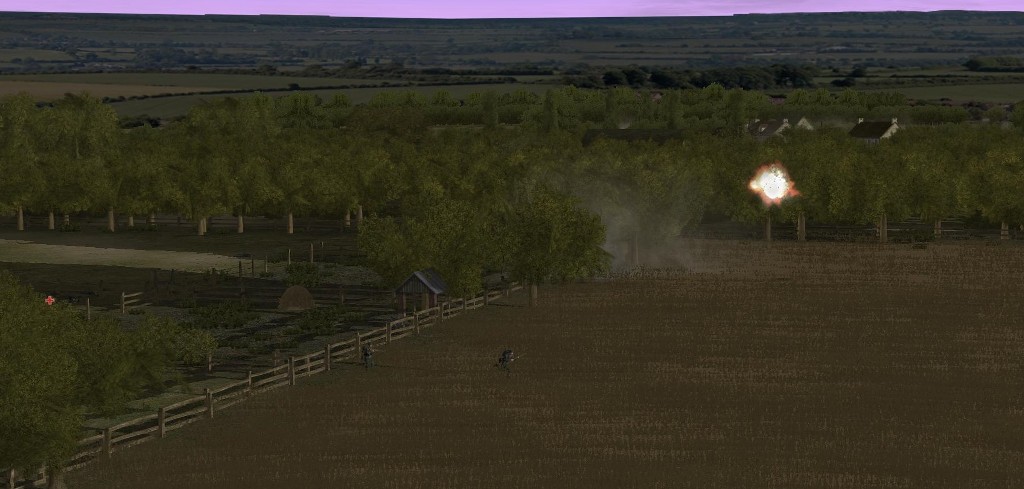
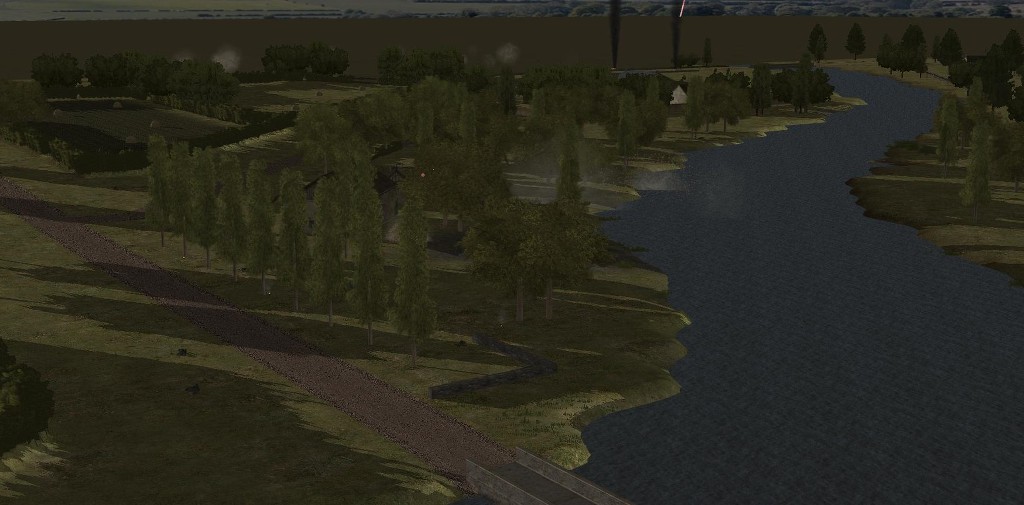
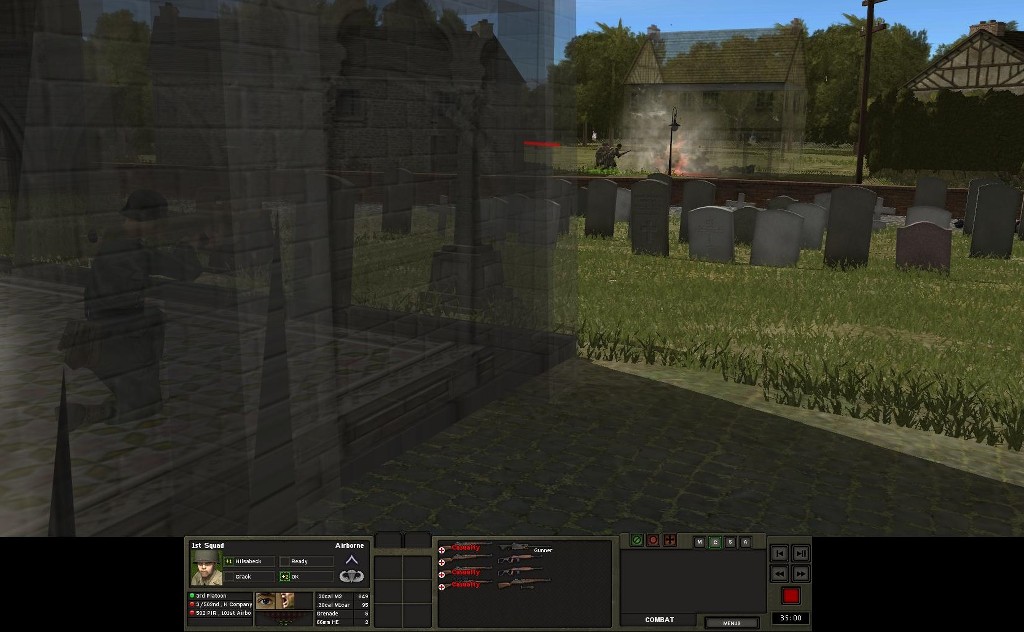
Just as 1st Platoon got their first confirmed kill, i didn't realise until later that it was the Georgian Coy Com, the first rounds from the 337th Artillery started to land on the left flank. I still haven't seen contacts on that flank, it was too quiet.
As the barrage on the left flank thundered in, I saw contacts on the road behind the objective **, they were heading towards the centre objective *. 502 3rd and 1st Platoons started to fire off a few shots, mostly rifles at range, then quickly the situation escalated. It appeared that the main force was behind the objectives, with a sizable force inside the small wood copse.
(1st Platoon take a few pot shots)
Contacts quickly appeared. The 795th seemed to react to first contact with G Coy rather than lie in wait for me to attack. They advanced directly, with little fire support and they made little effort to suppress.
(and suddenly there they were)
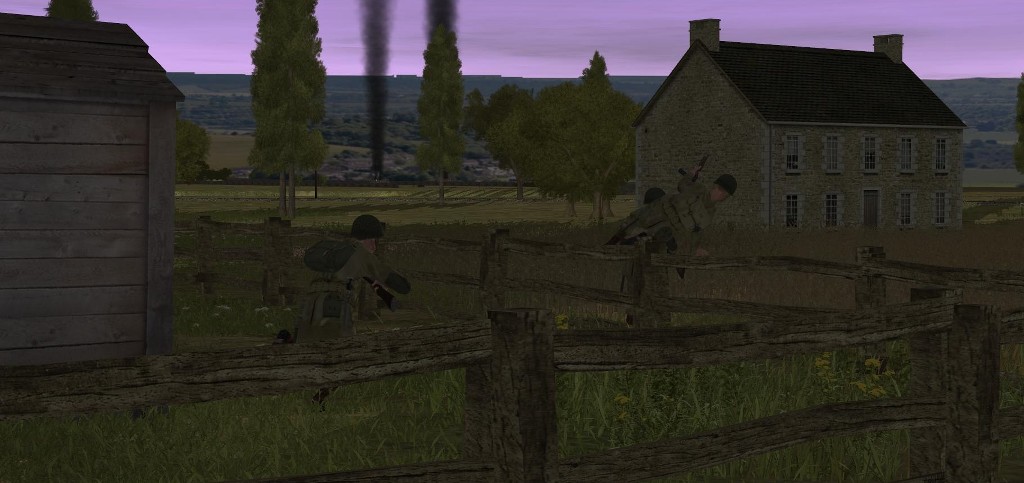
I'd broken down the various squads from 1st and 3rd Platoons and distributed them in positions with reasonable concealment, and good fire arcs that complimented each other before assaulting our first objective. This had put both platoons in good positions to hold their ground under the attack.
(A squad from 3rd Platoon fire from outside of the courtyard)
(3rd Platoon Commander takes position in a second story window to fire to the grassland behind the courtyard of objective *)
I'd only seen one minor contact with the 795th as 3rd Platoon breached into the compound at objective **. I ordered two teams to breach, blasting through the walls into the buildings that fronted into the compound. Both sets of charges blew at the same time and the teams rushed in. I expected them to be met with a hail of bullets, but nothing. They swept into the compound and I started to think that I'd set something up wrong with the battle.
As the lead fire-team from 1st Squad came out the far side of the courtyard they got eyes on a staff car. Catching the Germans as equally surprised as the Para's, 1st Platoon opened fire
(not sure how the Germans didn't hear the charges)
Just as 1st Platoon got their first confirmed kill, i didn't realise until later that it was the Georgian Coy Com, the first rounds from the 337th Artillery started to land on the left flank. I still haven't seen contacts on that flank, it was too quiet.
As the barrage on the left flank thundered in, I saw contacts on the road behind the objective **, they were heading towards the centre objective *. 502 3rd and 1st Platoons started to fire off a few shots, mostly rifles at range, then quickly the situation escalated. It appeared that the main force was behind the objectives, with a sizable force inside the small wood copse.
(1st Platoon take a few pot shots)
Contacts quickly appeared. The 795th seemed to react to first contact with G Coy rather than lie in wait for me to attack. They advanced directly, with little fire support and they made little effort to suppress.
(and suddenly there they were)
I'd broken down the various squads from 1st and 3rd Platoons and distributed them in positions with reasonable concealment, and good fire arcs that complimented each other before assaulting our first objective. This had put both platoons in good positions to hold their ground under the attack.
(A squad from 3rd Platoon fire from outside of the courtyard)
(3rd Platoon Commander takes position in a second story window to fire to the grassland behind the courtyard of objective *)


AAR Continued
With 3rd and 1st Platoon engaged on the right flank to take objectives * & **, when the barrage halted, 2nd Platoon moved forward on the left. There still was no contact, but with heavy fighting for the other objectives I expected to find more Georgian troops.
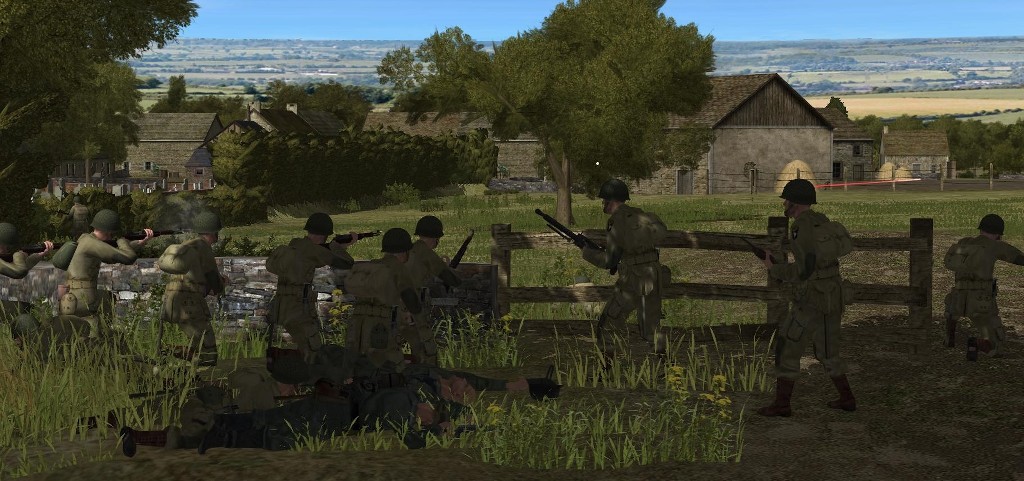
There was no let up on the firefight on the right flank., more forces from the 795th pushed forward. The Para's of the 502 second held their ground, with the split squads there was always someone to put done fire and target advancing enemy.
(3rd & 1st Platoon poor on the fire on the south eastern side of the court yard)
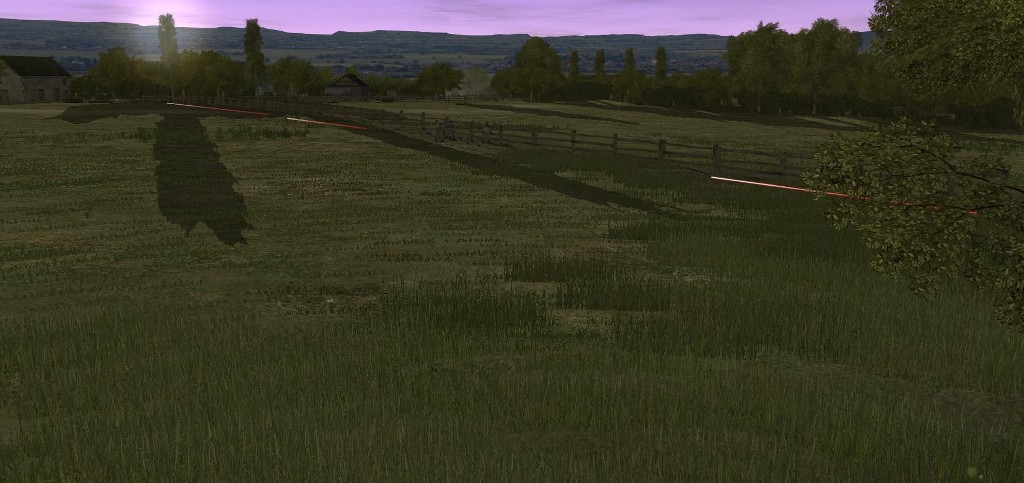
With the continued cross fire from 3rd and 1st Platoon, the 795th started to fallback. It wasn't exactly as planned, but the F Coy Commander had called in a second arty strike from the 337th and the retreating 795th fell back straight onto the falling artillery
(Georgian conscripts retreat onto air-burst artillery rounds)
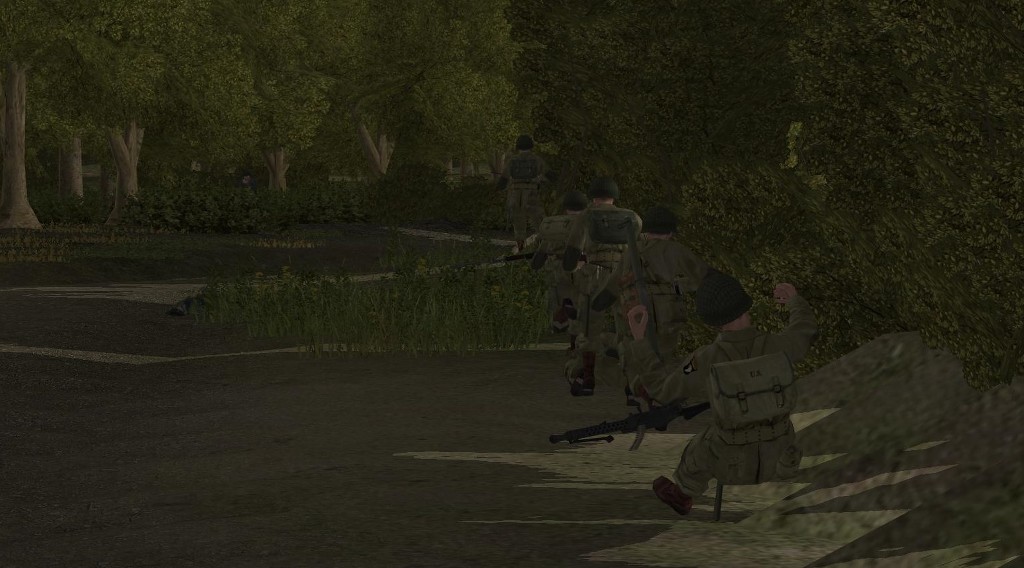
On the left flank, 2nd Platoon's advance had gone almost unnoticed. I'd had them moving forward at a good pace. With buildings ahead, they crossed open spaces using suppression fire and bounding. The attempt was not to leave anyone open to return fire, even if there wasn't any.
(elements of 2nd Platoon advance)
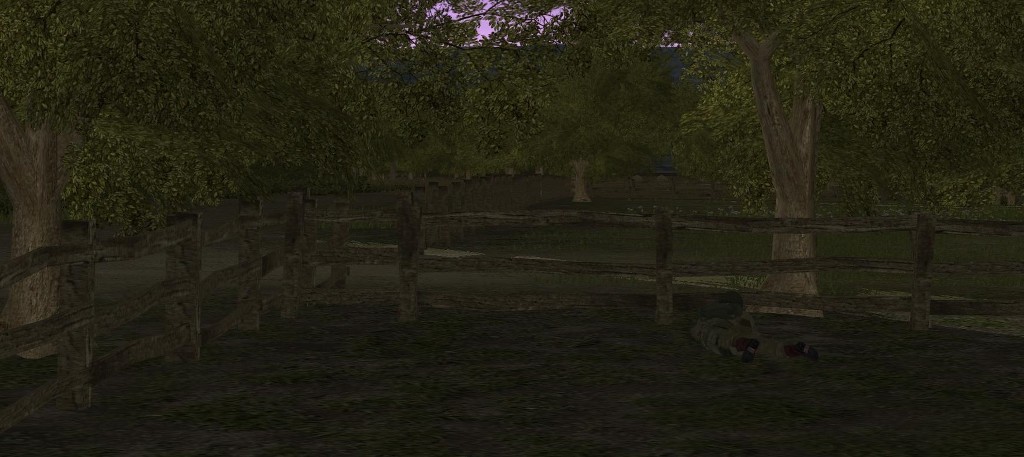
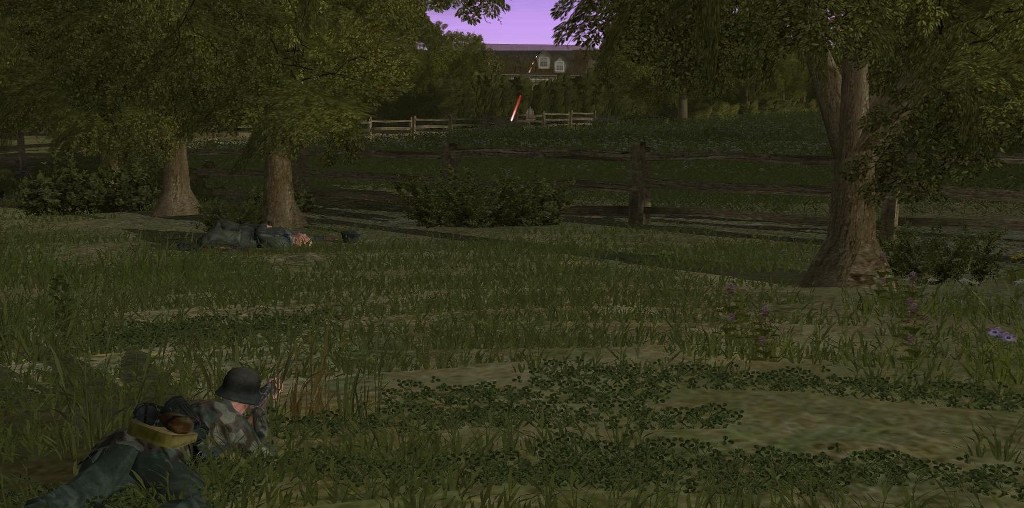
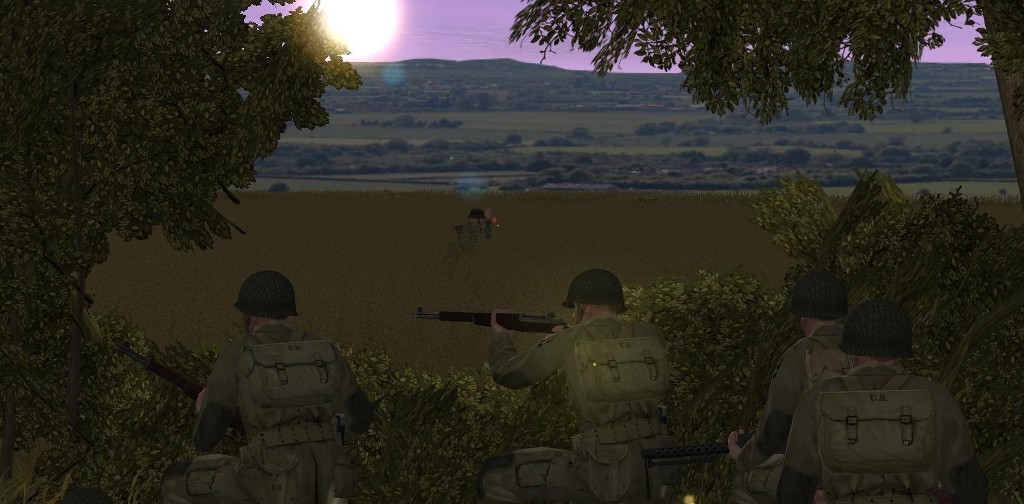
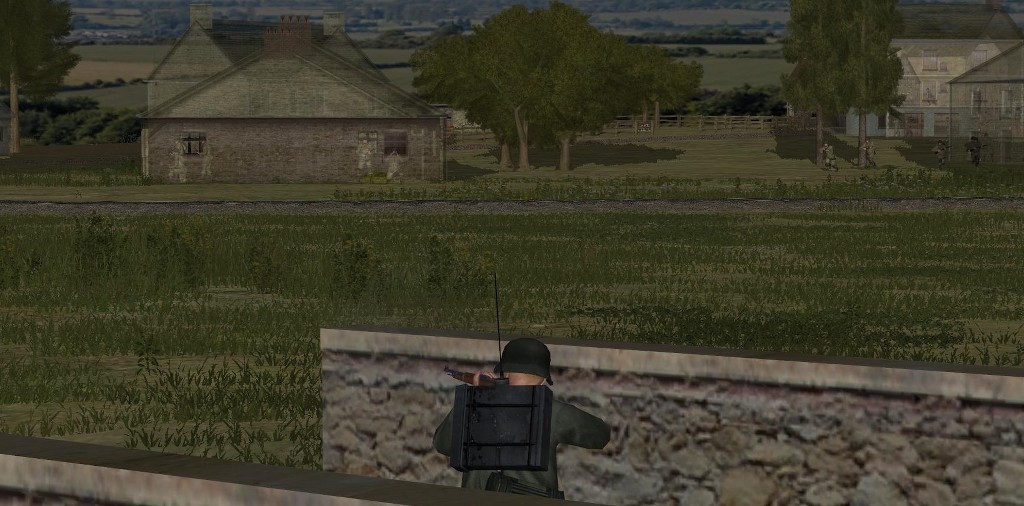
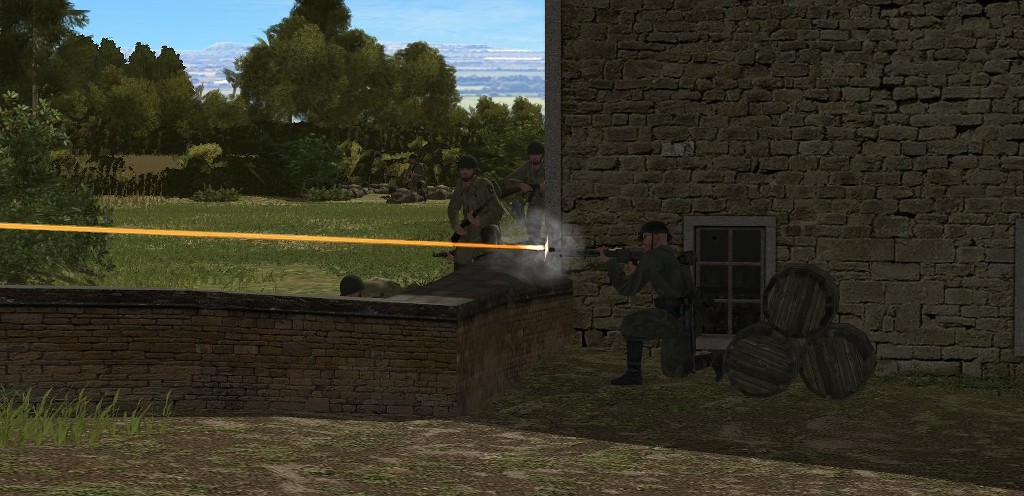
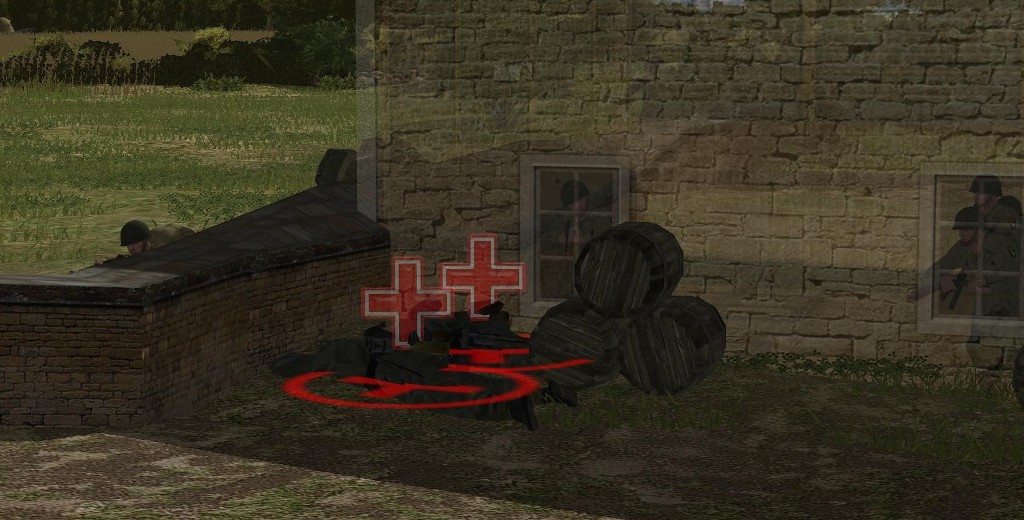
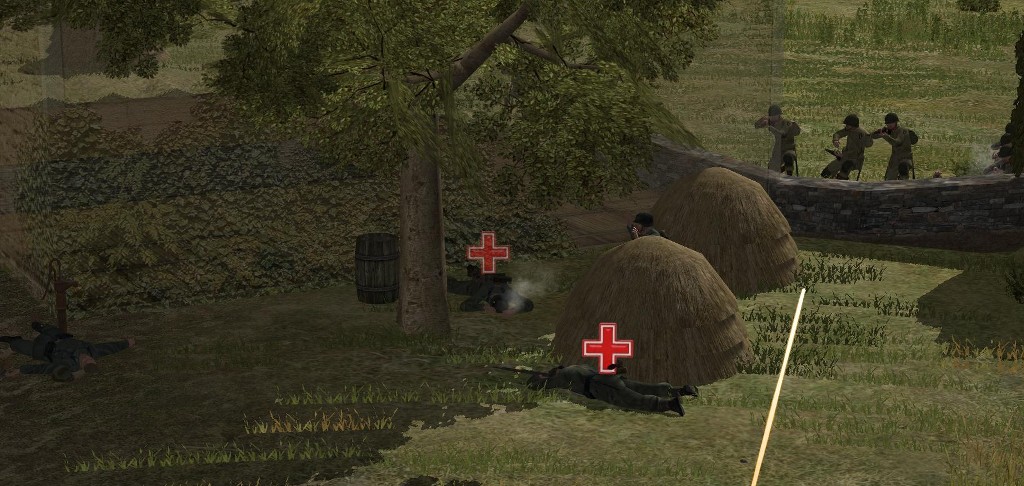
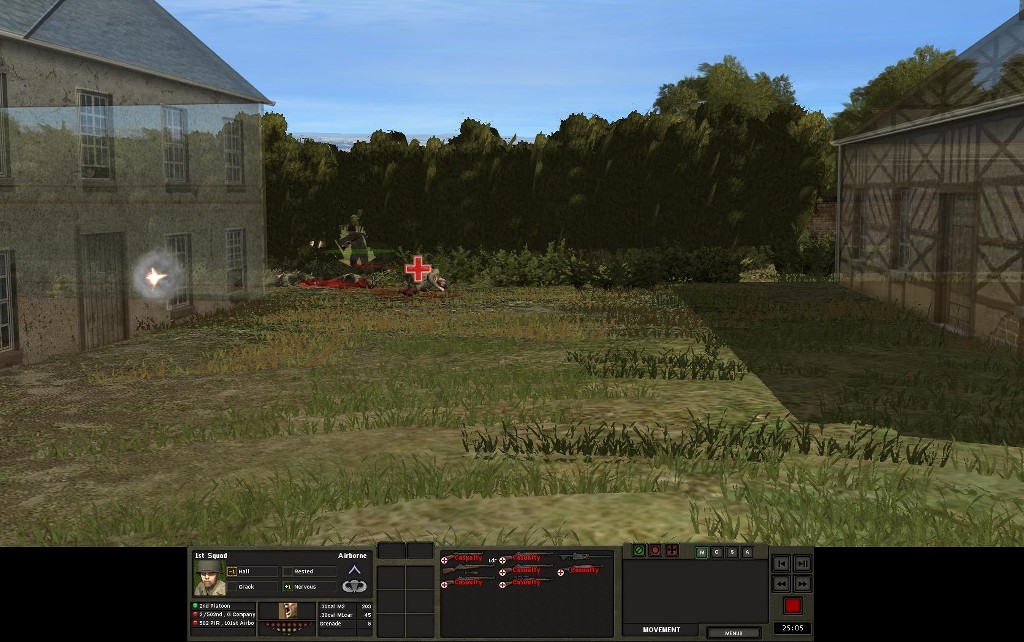
It wasn't all going the 502nd's way. As 1st Platoon advanced towards objective *, a hidden Jerry opens up. Pvt Peters took a hit, not killed outright, but he was WIA.
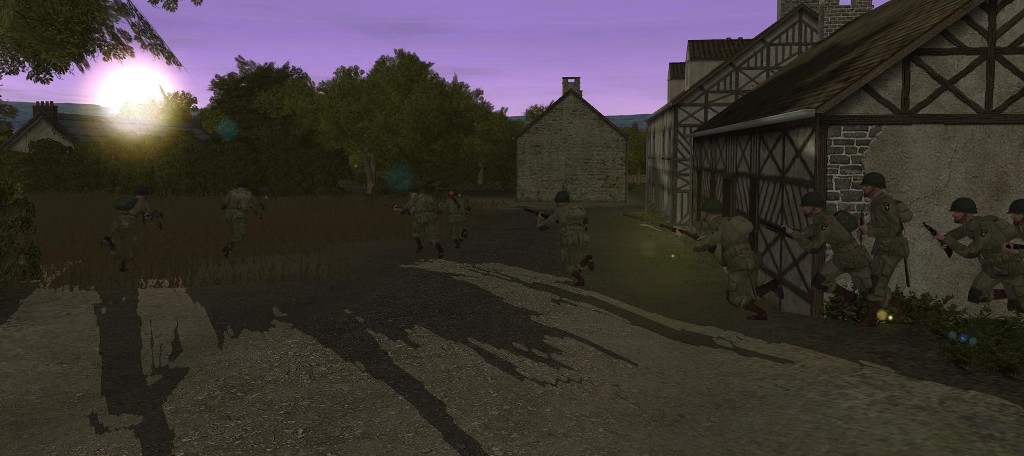
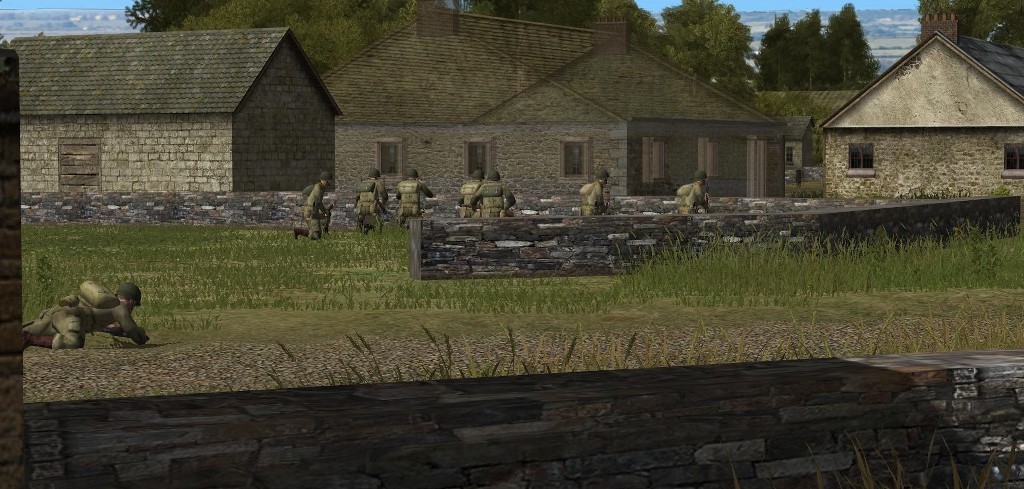
Once 2nd Platoon reached the small group of houses in front of the objective, had them move from corner to corner. I was trying to use the new peek logic, not sure I saw a great deal of peeking, but the Platoon push on through. 502 Btn. Command with the support HQ also followed. I had everyone active on the battlefield
(Clearing houses and pushing down the street)
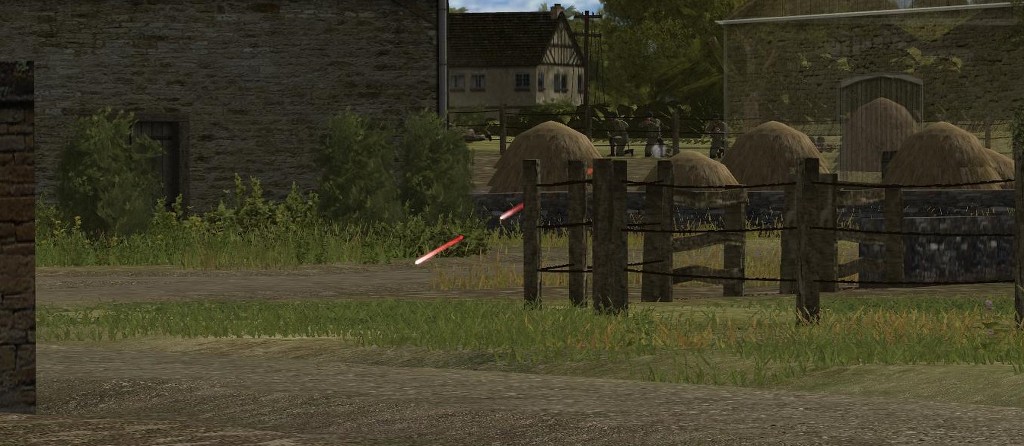
3rd Platoon had objective ** secure, whilst 1st Platoon was cleaning up any resistance in the small wooded copse at objective *. Both artillery barrages were finished, I still had around 150 rounds left but decided there wasn't time, or the need, to call them in.
(A burst of 45cal across the woods)
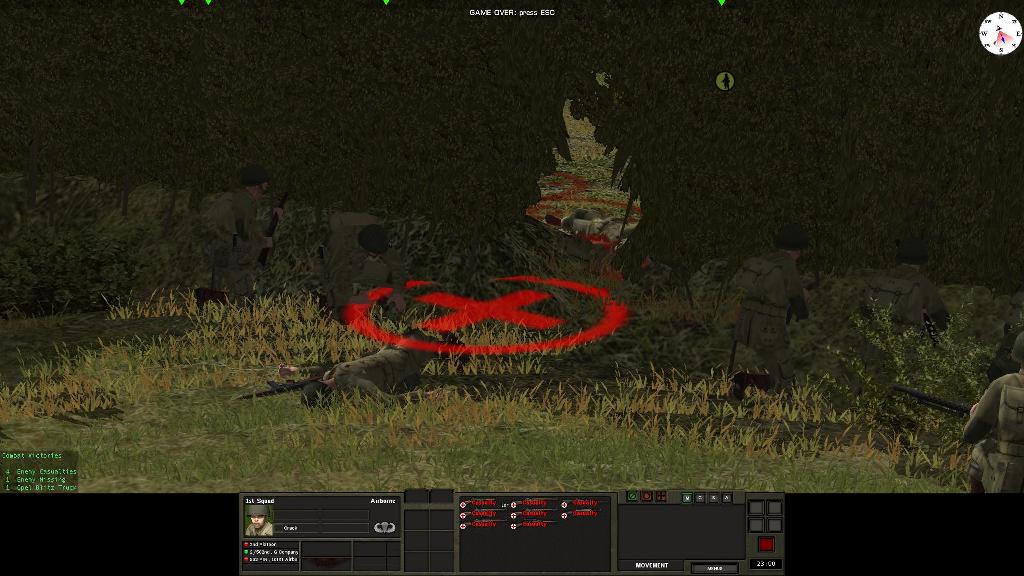
With all 3 objectives secured and the 795th Georgian's on the run the battle was obviously falling to the 502nd. The first CMBN battle of the PzC Campaign had gone well.
(a Georgian conscript surrenders to F Company, 502nd.)
With 3rd and 1st Platoon engaged on the right flank to take objectives * & **, when the barrage halted, 2nd Platoon moved forward on the left. There still was no contact, but with heavy fighting for the other objectives I expected to find more Georgian troops.
There was no let up on the firefight on the right flank., more forces from the 795th pushed forward. The Para's of the 502 second held their ground, with the split squads there was always someone to put done fire and target advancing enemy.
(3rd & 1st Platoon poor on the fire on the south eastern side of the court yard)
With the continued cross fire from 3rd and 1st Platoon, the 795th started to fallback. It wasn't exactly as planned, but the F Coy Commander had called in a second arty strike from the 337th and the retreating 795th fell back straight onto the falling artillery
(Georgian conscripts retreat onto air-burst artillery rounds)
On the left flank, 2nd Platoon's advance had gone almost unnoticed. I'd had them moving forward at a good pace. With buildings ahead, they crossed open spaces using suppression fire and bounding. The attempt was not to leave anyone open to return fire, even if there wasn't any.
(elements of 2nd Platoon advance)
It wasn't all going the 502nd's way. As 1st Platoon advanced towards objective *, a hidden Jerry opens up. Pvt Peters took a hit, not killed outright, but he was WIA.
Once 2nd Platoon reached the small group of houses in front of the objective, had them move from corner to corner. I was trying to use the new peek logic, not sure I saw a great deal of peeking, but the Platoon push on through. 502 Btn. Command with the support HQ also followed. I had everyone active on the battlefield
(Clearing houses and pushing down the street)
3rd Platoon had objective ** secure, whilst 1st Platoon was cleaning up any resistance in the small wooded copse at objective *. Both artillery barrages were finished, I still had around 150 rounds left but decided there wasn't time, or the need, to call them in.
(A burst of 45cal across the woods)
With all 3 objectives secured and the 795th Georgian's on the run the battle was obviously falling to the 502nd. The first CMBN battle of the PzC Campaign had gone well.
(a Georgian conscript surrenders to F Company, 502nd.)
Reminds me a bit of the 'Biltong's Campaign Rules' back from the CMx1 days. Designed for single player battles in CMBB, the idea was you'd take a German formation (company size) as a core unit and take it through a series of eastern front battles based on dice roles and charts that changed as time progressed from June 1941 onwards.
From my hazy memory from 2002(ish) between Uni and other distractions it was a lot of fun and you became attached to your officers in particular by the time you hit winter and everything grounded to a halt. I think nothing was done to extend it seriously into 1942 and CMAK’s release killed it.
Trying to get a hold of some old copies of the documents may help you DoubleD in some idea generation and record keeping. I’ve been trying to get a hold of a copy of the old excel files in particular to see if they are still workable in a CMx2 game and/or to update them but all the old members involved in its development and links to where they were hosted have long since moved on / disappeared.
If anyone still has a copy lying around it could help.
With the first battle finished, I moved on to the second. Another quick battle map, I set this up straight from the box.
The scenario has G Company from the 2/502 and Heavy Weapons from the 2/501st attacking a Company from the Grenadier Regt. 919th. Based upon the definitions from PzC and the rules I've setup to translate that to CM, the US force are crack troops, well motivated and typically led. They were almost a full force, with one squad missing from the infantry company. The Germans are green, with low motivation and typically led. They have off map support from a Werfer gun (280mm) unit off map with 6 guns, this required me to include an FO team. The PzC location was a bunker so I included trenches and bunkers in the Axis QB listing. It didn't quite work out as expected, which will come through in the battle AAR.
Battle first was very successful and relatively easy, I think this was because it was against poorly motivated, conscript troops. I'd never have setup a QB in that manner, but following the PzC campaign and the initial rules I'd setup that's what I got. More on those rules at a later stage.
After my second battle, I'll update the AAR below, I ran the Axis turn. There were no assaults, so no further battles on that turn. For turn 3 I made no assaults and neither did the Axis AI. I consolidated my forces and we traded blows from heavy weapons and arty.
The 4th turn, I intend to make 3 Allied assaults. 1 for St. Mere Eglise, the 2nd against a small force from the 919, and the 3rd to get a beach-head on Utah beach. I'll post those AAR's over time.
The second battle AAR has G Coy 2/502 PIR and Heavy Weapons 2/501 PIR attacking the 1s/I/GR. 919, from the 709th Inf. Div.. They're dug into a bunker complex and have support from a Werfer Company with 6 guns.
My force consists of a Company of US Airborne troops, at around 80% strength, and a HW Company, also US Airborne. In the PzC OOB the HW Company has 172 men, I've only got around 40 in the CM HW Company. It includes 8 MMG teams and 2 81mm mortar teams, off map, and various leadership teams. PzC has my force at 304 men, in CM I've translated this to 170.
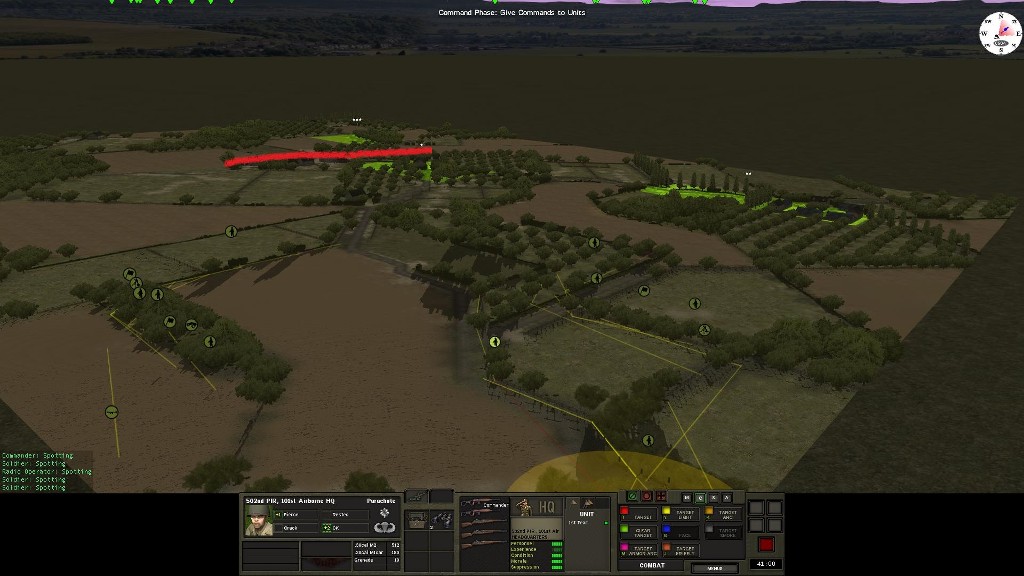
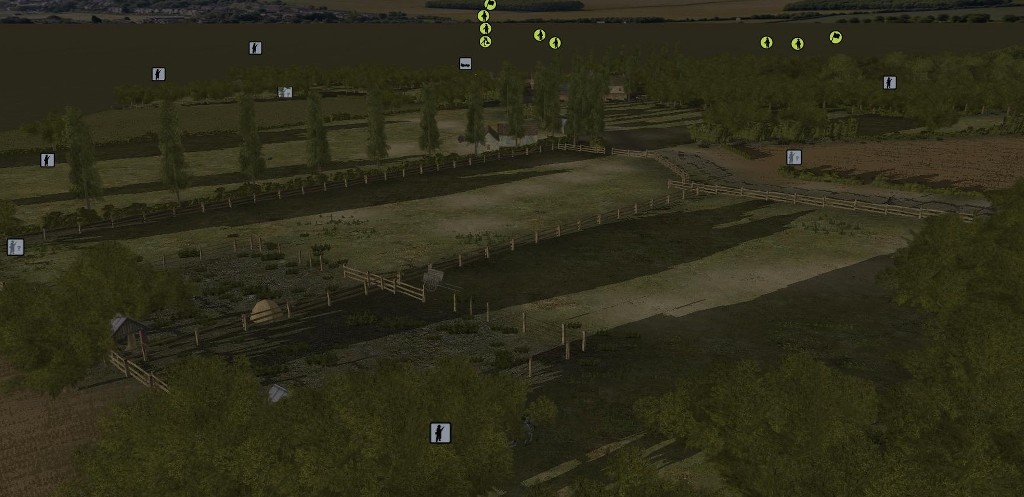
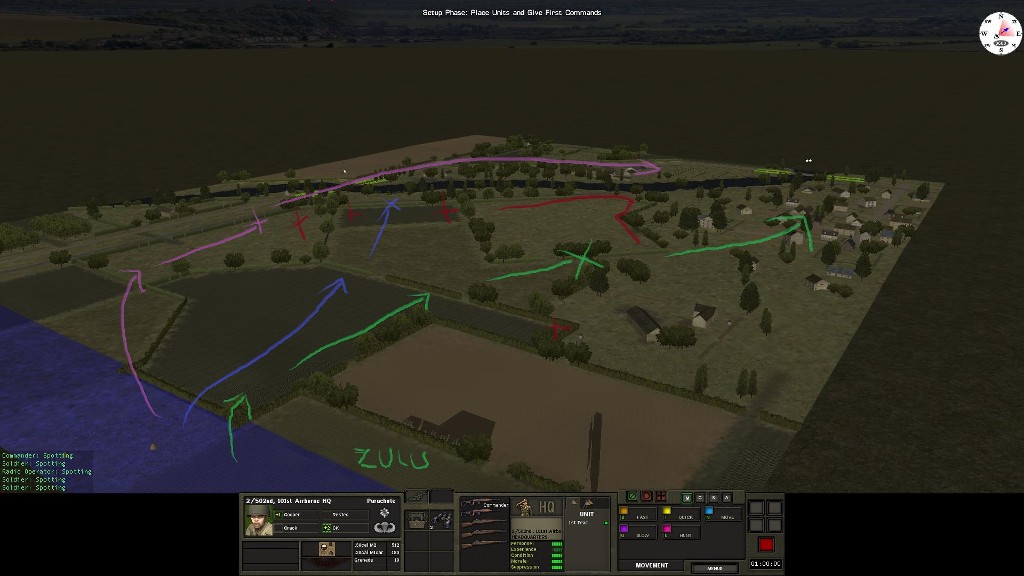
I'm attacking into the North East, with two small bridges as my objectives, * & **. My kick off point is Zulu, and my plan is to push 1st Platoon along the green advance line, setting up an over-watch position at the X point behind brocage, 2nd Platoon along the blue line, again over-watch at the X point. 3rd Platoon will do most of the advancing along the purple line, securing the NW bridge and sweeping along the rear of the German defense. The HW support will be setup along the red lines and X points.
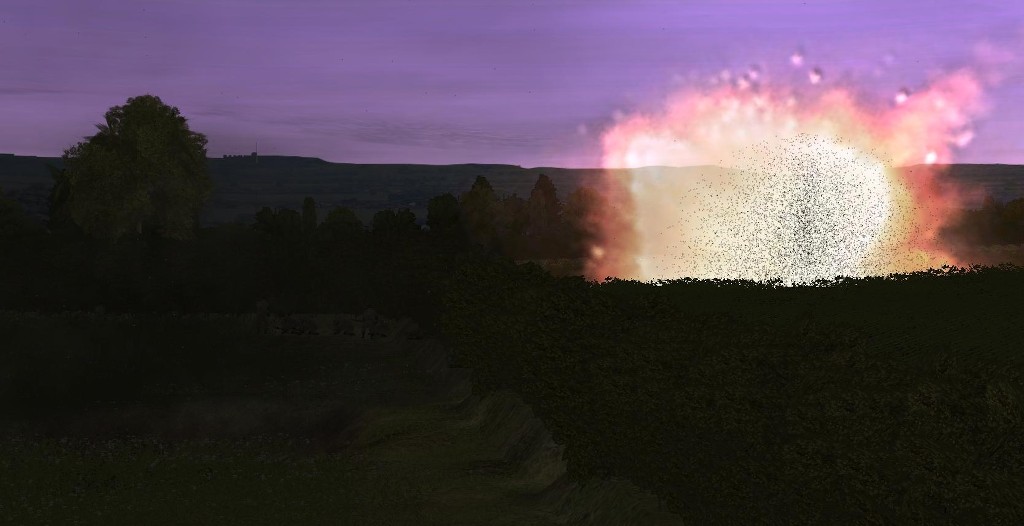
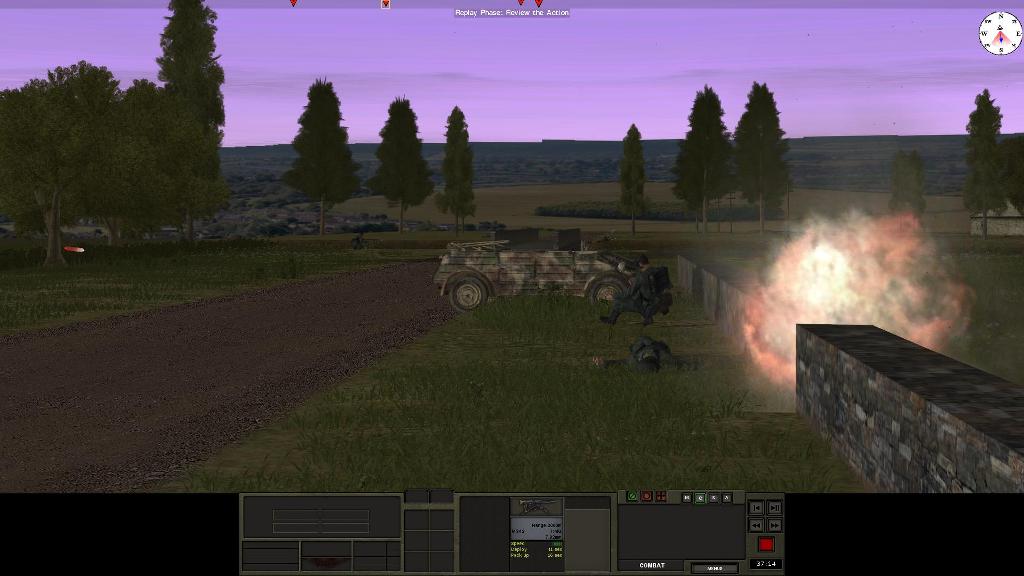
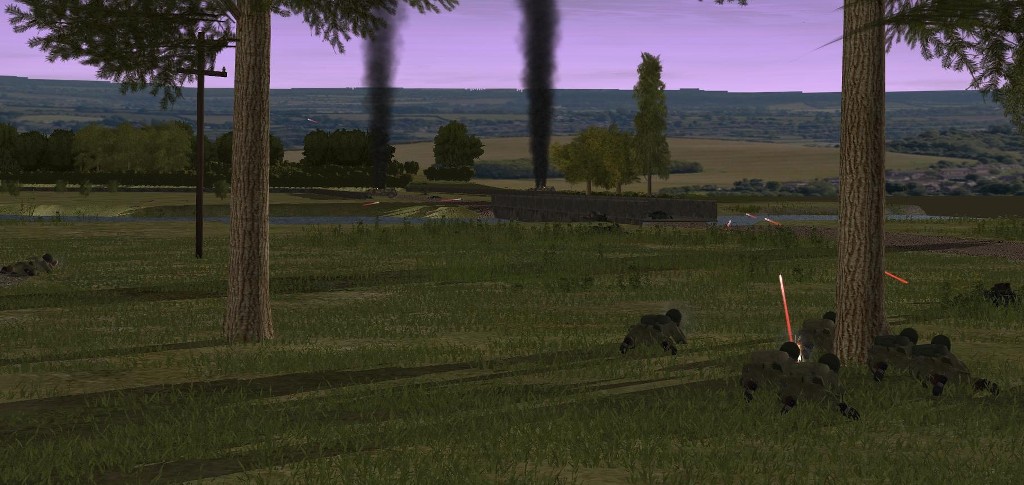
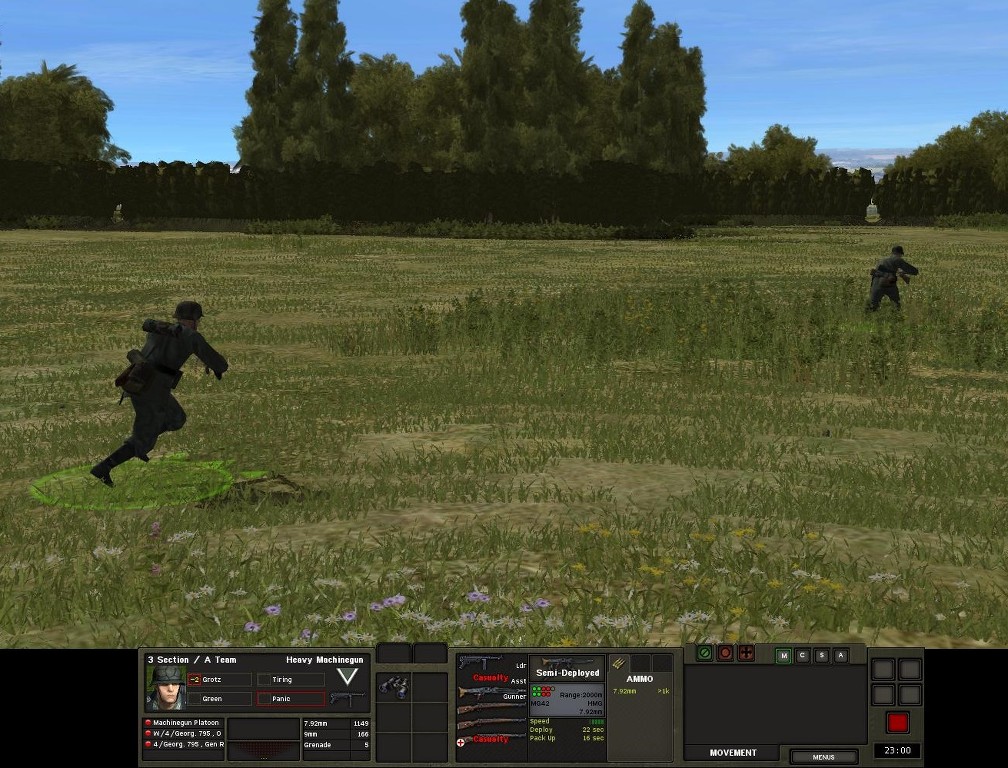
I setup my forces at Zulu, sending out scouts along the initial advance lines..... and then there is a high pitched whine followed by a very loud WHOMP. I like to wear over ear headphones with a fairly high volume when I play CM, maximise my immersion. The barrage actually made me physically jump in my chair!. I'd never faced 280mm Werfer before, in real life it must have been terrifying.
(G Coy and the HW Coy ready for kick off at Zulu. Scouts are running forward)
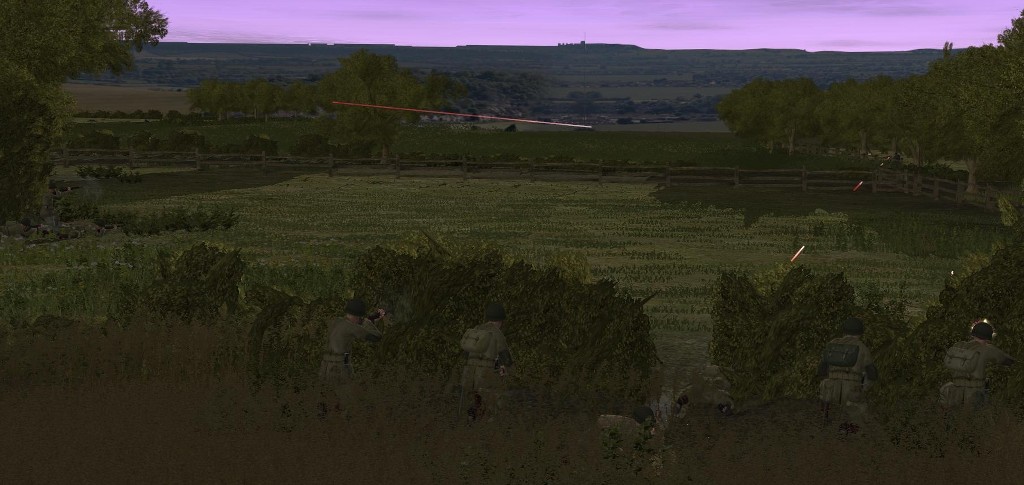
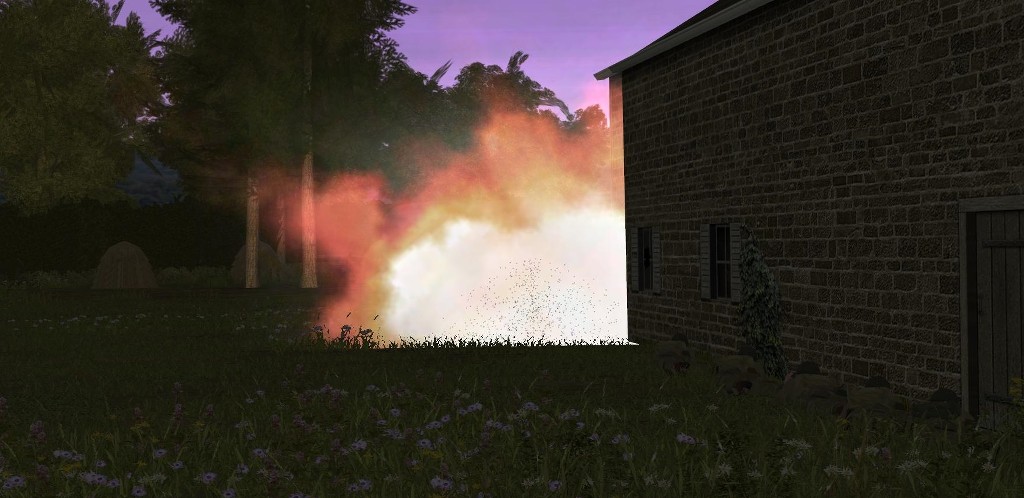
The first rockets start to come in, the initial rounds land at the hedgerow beyond my setup point
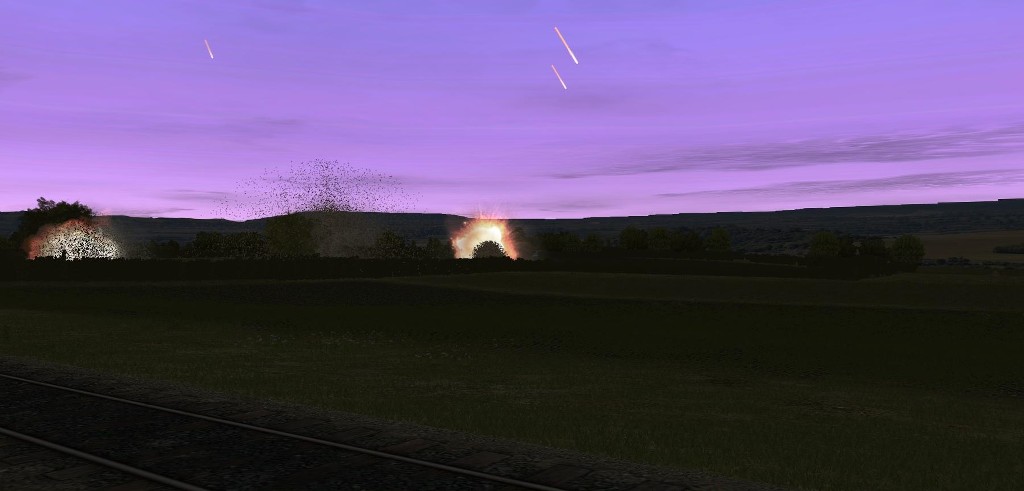
As more rockets come in, they start to land in the setup zone. This was in the second 30 seconds of the first turn.
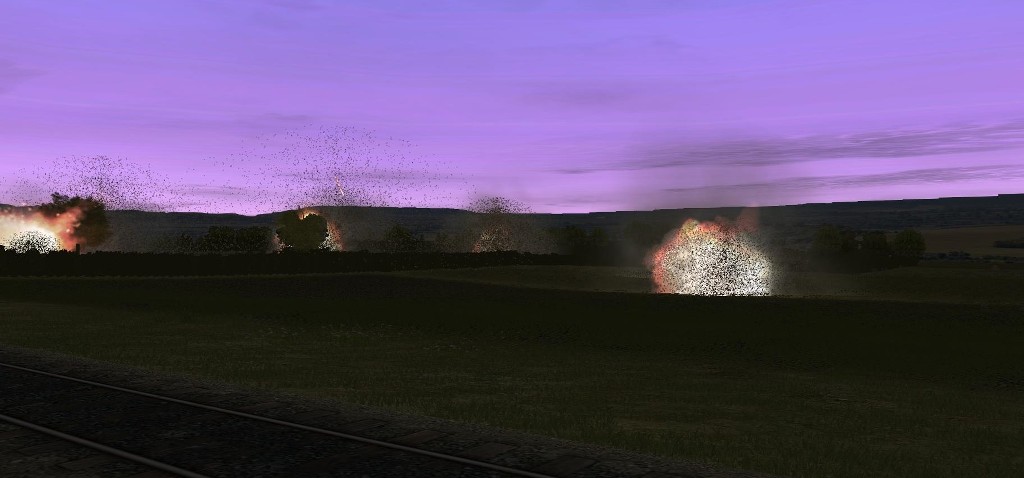
I then started to take casualties. I can only describe the sound as WHOMP, a very big WHOMP. I replayed back the turn several times as I digested what I'd seen. I'd never have setup a QB with Werfer, and haven't had them in a scenario before, they were FANTASTIC.
(This round landed smack in amongst a HW MMG group)
Once I'd stopped re-watching the carnage I reassessed the situation. The usual rule is no defense arty in the setup zone, I guess the AI hadn't read that. I chose to continue rather than reset and work with what I'd been dealt with. The casualties didn't seem to bad, they turned out worse than I'd thought, but I figured it was a test so let's 'test'. I ordered my teams to scatter out of the kill zone as quickly as possible, pushing out to the flanks ASAP.
(smoke and debris from the initial barrage of 280mm rockets)
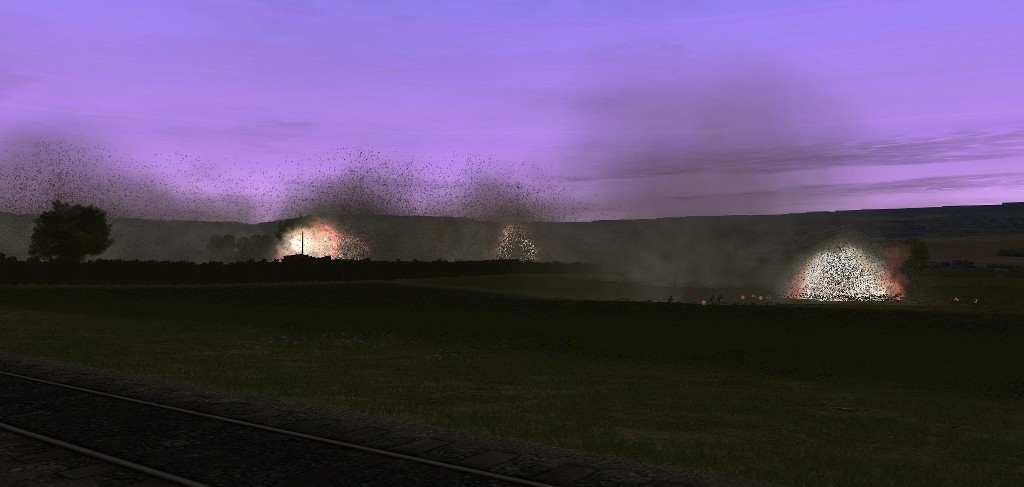
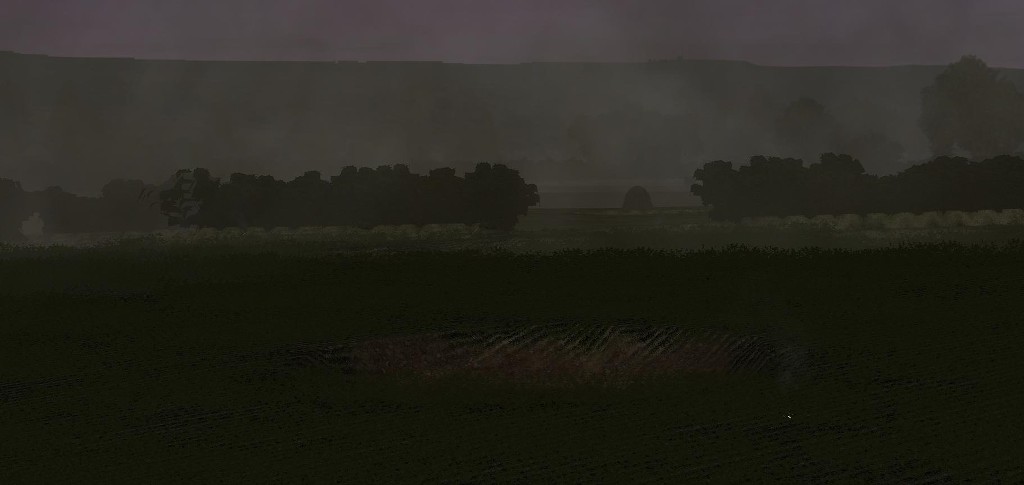
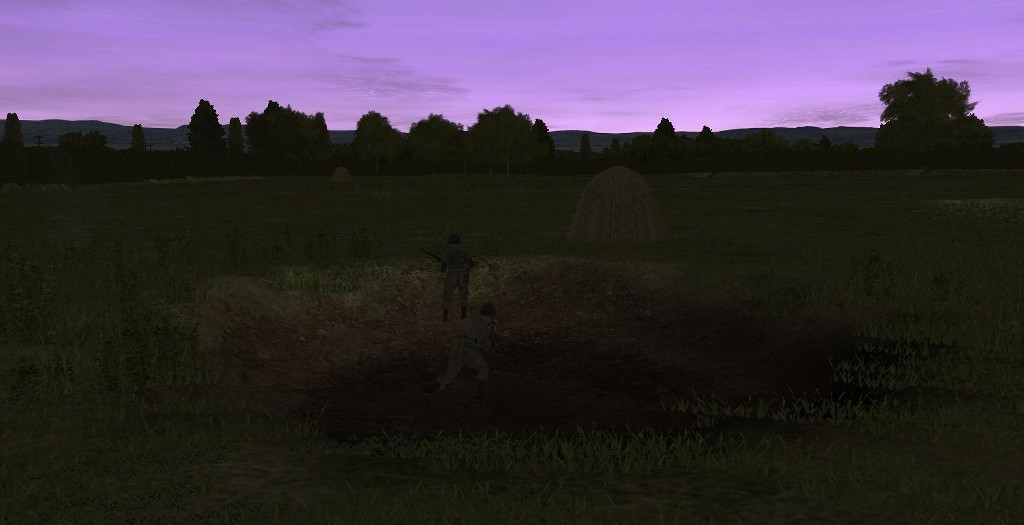
The craters were about 6' deep (2mtr), and the dust and smoke was across the battlefield. Whilst the explosions were big, most of the force seemed to be in making the holes and there wasn't a huge amount of splash damage.
(This farmer would take a while to fill the holes in his field)
The barrage took a couple of turns to finish. In that time I took no further casualties and my troops were scattered on the flanks. I left it a full turn of no further shelling before I moved again, just to be sure. I was nervous about my forces getting caught in a second barrage. One shell could easily take out an entire squad, possibly more.
(1st Platoon move forward to their original kick off point, Zulu, as the dust settles)
I quickly sent my scouts out, paying less attention to their safety than I normally do. I wanted to get my forces out from under the barrage zone as soon as I could. Even spotting rockets for a new barrage could be devastating, not only direct casualties but for morale and fitness. As the scouts moved forward they quickly got a contact on a bunker.... It was very close to the setup zone, with so far to go I thought this battle was gonna be tough.
(Forward scouts from 1st Platoon get a bunker sound contact. They stopped just short of the brocage and then hunted forward)
Then came my second surprise of the battle, the bunker was facing the other way. If my left flank scouts had run across one of the hedgerow openings in the other field they would have been in the firing line, but it seemed an odd position.
(the scouts hadn't come across the rear of a bunker so easily. Johnson could have gone and knocked on the door)

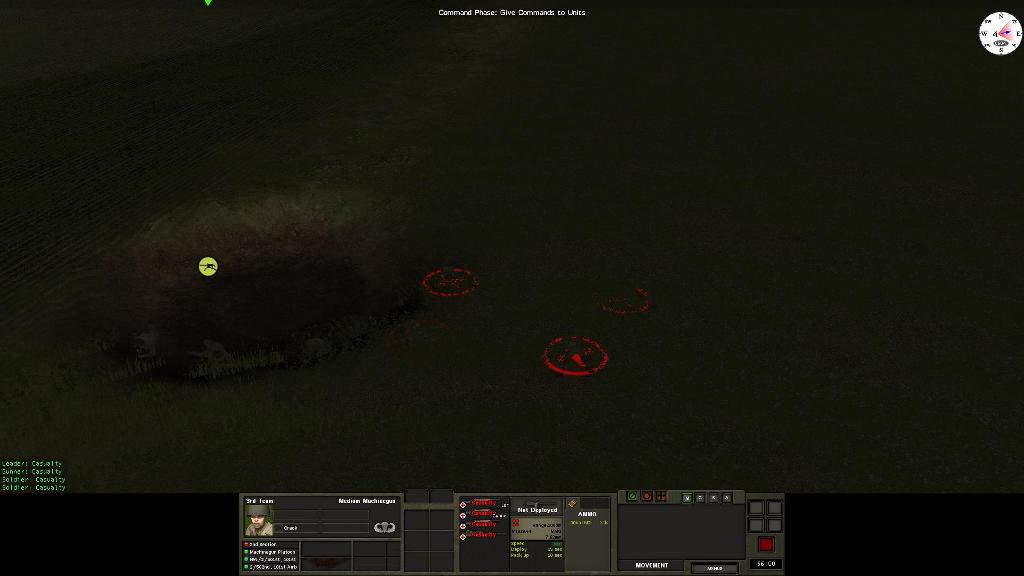
With no further rockets incoming I was starting to feel a little more comfortable. I still wanted to get my forces to their over-watch points as quickly as possible, but I started applying buddy aid. Then I noticed I'd actually lost an entire MMG squad.
(a 280mm rocket landed right next to 3rd team MMG. The MMG HQ didn't report the loss down the line because the entire squad had gone up in smoke)
I decided to stick with my original plan. I guessed the barrage was done, so I started pushing 1st Platoon forward. I left 2nd and 3rd because I was being cautious, but I did push a scout team out along their initial advance path. I didn't engage the bunker, but left the scouts watching. I sent a second scout team further right and got sound contacts on two more bunkers.
(G & HW Coy setup after around 12 minutes. There was a lot of chattering from the pixeltruppen, they were certainly more nervous than me)
As I moved the left flank scout team across the second field I had them use the craters from the barrage to bound across the field. They were deep enough for the men to stand in and I figured they provided good cover in an open field.
(Scouts zig zag across an open field moving from crater to crater)
I'll leave you all there, second update later today.
My force consists of a Company of US Airborne troops, at around 80% strength, and a HW Company, also US Airborne. In the PzC OOB the HW Company has 172 men, I've only got around 40 in the CM HW Company. It includes 8 MMG teams and 2 81mm mortar teams, off map, and various leadership teams. PzC has my force at 304 men, in CM I've translated this to 170.
I'm attacking into the North East, with two small bridges as my objectives, * & **. My kick off point is Zulu, and my plan is to push 1st Platoon along the green advance line, setting up an over-watch position at the X point behind brocage, 2nd Platoon along the blue line, again over-watch at the X point. 3rd Platoon will do most of the advancing along the purple line, securing the NW bridge and sweeping along the rear of the German defense. The HW support will be setup along the red lines and X points.
I setup my forces at Zulu, sending out scouts along the initial advance lines..... and then there is a high pitched whine followed by a very loud WHOMP. I like to wear over ear headphones with a fairly high volume when I play CM, maximise my immersion. The barrage actually made me physically jump in my chair!. I'd never faced 280mm Werfer before, in real life it must have been terrifying.
(G Coy and the HW Coy ready for kick off at Zulu. Scouts are running forward)
The first rockets start to come in, the initial rounds land at the hedgerow beyond my setup point
As more rockets come in, they start to land in the setup zone. This was in the second 30 seconds of the first turn.
I then started to take casualties. I can only describe the sound as WHOMP, a very big WHOMP. I replayed back the turn several times as I digested what I'd seen. I'd never have setup a QB with Werfer, and haven't had them in a scenario before, they were FANTASTIC.
(This round landed smack in amongst a HW MMG group)
Once I'd stopped re-watching the carnage I reassessed the situation. The usual rule is no defense arty in the setup zone, I guess the AI hadn't read that. I chose to continue rather than reset and work with what I'd been dealt with. The casualties didn't seem to bad, they turned out worse than I'd thought, but I figured it was a test so let's 'test'. I ordered my teams to scatter out of the kill zone as quickly as possible, pushing out to the flanks ASAP.
(smoke and debris from the initial barrage of 280mm rockets)
The craters were about 6' deep (2mtr), and the dust and smoke was across the battlefield. Whilst the explosions were big, most of the force seemed to be in making the holes and there wasn't a huge amount of splash damage.
(This farmer would take a while to fill the holes in his field)
The barrage took a couple of turns to finish. In that time I took no further casualties and my troops were scattered on the flanks. I left it a full turn of no further shelling before I moved again, just to be sure. I was nervous about my forces getting caught in a second barrage. One shell could easily take out an entire squad, possibly more.
(1st Platoon move forward to their original kick off point, Zulu, as the dust settles)
I quickly sent my scouts out, paying less attention to their safety than I normally do. I wanted to get my forces out from under the barrage zone as soon as I could. Even spotting rockets for a new barrage could be devastating, not only direct casualties but for morale and fitness. As the scouts moved forward they quickly got a contact on a bunker.... It was very close to the setup zone, with so far to go I thought this battle was gonna be tough.
(Forward scouts from 1st Platoon get a bunker sound contact. They stopped just short of the brocage and then hunted forward)
Then came my second surprise of the battle, the bunker was facing the other way. If my left flank scouts had run across one of the hedgerow openings in the other field they would have been in the firing line, but it seemed an odd position.
(the scouts hadn't come across the rear of a bunker so easily. Johnson could have gone and knocked on the door)
With no further rockets incoming I was starting to feel a little more comfortable. I still wanted to get my forces to their over-watch points as quickly as possible, but I started applying buddy aid. Then I noticed I'd actually lost an entire MMG squad.
(a 280mm rocket landed right next to 3rd team MMG. The MMG HQ didn't report the loss down the line because the entire squad had gone up in smoke)
I decided to stick with my original plan. I guessed the barrage was done
, so I started pushing 1st Platoon forward. I left 2nd and 3rd because I was being cautious, but I did push a scout team out along their initial advance path. I didn't engage the bunker, but left the scouts watching. I sent a second scout team further right and got sound contacts on two more bunkers.(G & HW Coy setup after around 12 minutes. There was a lot of chattering from the pixeltruppen, they were certainly more nervous than me)
As I moved the left flank scout team across the second field I had them use the craters from the barrage to bound across the field. They were deep enough for the men to stand in and I figured they provided good cover in an open field.
(Scouts zig zag across an open field moving from crater to crater)
I'll leave you all there, second update later today.
AAR continued
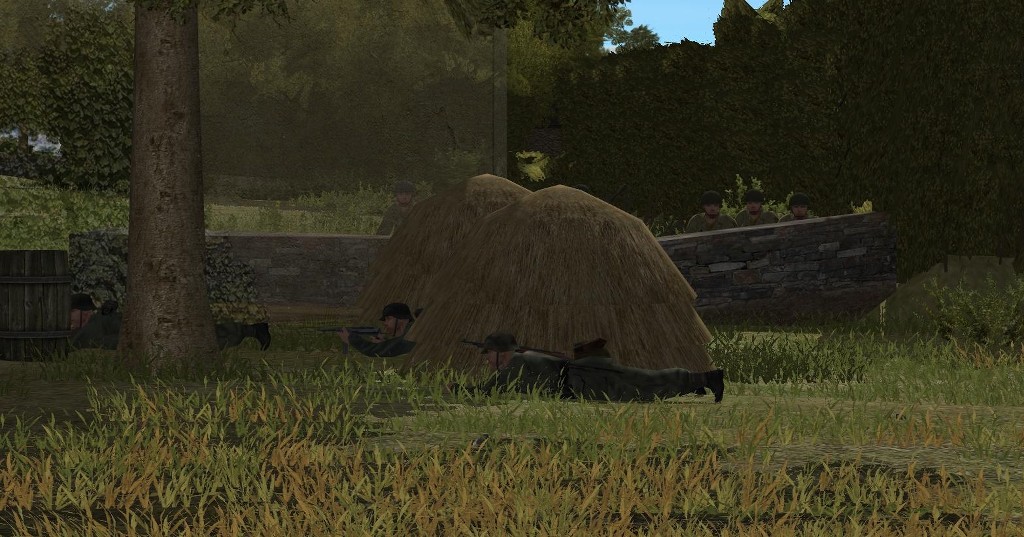
With additional 1st Platoon scouts seeking out to identify the other bunker sound contacts, I got third surprise of the battle. The bunkers were also facing an odd direction. They we're concrete, which I didn't realise I could influence when I purchased them but they were facing the northwest. They weren't even presenting covering arcs of fire, preventing me from attacking each of the bunkers. Their position did present a challenge for my original plan as they covered some of my over-watch points.
(Bunkers 2 and 3 in their watch positions)
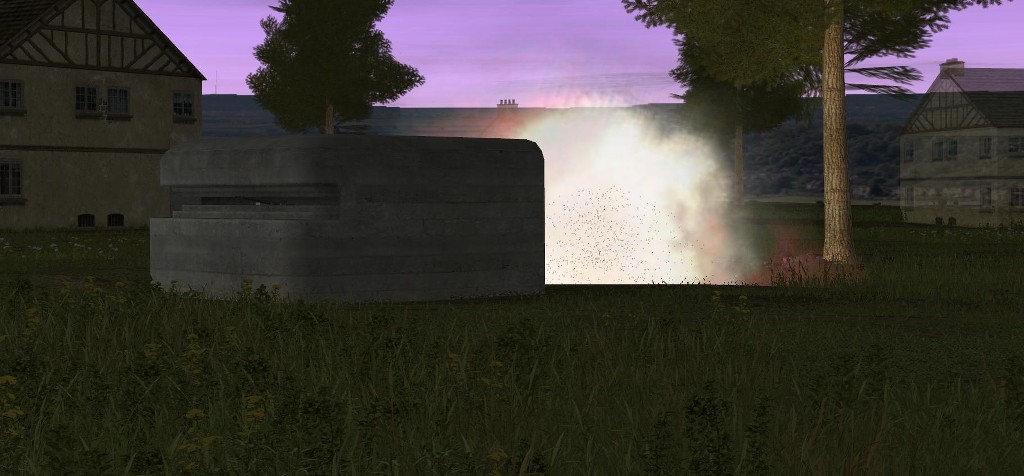
As I now identified the concrete bunkers weren't covering the first wooden bunker, I ordered an assault team forward with demo charges and a bazooka and attacked.
(The destruction was swift and easy)
I was now feeling confident. I reviewed my plan, and with some minor adjustments thought I could continue. Ordering 2nd and 3rd Platoons forward I started to setup for the assault on objective * & **. Suddenly, a familiar whine and the echoing WHOMP was heard as I watch 1st Platoon advance. Looking quickly back, a second Werfer barrage had started.
(A rocket explodes in the field in front of a cowering squad)
The barrage was far enough away for me to scatter 2nd and 3rd Platoon and to exit without any casualties, but I had to consider my primary over-watch area a kill zone. The clock was ticking and I needed to come-up with an alternative plan.
(second Werfer barrage comes in. 2nd and 3rd Platoons have already scattered as the rockets continued to rain down)
So, plan B. With my over-watch zone now out of scope, I identified two wider avenues of attack. 1st Platoon would continue to take the right flank, but go through the urban area. They'd blow both bunkers from behind with a HW MMG team setting up over-watch at point A. 2nd and 3rd Platoons would go further on the left flank. Together with the 2nd MMG Platoon they'd setup at point B and assault the NW bridge objective. I now considered the red area a no go zone, and hoped there was no other area. The Werfer didn't appear to need spotting rounds, instead the barrages came in direct and fast.
(Adjusted Plan B)
Conscious of time an knowing there was still a company of Grenadier to deal with, I put my plan into action
(1st Platoon, 2nd Squad assault team blow the back of the first bunker)
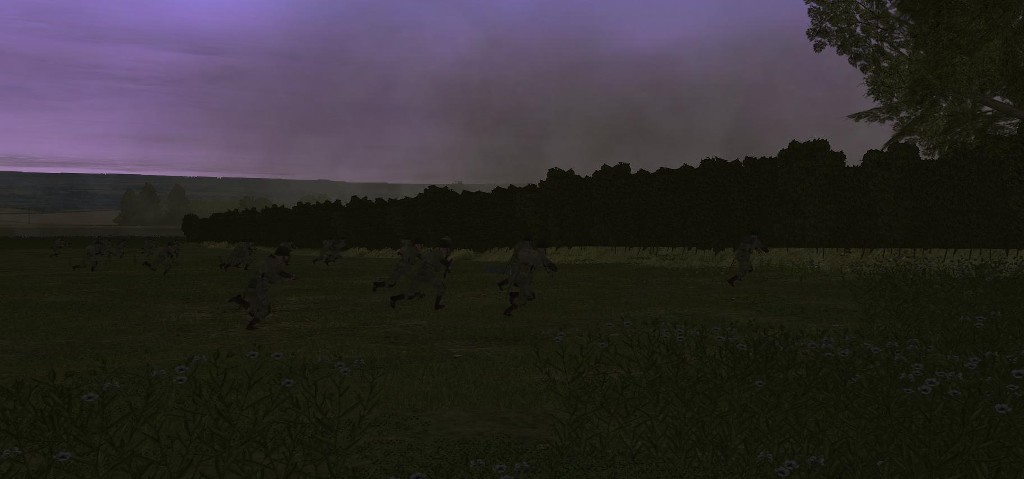
2nd, 3rd Platoon and the MMG Platoon dash through the Werfer fire. There were on the periphery, but a stray rocket could do a lot of damage.
(Dashing through 280mm rocket explosions, some pixeltruppen appear to be holding onto their hats)
(Second bunker on the right flank is dispatched. I tried using bazooka fire with no luck. The only way to destroy the bunkers was to order them to blast the bunkers. Thankfully the PIR was carrying demolition charges)
I try not to bunch up troops, however to get them moving as quickly as possible it was necessary in some cases. I pushed hard down the right flank. I didn't get any sound contacts, which was a surprise as I thought some forces would have been stationed in the buildings. Once I secure a foothold in the buildings and 1st Platoon had over-watch, I brought in the MMG's on mass.
(MMG's from the HW Coy dash up the right flank)
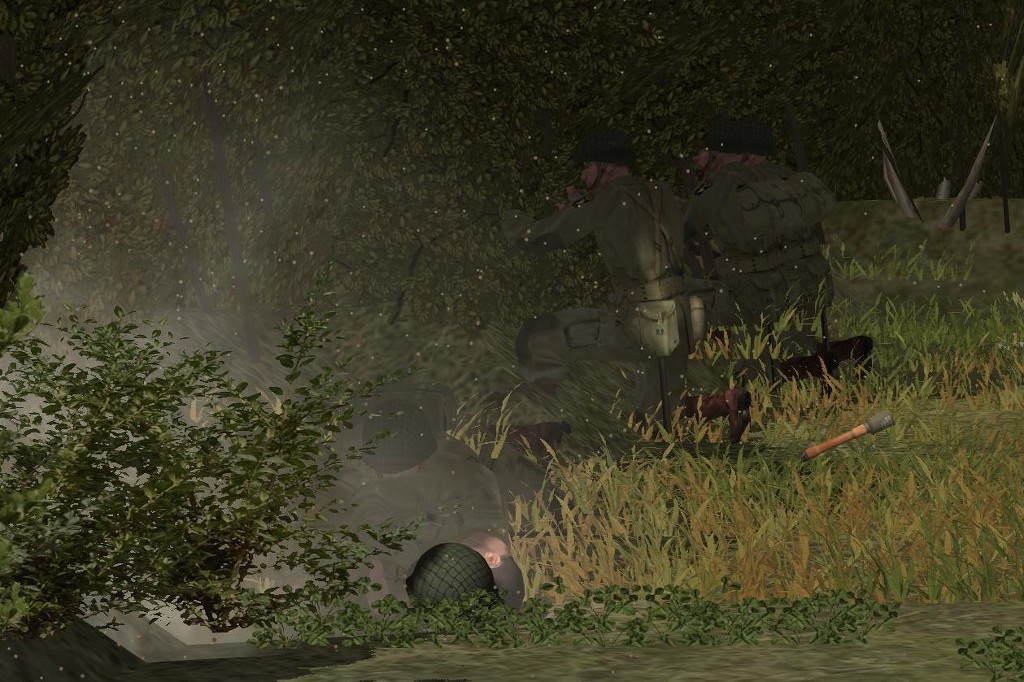
On the left flank, 2nd Platoon led and made the first contact with Grenadiers from the 919th. The Para's weren't advancing with hold fire orders and quickly engaged. The return fire was weak and the Grenadiers quickly retreated.
Soon after the initial contact on the left flank, a more enthusiastic German force advanced on the NW bridge. They quickly setup a defensive perimeter and a protracted firefight took place for fire superiority. I had 3 MMG's and two para squads but LOs was limited due to the compact over-watch location. I was also concerned that any mortar fire would be difficult to counter with my forces so closely clumped.
(Jerry lays on the fire with MG34's and bolt action rifles. It looks like they only had one MG per squad and limited automatic weapons, other than the MG)
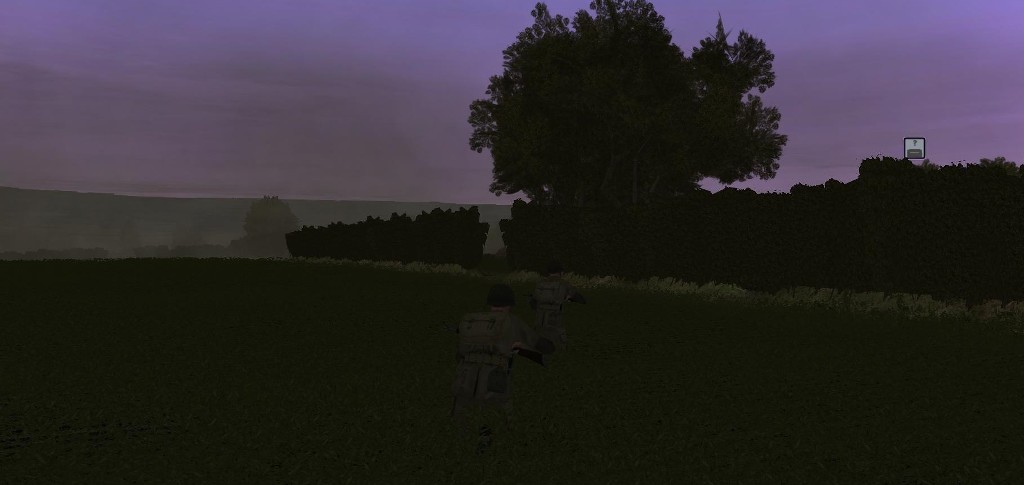
My position 20 minutes in was far better than I'd anticipated after the Werfer barrage. My left flank force had a strong over-watch position with good concealment and were laying on the fire. It wasn't clear who had fire superiority at this time, but there was little suppression on my force and limited casualties. On the right flank 1st Platoon had advanced through the buildings with no direct resistance. Once the firefight started on the left flank a force started to advance over the second bridge towards the small village. I pushed 1st and the MMG Platoon forward as far and as quick as I dare to setup a defensive perimeter covering the bridge and to prevent the German force gaining access to the buildings. I didn't want to have to advance through urban fighting.
(919 and the 502 trade shots for the NW bridge in the foreground. In the background 1st Platoon advance under cover of the MMG Platoon.)
I'll update later on 502nd's battle for the bridges.
With additional 1st Platoon scouts seeking out to identify the other bunker sound contacts, I got third surprise of the battle. The bunkers were also facing an odd direction. They we're concrete, which I didn't realise I could influence when I purchased them but they were facing the northwest. They weren't even presenting covering arcs of fire, preventing me from attacking each of the bunkers. Their position did present a challenge for my original plan as they covered some of my over-watch points.
(Bunkers 2 and 3 in their watch positions)
As I now identified the concrete bunkers weren't covering the first wooden bunker, I ordered an assault team forward with demo charges and a bazooka and attacked.
(The destruction was swift and easy)
I was now feeling confident. I reviewed my plan, and with some minor adjustments thought I could continue. Ordering 2nd and 3rd Platoons forward I started to setup for the assault on objective * & **. Suddenly, a familiar whine and the echoing WHOMP was heard as I watch 1st Platoon advance. Looking quickly back, a second Werfer barrage had started.
(A rocket explodes in the field in front of a cowering squad)
The barrage was far enough away for me to scatter 2nd and 3rd Platoon and to exit without any casualties, but I had to consider my primary over-watch area a kill zone. The clock was ticking and I needed to come-up with an alternative plan.
(second Werfer barrage comes in. 2nd and 3rd Platoons have already scattered as the rockets continued to rain down)
So, plan B. With my over-watch zone now out of scope, I identified two wider avenues of attack. 1st Platoon would continue to take the right flank, but go through the urban area. They'd blow both bunkers from behind with a HW MMG team setting up over-watch at point A. 2nd and 3rd Platoons would go further on the left flank. Together with the 2nd MMG Platoon they'd setup at point B and assault the NW bridge objective. I now considered the red area a no go zone, and hoped there was no other area. The Werfer didn't appear to need spotting rounds, instead the barrages came in direct and fast.
(Adjusted Plan B)
Conscious of time an knowing there was still a company of Grenadier to deal with, I put my plan into action
(1st Platoon, 2nd Squad assault team blow the back of the first bunker)
2nd, 3rd Platoon and the MMG Platoon dash through the Werfer fire. There were on the periphery, but a stray rocket could do a lot of damage.
(Dashing through 280mm rocket explosions, some pixeltruppen appear to be holding onto their hats)
(Second bunker on the right flank is dispatched. I tried using bazooka fire with no luck. The only way to destroy the bunkers was to order them to blast the bunkers. Thankfully the PIR was carrying demolition charges)
I try not to bunch up troops, however to get them moving as quickly as possible it was necessary in some cases. I pushed hard down the right flank. I didn't get any sound contacts, which was a surprise as I thought some forces would have been stationed in the buildings. Once I secure a foothold in the buildings and 1st Platoon had over-watch, I brought in the MMG's on mass.
(MMG's from the HW Coy dash up the right flank)
On the left flank, 2nd Platoon led and made the first contact with Grenadiers from the 919th. The Para's weren't advancing with hold fire orders and quickly engaged. The return fire was weak and the Grenadiers quickly retreated.
Soon after the initial contact on the left flank, a more enthusiastic German force advanced on the NW bridge. They quickly setup a defensive perimeter and a protracted firefight took place for fire superiority. I had 3 MMG's and two para squads but LOs was limited due to the compact over-watch location. I was also concerned that any mortar fire would be difficult to counter with my forces so closely clumped.
(Jerry lays on the fire with MG34's and bolt action rifles. It looks like they only had one MG per squad and limited automatic weapons, other than the MG)
My position 20 minutes in was far better than I'd anticipated after the Werfer barrage. My left flank force had a strong over-watch position with good concealment and were laying on the fire. It wasn't clear who had fire superiority at this time, but there was little suppression on my force and limited casualties. On the right flank 1st Platoon had advanced through the buildings with no direct resistance. Once the firefight started on the left flank a force started to advance over the second bridge towards the small village. I pushed 1st and the MMG Platoon forward as far and as quick as I dare to setup a defensive perimeter covering the bridge and to prevent the German force gaining access to the buildings. I didn't want to have to advance through urban fighting.
(919 and the 502 trade shots for the NW bridge in the foreground. In the background 1st Platoon advance under cover of the MMG Platoon.)
I'll update later on 502nd's battle for the bridges.
The 3rd and final installment to the current battle
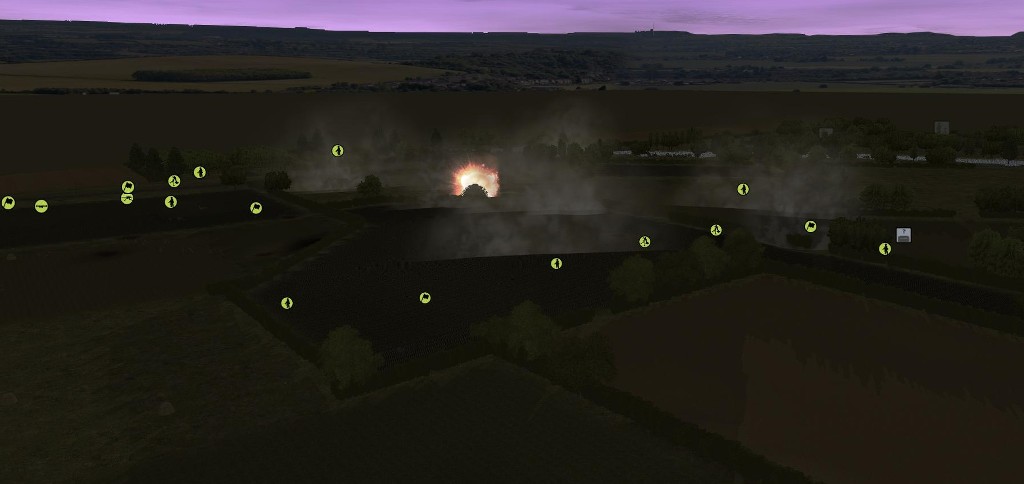
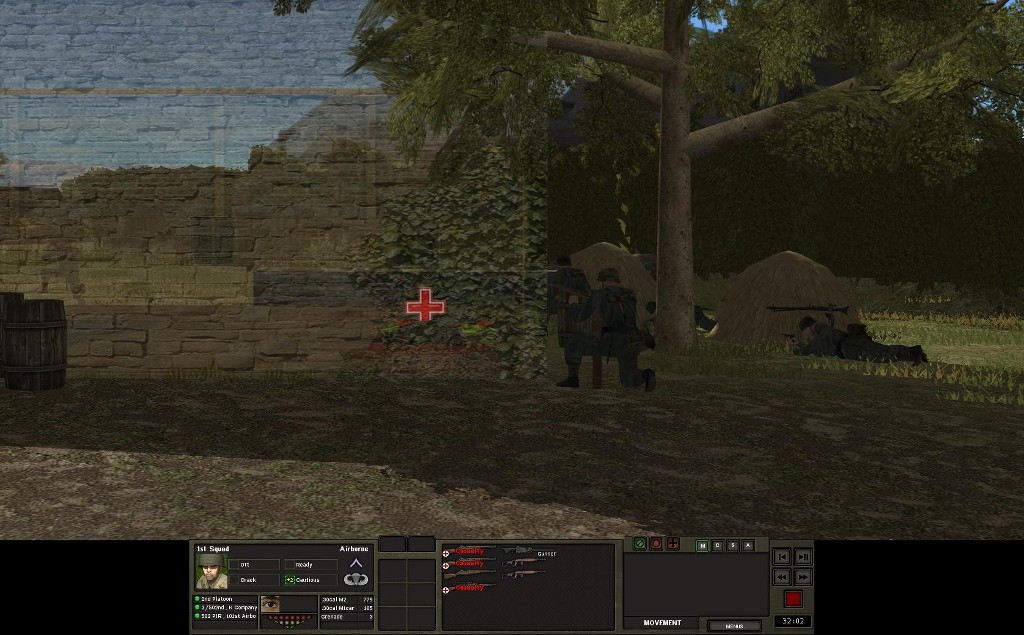
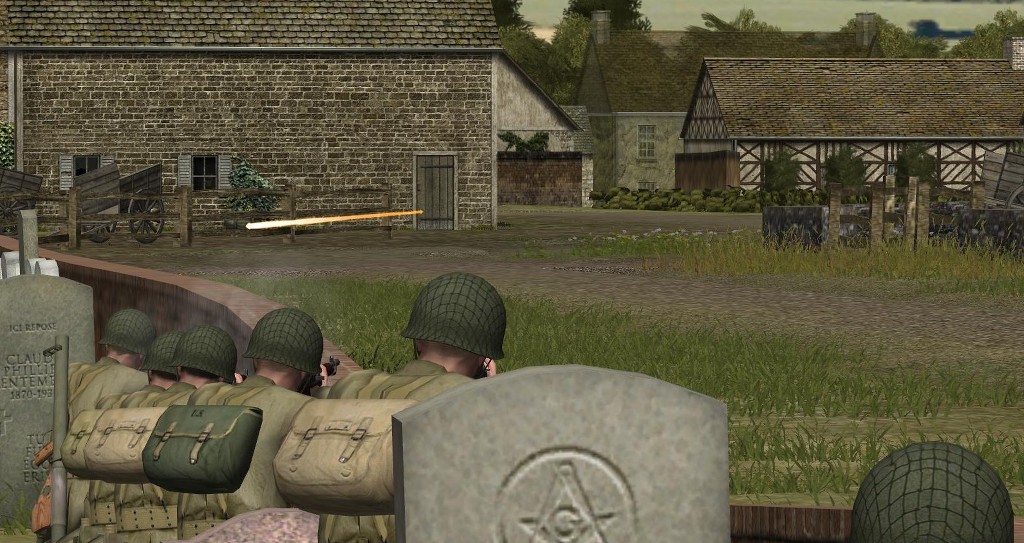
We open with 1st Platoon and a MMG Platoon setup on the right flank, in the buildings. I had split some of the squads, ordering some groups to lay down suppression area fire, whilst I left some groups free to pick their own targets of opportunity.
The Grenadier's hadn't made it to the buildings so had to try and counter my fire from an open position. They lacked the firepower so this was only going to go one way, I just had to be patient.
(A Grenadier fire team trade shots with a fire team from the 1st Platoon)
(A 60mm mortar puts direct fire on the other side of the bridge, hitting a HMG team)
On the left flank, once I'd started to get fire superiority I had two teams lay down smoke and then breached a hole in the brocage. My plan was to advance to a stone house just at the edge of the NW bridge and setup a second fire-base.
(2nd Platoon Commander blows the brocage)
(A squad from 3rd Platoon dash to the house and immediately start laying down more suppression fire)
I called in two heavy arty barrages. Once they'd been completed I would push my troops across the bridge. I expected the Grenadiers to be suppressed and dememorialised enough at that point to ensure a successful assault.
(barrage 1 was across the green line. The second was from the NW bridge to the bunker spotted in the picture)
On my right flank, I started pushing assault teams forward under MMG cover fire. I wanted to get them to the stone buildings on the outskirts of the village in order for them to start their assault on the second bridge.
(assault teams move forward in preparation)
As my first mortar strike came in, it was crap. So far off the mark it didn't even land on the map. 1st Platoon would have to assault with only MMG cover fire and there own fire)
(the mortar HQ team called this in..... more training needed I think)
The second barrage was better. The bunker was a wooden one. It hadn't laid down any fire at that point in time. I couldn't tell if it's LOS was blocked or if it wasn't maned. I was starting to suspect that none of the bunkers had been manned.
(I saw a couple of confirmed kills on this arty barrage)
I ordered ceasefire on the 1st barrage but when it finished it had used most of the rounds so there was no point in adjusting. Rather than wait for the second barrage to finish, I kicked off 1st Platoon's assault on the right flank.
(a fire team start their assault)
I bounded them forward, as one team reached their stop point they laid down suppression fire for the next team to advance. I had four teams advancing which allowed me to always have one team laying down suppression fire, one team ready for opportunity fire and two teams advancing. I knew there were some Grenadiers on the other side of the bridge, but no eyes on at this time.
As the assault teams got closer I had two teams laying down suppression fire with a third team ready to take opportunity shots. I wanted to get the defending Grenadiers to break, and they did.
(a defending Grenadier team make a break for it from behind the hedgerow, 1st Platoon take pot shots)

With defenders on the right flank breaking, I pushed the 502'nds assault hard. I wasn't sure all of the 919th had broken cover so continued to lay down suppression fire as the fire teams advanced
(one team lay down fire as a second assault team race for the bridge)
On my left flank, 2nd and 3rd Platoons had taken their side of the bridge. I brought up MMG teams to position either side of the bridgehead to provide cover fire for the squads to assault over once the second barrage had finished.
(The last of the barrage rounds land close to the bunker)

At this point in time the Grenadiers from the 919th threw in the towel and surrendered. I didn't need to push 2nd and 3rd over the bridge, the battle was over and the Para's from the 502nd were victorious.
My second PzC campaign battle was a success. I'd secured the objective, seriously damaged the 919th and pushed them back from the area.

Battle synopsis.
In hindsight using QB for the bunkers didn't seem to work. The un-destroyed bunker was empty, I'm guessing the others were as well. For some reason the QB hadn't positioned the bunkers very well or manned them. I've also had a look at the AI plans for both these QB maps. I don't know anything about the CM AI, but the plans looked pretty poor and explained some of the behavior I've seen over the last two battles. One map had only one AI plan, the above map only had an Allied AI plan for defense some I'm not even sure if the Axis force would have been able to use that. for the next battle I'm going to have a play around with the AI plans and will try some specific battle scenarios. I want FOW, so will have to do several AI plans and will also leave it a few days, to try and forget the plans. I have a terrible memory, hopefully I won't recognise the plans I've scripted when I run the battles, if I can even get the AI to work
We open with 1st Platoon and a MMG Platoon setup on the right flank, in the buildings. I had split some of the squads, ordering some groups to lay down suppression area fire, whilst I left some groups free to pick their own targets of opportunity.
The Grenadier's hadn't made it to the buildings so had to try and counter my fire from an open position. They lacked the firepower so this was only going to go one way, I just had to be patient.
(A Grenadier fire team trade shots with a fire team from the 1st Platoon)
(A 60mm mortar puts direct fire on the other side of the bridge, hitting a HMG team)
On the left flank, once I'd started to get fire superiority I had two teams lay down smoke and then breached a hole in the brocage. My plan was to advance to a stone house just at the edge of the NW bridge and setup a second fire-base.
(2nd Platoon Commander blows the brocage)
(A squad from 3rd Platoon dash to the house and immediately start laying down more suppression fire)
I called in two heavy arty barrages. Once they'd been completed I would push my troops across the bridge. I expected the Grenadiers to be suppressed and dememorialised enough at that point to ensure a successful assault.
(barrage 1 was across the green line. The second was from the NW bridge to the bunker spotted in the picture)
On my right flank, I started pushing assault teams forward under MMG cover fire. I wanted to get them to the stone buildings on the outskirts of the village in order for them to start their assault on the second bridge.
(assault teams move forward in preparation)
As my first mortar strike came in, it was crap. So far off the mark it didn't even land on the map. 1st Platoon would have to assault with only MMG cover fire and there own fire)
(the mortar HQ team called this in..... more training needed I think)
The second barrage was better. The bunker was a wooden one. It hadn't laid down any fire at that point in time. I couldn't tell if it's LOS was blocked or if it wasn't maned. I was starting to suspect that none of the bunkers had been manned.
(I saw a couple of confirmed kills on this arty barrage)
I ordered ceasefire on the 1st barrage but when it finished it had used most of the rounds so there was no point in adjusting. Rather than wait for the second barrage to finish, I kicked off 1st Platoon's assault on the right flank.
(a fire team start their assault)
I bounded them forward, as one team reached their stop point they laid down suppression fire for the next team to advance. I had four teams advancing which allowed me to always have one team laying down suppression fire, one team ready for opportunity fire and two teams advancing. I knew there were some Grenadiers on the other side of the bridge, but no eyes on at this time.
As the assault teams got closer I had two teams laying down suppression fire with a third team ready to take opportunity shots. I wanted to get the defending Grenadiers to break, and they did.
(a defending Grenadier team make a break for it from behind the hedgerow, 1st Platoon take pot shots)
With defenders on the right flank breaking, I pushed the 502'nds assault hard. I wasn't sure all of the 919th had broken cover so continued to lay down suppression fire as the fire teams advanced
(one team lay down fire as a second assault team race for the bridge)
On my left flank, 2nd and 3rd Platoons had taken their side of the bridge. I brought up MMG teams to position either side of the bridgehead to provide cover fire for the squads to assault over once the second barrage had finished.
(The last of the barrage rounds land close to the bunker)
At this point in time the Grenadiers from the 919th threw in the towel and surrendered. I didn't need to push 2nd and 3rd over the bridge, the battle was over and the Para's from the 502nd were victorious.
My second PzC campaign battle was a success. I'd secured the objective, seriously damaged the 919th and pushed them back from the area.
Battle synopsis.
In hindsight using QB for the bunkers didn't seem to work. The un-destroyed bunker was empty, I'm guessing the others were as well. For some reason the QB hadn't positioned the bunkers very well or manned them. I've also had a look at the AI plans for both these QB maps. I don't know anything about the CM AI, but the plans looked pretty poor and explained some of the behavior I've seen over the last two battles. One map had only one AI plan, the above map only had an Allied AI plan for defense some I'm not even sure if the Axis force would have been able to use that. for the next battle I'm going to have a play around with the AI plans and will try some specific battle scenarios. I want FOW, so will have to do several AI plans and will also leave it a few days, to try and forget the plans. I have a terrible memory, hopefully I won't recognise the plans I've scripted when I run the battles, if I can even get the AI to work
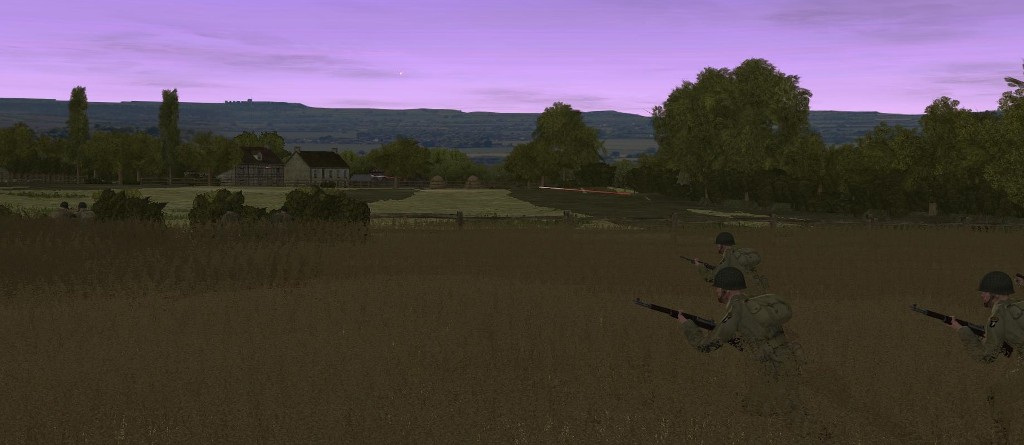
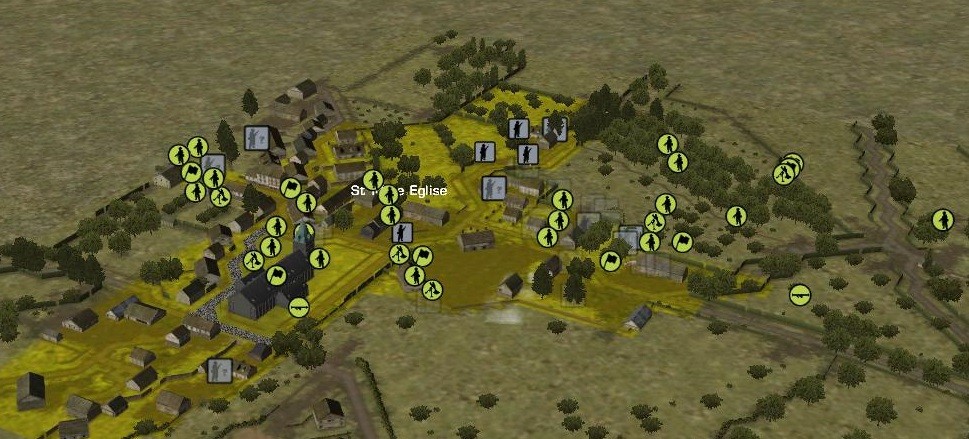
Welcome back. Following on from the last battles, in turn 4 I've chosen to make 3 assaults. The first is to take Saint Mere Eglise. This will be made by the K & G Coy, 2/502nd. We saw G Coy in the previous battle and they are now at around 60% strength, whilst K Coy had pooled forces during the morning and was at 90%. Defending St. Mere Eglise were 4/Georgian, 795 Btn, the same Regiment as the first battle, 739th Grenadier Regt, and an attachment of 75mm AT guns. The time was 10 am, I pulled my forces together and set out to take Eglise.
The previous battles were from the box QBs. I chose for this one to do some simple AI scripting to see if I could spice up the German defense. I didn't do anything fancy, just adding some more movement and designating specific groups. I did two plans, both similar but with differences on the flanks. The AAR gives the result....
PzC battle 3 - Assault on Saint Mere Eglise.
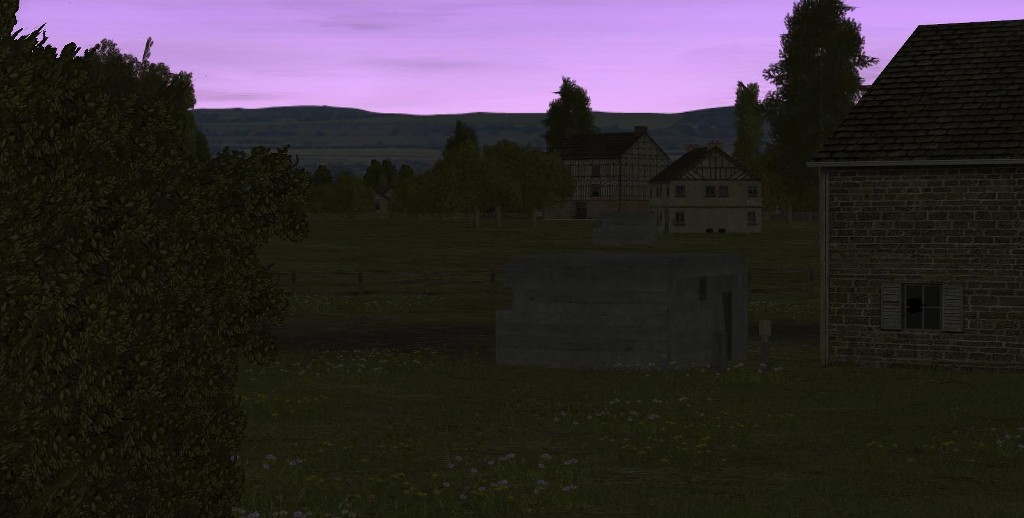
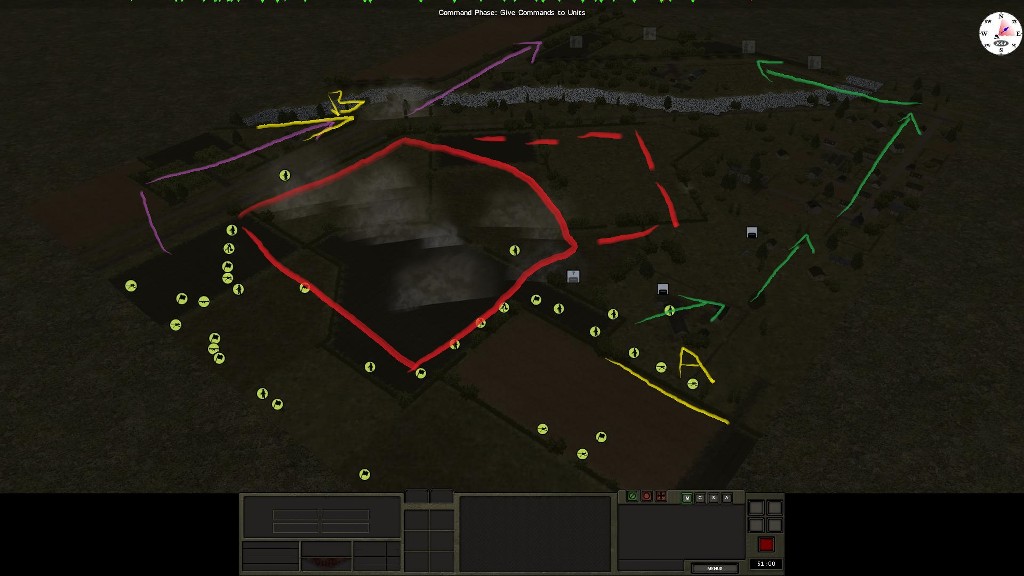
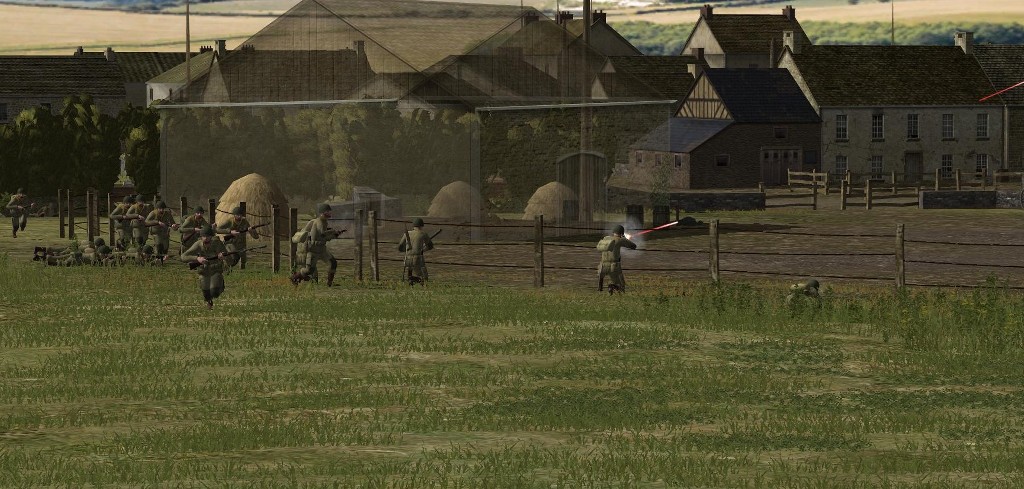
The objective is simple, secure the town of Eglise; it's main building of notice being a large church on the west side of town. It is surrounded by brocage and small orchard fields. Eglise sits on a slight elevation, with the road heading south running through a minor defilade. My initial plan is for K Coy to do most of the work, it's attack route will be the green line. I'll hold over-watch points at the X's, then break the platoons out for the final assault. G Coy, in it's weakened state will act as right flank protection, pink lines, and then follow K Coy into the town, cleaning up behind them and acting as suppression support as needed. There's a reasonable count of houses east of the church, cleaning them out may get messy so if I can pin the Georgian's and prevent them from retreating that direction I will. I'm thinking G Coy might be able to do this in their second arrow tip.

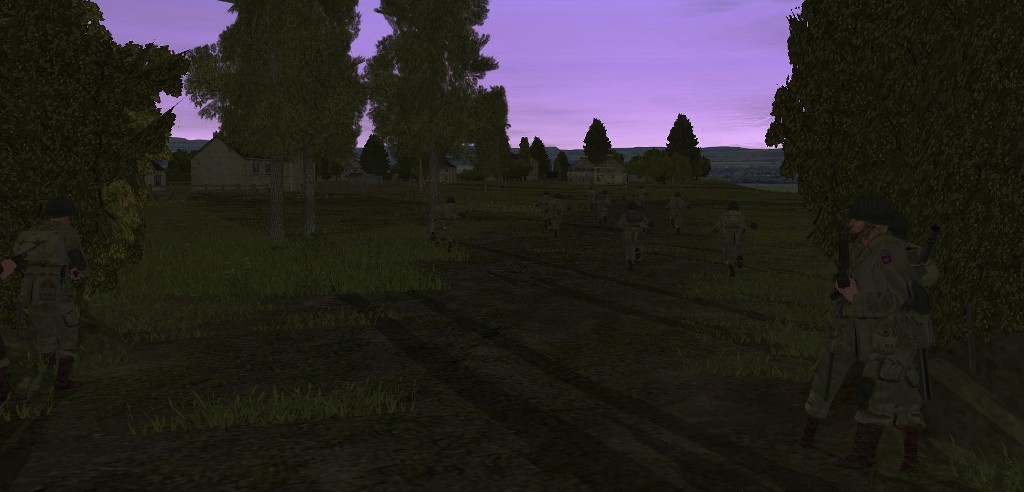
The first push forward is uneventful. Scouts run ahead of both Coy's to ensure we don't run into any ambushes.
(Here's the church, here's the steeple, open the doors.... where's all the people?)
(Two lead para's from 502nd, G Coy)
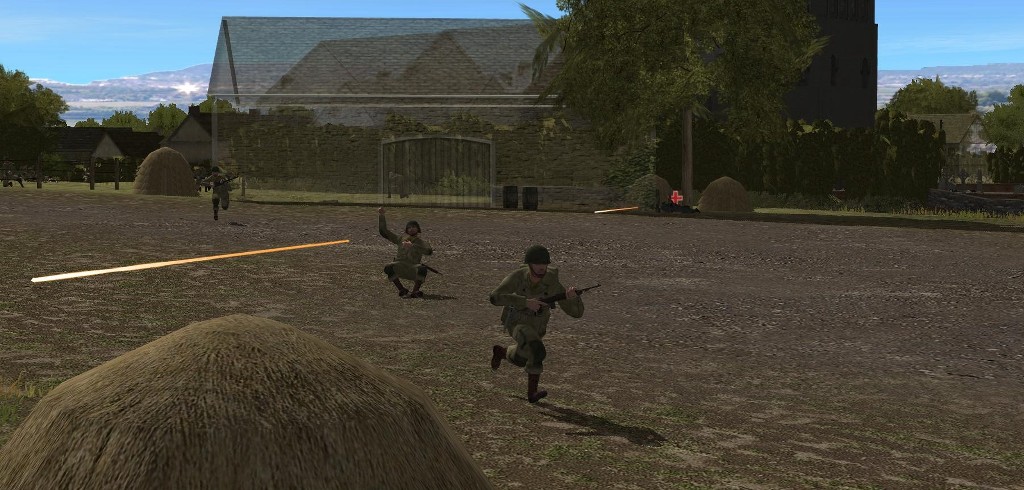
Scouts from K Coy reported back sighting German pickets. 1st Platoon advanced forward, setup quietly and then opened up to fix them in place, an assault squad pushed on the pickets flanks to try and finish.
(1st Platoon, K Coy, mortar team open fire on the German forward scouts)
The 4/Georgian troops gave limited return fire, then made a quick dash to retreat before the assault squad could close in.
(Casualties as the Germans break cover and run for it)
The German scout party dashed directly north and K Coy gave chase. It seemed the scouts were part of a group in the north western AO. I ordered 2nd Platoon to identify and pin any force in that area into the NW AO, trying to prevent them linking up with a force in Eglise and the urban area. It was a rapid dash, with 1st and 3rd Platoons trying to cover 2nd's rapid advance. G Coy picked up their pace on the right flank, keeping pace with K Coy. 2nd Platoon were just too late to prevent the NW force from escaping. As the rest of the Company caught up, I decided to continue the pursuit into Eglise and try and keep the momentum. I had AT gun sound contacts which looked like they were being moved by foot. The more I could catch in the open, the less urban fighting. I ordered G Coy to setup over-watch in a group of houses to the south west of the church. They'd now be more than a mop up force, they'd be part of the main assault.
(K Coy secure the NW AO, and prepare to assault east. G Coy secure over-watch)
As K Coy's assault advanced they started to catch-up with the slower rear elements of the retreating German force. I tried to leap frog the squads forward, pinning any retreating forces and then closing quickly to finish them off.
(K Coy watch an abandoned AT gun with unease)
It's not long before G Coy also start to spot moving German soldiers. It looks like the entire Company is pulling back into the buildings east of the church, exactly what I was trying to prevent. It was looking more and more like the 502nd would have to go house clearing.
(G Coy open fire on retreating Germans from their over-watch positions)
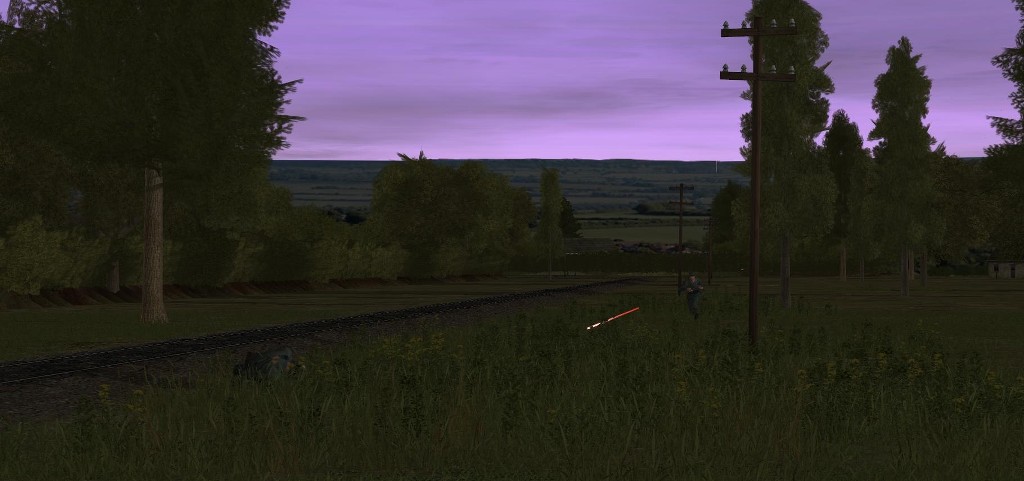
It seems the 502nd were also facing some mortar units. Spotter rounds came in, and eventually the barrage, but it was behind the quickly advancing para's
As K Coy started to enter the built-up area west of the church they started to get into street fighting. It's close quarters, and usually very messy for both sides. I wanted to keep a good advancing pace, but not lose Platoon cohesion and took a lot of care how I advanced, ensuring squads provided cover fire. I wanted to prevent any panic breaks into enemy fire arcs.
(Troopers move to catch a hidden Georgian trying to ambush another squad)
(Meanwhile another squad storm the building, catching the ambush distracted, and from behind)
Because the Germans were retreating so quickly, it was difficult to keep them pinned. Often squads would setup to cover, suppress whilst another squad stormed the building, only to find it empty. I continued to try and keep the pace as tempered as possible, to ensure cohesion.
As K Coy got closer to the church the fighting started to intensify. The Germans had started to hold their ground, some units inside the church, others on the eastern and western flanks.
(Good spacing from troopers of 3rd squad, K Coy)
Some German forces started to surrender, I thought the pace might have worn out the enemy and broken them. I stepped up the suppression fire and started to setup a surrounding force on the south western arc of the area
(as troopers storm a building the German squad puts it's hands up and surrenders)
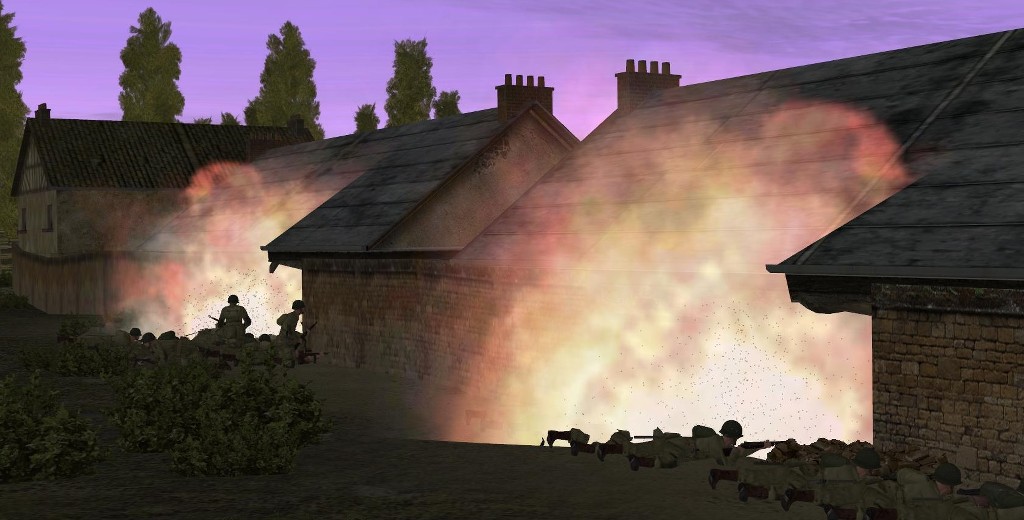
A few seconds later and a Panzerschreck rips through the house, killing the surrendering soldiers, and almost half the assault squad. There was still a lot of fight left in the Germans. It just hotted up from here.
As K and G Coy tightened their arc on the defending force they started to bunch up. It doesn't take a lot to take heavy casualties in this situation, I got them pouring on suppression fire on every building and hedgerow they could see.
(Squads of K and G Coy fire into the farm yard south of the church. A sizable force are on the other side, and a HMG)
A few minutes earlier, I sent G Coy HQ, 1st Team, 3rd Platoon lead and a squad south east in an attempt to prevent any Germans from retreating south. As the fighting intensified I brought them back north, to try and squeeze the defending force from the south. They were a small team, so they shouldn't engage anything big, but they found targets of opportunity.
(1st Team spot a Opel truck and open fire. The driver managed to reverse, drive off turning left, and escape around behind the barn.... not good shooting from the Regt. Exec.)
As the fighting continued in such close quarters I started to see what I'd been dreading. I had to press home the attack to try and limit my casualties.
(a second German grenade, bottom right, just before it detonates. The first had already killed one trooper and wounded another. The second grenade took out the guy on his knee)
Meanwhile, as the truck escaped the poor shooting of the 1st Exec, it rounded the corner and the driver jumped out. Shortly after the empty truck was sprayed with MG fire.
(I never did find the driver, not sure if he survived the battle)

A German fire-team had set itself up in a corner overlooking the farm yard to the south, they were out of LOS and had good cover behind the building. As teams from K and G Coy started to get mixed together, setting up cover arcs and assaulting buildings, I started to lose command cohesion. With bullets flying and grenades exploding a panicking team quickly rattles troops around and then stupid things happen.
(an assault team is ambushed by the hidden German team)
(the rest of the squad make a break for it, in the wrong direction. They run directly into the line of fire, dashing across the farm yard into the enemy teams and take further casualties)
The initial assault had gone well. I'm not sure if that was my method of advance, or because the Germans had been retreating. Now, as I tried to push home that advantage I was starting to pay for the ground. Taking the church and the buildings to the east could be very costly.
More to follow.
The previous battles were from the box QBs. I chose for this one to do some simple AI scripting to see if I could spice up the German defense. I didn't do anything fancy, just adding some more movement and designating specific groups. I did two plans, both similar but with differences on the flanks. The AAR gives the result....
PzC battle 3 - Assault on Saint Mere Eglise.
The objective is simple, secure the town of Eglise; it's main building of notice being a large church on the west side of town. It is surrounded by brocage and small orchard fields. Eglise sits on a slight elevation, with the road heading south running through a minor defilade. My initial plan is for K Coy to do most of the work, it's attack route will be the green line. I'll hold over-watch points at the X's, then break the platoons out for the final assault. G Coy, in it's weakened state will act as right flank protection, pink lines, and then follow K Coy into the town, cleaning up behind them and acting as suppression support as needed. There's a reasonable count of houses east of the church, cleaning them out may get messy so if I can pin the Georgian's and prevent them from retreating that direction I will. I'm thinking G Coy might be able to do this in their second arrow tip.
The first push forward is uneventful. Scouts run ahead of both Coy's to ensure we don't run into any ambushes.
(Here's the church, here's the steeple, open the doors.... where's all the people?)
(Two lead para's from 502nd, G Coy)
Scouts from K Coy reported back sighting German pickets. 1st Platoon advanced forward, setup quietly and then opened up to fix them in place, an assault squad pushed on the pickets flanks to try and finish.
(1st Platoon, K Coy, mortar team open fire on the German forward scouts)
The 4/Georgian troops gave limited return fire, then made a quick dash to retreat before the assault squad could close in.
(Casualties as the Germans break cover and run for it)
The German scout party dashed directly north and K Coy gave chase. It seemed the scouts were part of a group in the north western AO. I ordered 2nd Platoon to identify and pin any force in that area into the NW AO, trying to prevent them linking up with a force in Eglise and the urban area. It was a rapid dash, with 1st and 3rd Platoons trying to cover 2nd's rapid advance. G Coy picked up their pace on the right flank, keeping pace with K Coy. 2nd Platoon were just too late to prevent the NW force from escaping. As the rest of the Company caught up, I decided to continue the pursuit into Eglise and try and keep the momentum. I had AT gun sound contacts which looked like they were being moved by foot. The more I could catch in the open, the less urban fighting. I ordered G Coy to setup over-watch in a group of houses to the south west of the church. They'd now be more than a mop up force, they'd be part of the main assault.
(K Coy secure the NW AO, and prepare to assault east. G Coy secure over-watch)
As K Coy's assault advanced they started to catch-up with the slower rear elements of the retreating German force. I tried to leap frog the squads forward, pinning any retreating forces and then closing quickly to finish them off.
(K Coy watch an abandoned AT gun with unease)
It's not long before G Coy also start to spot moving German soldiers. It looks like the entire Company is pulling back into the buildings east of the church, exactly what I was trying to prevent. It was looking more and more like the 502nd would have to go house clearing.
(G Coy open fire on retreating Germans from their over-watch positions)
It seems the 502nd were also facing some mortar units. Spotter rounds came in, and eventually the barrage, but it was behind the quickly advancing para's
As K Coy started to enter the built-up area west of the church they started to get into street fighting. It's close quarters, and usually very messy for both sides. I wanted to keep a good advancing pace, but not lose Platoon cohesion and took a lot of care how I advanced, ensuring squads provided cover fire. I wanted to prevent any panic breaks into enemy fire arcs.
(Troopers move to catch a hidden Georgian trying to ambush another squad)
(Meanwhile another squad storm the building, catching the ambush distracted, and from behind)
Because the Germans were retreating so quickly, it was difficult to keep them pinned. Often squads would setup to cover, suppress whilst another squad stormed the building, only to find it empty. I continued to try and keep the pace as tempered as possible, to ensure cohesion.
As K Coy got closer to the church the fighting started to intensify. The Germans had started to hold their ground, some units inside the church, others on the eastern and western flanks.
(Good spacing from troopers of 3rd squad, K Coy)
Some German forces started to surrender, I thought the pace might have worn out the enemy and broken them. I stepped up the suppression fire and started to setup a surrounding force on the south western arc of the area
(as troopers storm a building the German squad puts it's hands up and surrenders)
A few seconds later and a Panzerschreck rips through the house, killing the surrendering soldiers, and almost half the assault squad. There was still a lot of fight left in the Germans. It just hotted up from here.
As K and G Coy tightened their arc on the defending force they started to bunch up. It doesn't take a lot to take heavy casualties in this situation, I got them pouring on suppression fire on every building and hedgerow they could see.
(Squads of K and G Coy fire into the farm yard south of the church. A sizable force are on the other side, and a HMG)
A few minutes earlier, I sent G Coy HQ, 1st Team, 3rd Platoon lead and a squad south east in an attempt to prevent any Germans from retreating south. As the fighting intensified I brought them back north, to try and squeeze the defending force from the south. They were a small team, so they shouldn't engage anything big, but they found targets of opportunity.
(1st Team spot a Opel truck and open fire. The driver managed to reverse, drive off turning left, and escape around behind the barn.... not good shooting from the Regt. Exec.)
As the fighting continued in such close quarters I started to see what I'd been dreading. I had to press home the attack to try and limit my casualties.
(a second German grenade, bottom right, just before it detonates. The first had already killed one trooper and wounded another. The second grenade took out the guy on his knee)
Meanwhile, as the truck escaped the poor shooting of the 1st Exec, it rounded the corner and the driver jumped out. Shortly after the empty truck was sprayed with MG fire.
(I never did find the driver, not sure if he survived the battle)
A German fire-team had set itself up in a corner overlooking the farm yard to the south, they were out of LOS and had good cover behind the building. As teams from K and G Coy started to get mixed together, setting up cover arcs and assaulting buildings, I started to lose command cohesion. With bullets flying and grenades exploding a panicking team quickly rattles troops around and then stupid things happen.
(an assault team is ambushed by the hidden German team)
(the rest of the squad make a break for it, in the wrong direction. They run directly into the line of fire, dashing across the farm yard into the enemy teams and take further casualties)
The initial assault had gone well. I'm not sure if that was my method of advance, or because the Germans had been retreating. Now, as I tried to push home that advantage I was starting to pay for the ground. Taking the church and the buildings to the east could be very costly.
More to follow.
Back into the fray and the assault on Saint Mere Eglise.
With the battle now hotting up I'd started to take casualties, nothing extreme but I was starting to get concerned as the brocage and houses gave more opportunities for ambush and unforeseen lines of fire. An assault group from 1st squad, 2nd Platoon K Coy. had already made a panic dash and taken further unnecessary casualties, and a well placed grenade had taken out 30% of another squad. The German MG fire-team which spooked 1st squad, K Coy., had set themselves up in a tight corner with a great arc of fire. They were difficult to get to, and had now become a stop to the entire 502nd's advance. Meanwhile, from the command units I'd sent south, I ordered Bt. HQ to scout further south, they came across some picket troops and decided they'd get stuck in.
(502nd Bt. HQ ambush German picket forces and take prisoners with zero casualties, way to go Command 07)
With the MG fire-team now stopping any advance across the farm yard it was giving the enemy force time to regroup. I started to lay down as much suppression fire as I could muster and then try and flank their position from either north or south.
(squads lay down fire and try to bound around the farm yard to find a spot to take out the MG team)
Further east, beyond the farm yard and overlooking the church courtyard another German fire-team had started to create a stronghold in one of the buildings. It didn't have a great field of fire, but it was another choke point that was stalling any advance.
(a squad returns fire on the stronghold on the west side of the church)
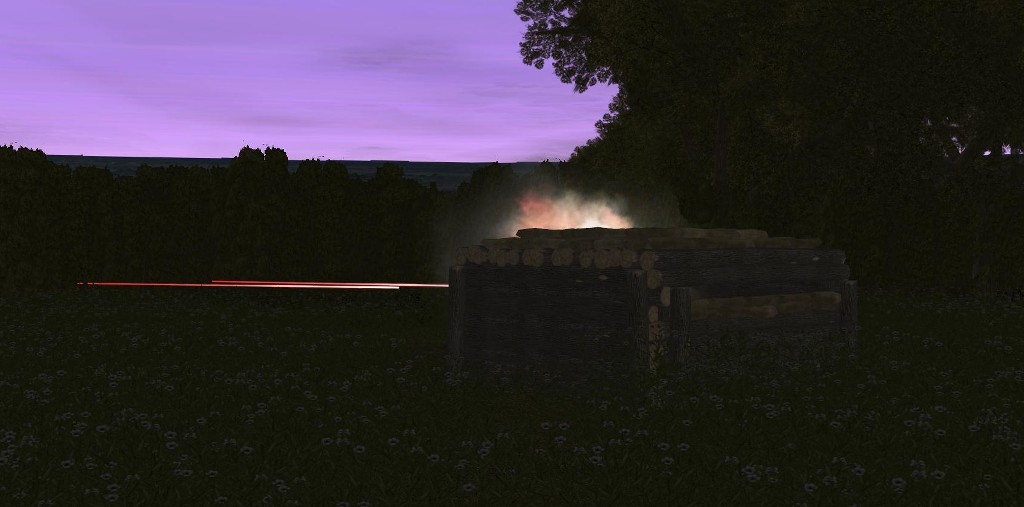
As squads put down suppression on the MG fire-team covering the farm yard, the MG team became distracted returning fire, and I managed to sneak a small assault team around behind them. It was risky, you never know who will spot who first and it can go wrong very quickly against MG's and MP40's.
The 502nd were still taking the occasional casualty, but in general I'd managed to halt the big scale losses and as I flanked the farm yard I ordered various platoons to pull back together into sight of their command elements, getting back command cohesion.
(teams use smoke to cover any open areas as they continue to work around the farm yard. Squads would lay suppression fire, and pop smoke, then another would dash across)
Finally we were set. Everyone who could remotely see the MG ambush spot opened up on the area, the assault team advanced and took out 3 of the remaining 4 man team. The forth surrendered. The assaulting team did take a casualty, another Para WIA to the backdrop screams of "MEDIC!... MEDIC!"
With the MG spot gone, I now had to focus on the stronghold. More enemy troops had headed that way and it covered my objective so it had to be dealt with. I started working squads in flanking moves, but the stronghold had good cover from most angles and the Para's had to put themselves in the open to return fire.
(not a good spot to try and suppress someone in a stone building)
So the latest sit rep. I'd secured the church, skirted the farm yard and was pushing against the stronghold. This would be a tough nut to crack. I decided to push forces from G Coy. further right and loop around through the orchard to get behind the stronghold. There was brocage on the immediate right of the stronghold, I'd send a squad with demo charges to blow their way through to assault when everything was ready. To try a direct assault across open ground through the farm yard or across the open fields on the left would result in heavy casualties. With a plan set, I ordered the 502nd to execute.
(The Georgian company hold a stronghold where the 3 enemy icons are visible. The single icon below is the surrendering soldier from the MG fire-team that had covered the farm yard)
(squads group up and start advancing into position to suppress and assault the stronghold. An abandoned AT gun looks like a monument to the action)
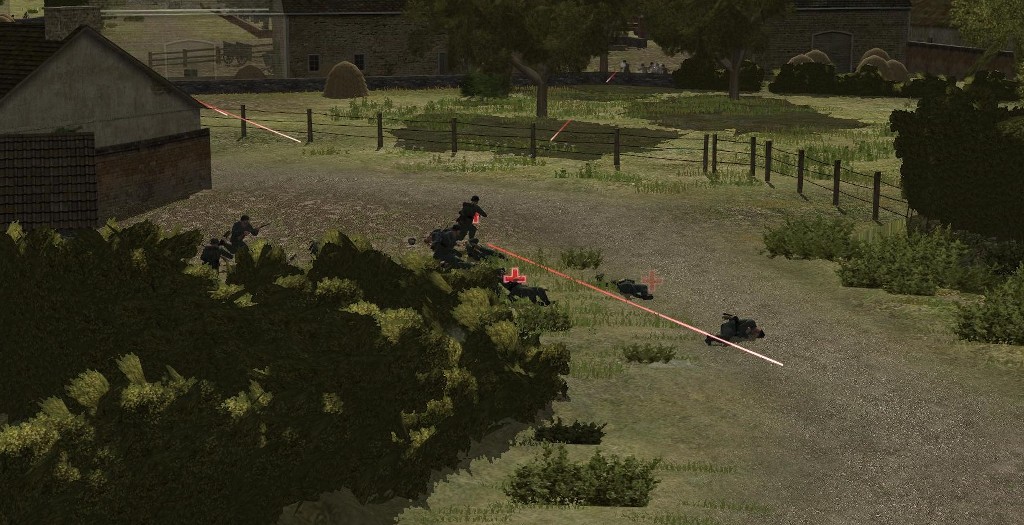
(the demo charge assault squad take a casualty as they try to maneuver themselves into position. German forces had set themselves up to cover routes to the orchard and the stronghold)
As the demo squad set themselves up they saw a hole in the brocage that I'd failed to spot. They decided to push through...... NOOOOOOO. Almost the entire squad is mowed down from German cross fire.
(6 of the 8 man assault team from 2nd Platoon are taken out, several KIA. The defenders were in both buildings)
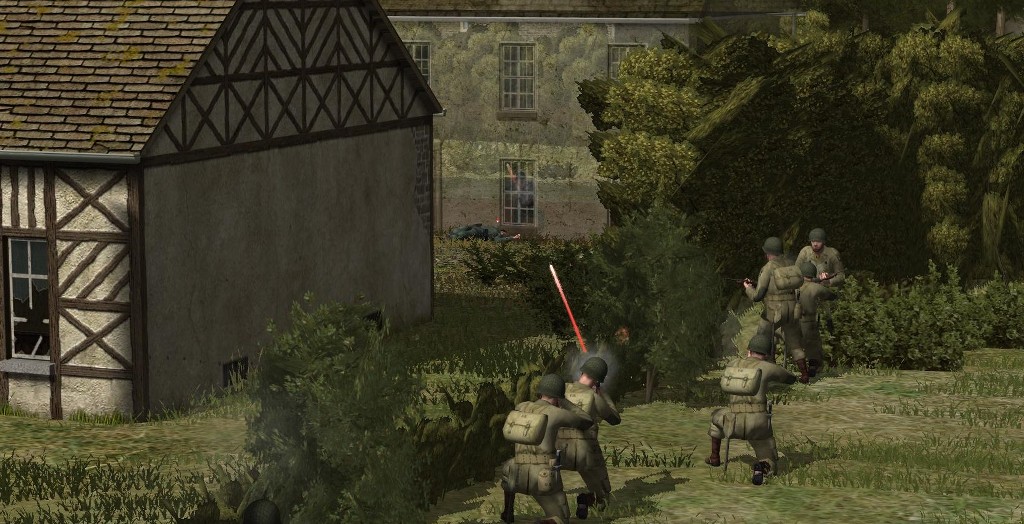
(someone from 3rd Platoon screams out "GRENADE...." and the squad watch as the grenade sails over their heads)
(taking out most of their Platoon's 60mm mortar team with one grenade)
With all the 502nd's focus now on the stronghold the suppression fire was withering. The defenders will broke and most of the force held-up in the two houses made a break for it. The streets that had made the stronghold so difficult to assault, now made it a deathtrap to escape.
(the 502nd spray the retreating forces with fire as they try to make a break for it. No mercy was shown after the casualties from 2nd Platoon. Two squads of retreating Germans were decimated, no survivors)
Not everyone had pulled out of the stronghold and it still had to be assaulted. The returning fire was much weaker, allowing the Para's to get in close to fire directly into the houses.
(no mercy)
With the stronghold defeated, resistance from the 4/Georgian, 739th Grenadier Regt. collapsed and the rest of the town was quickly cleared out. I'd taken just over 20% casualties, I was OK with that considering the urban combat.
(Medics do their work as they try to stop my pixeltruppen going from red crosses to dark red skulls, "HOLD ON SAVAGE, HOLD ON!")
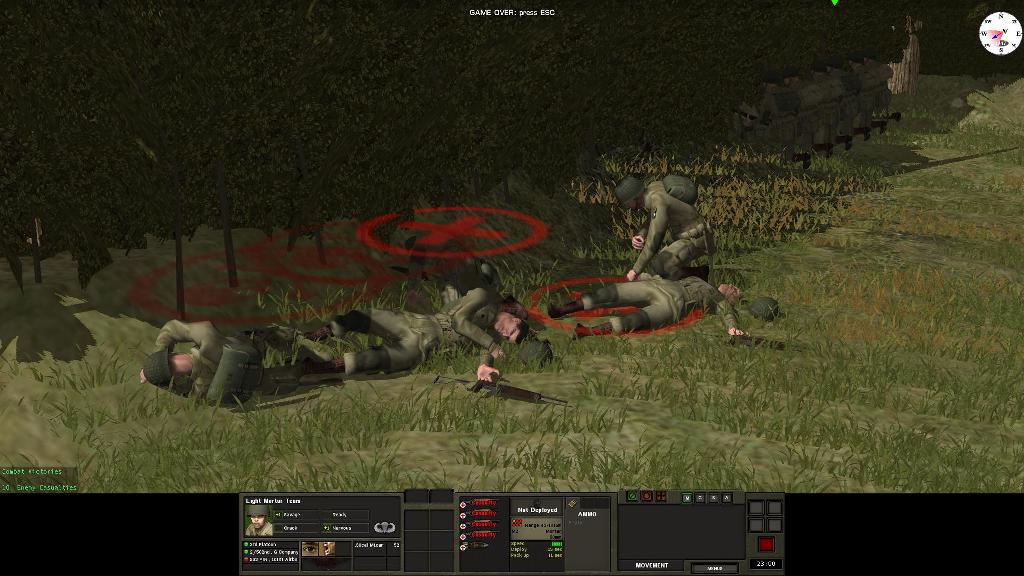
(the entire stronghold assault squad was lost. 8 good pixeltruppen from G Coy. wouldn't be joining the future battles)
(defense still needed to be maintained, good field skills and discipline from this pixeltruppen as a medic gives buddy aid to his friend)
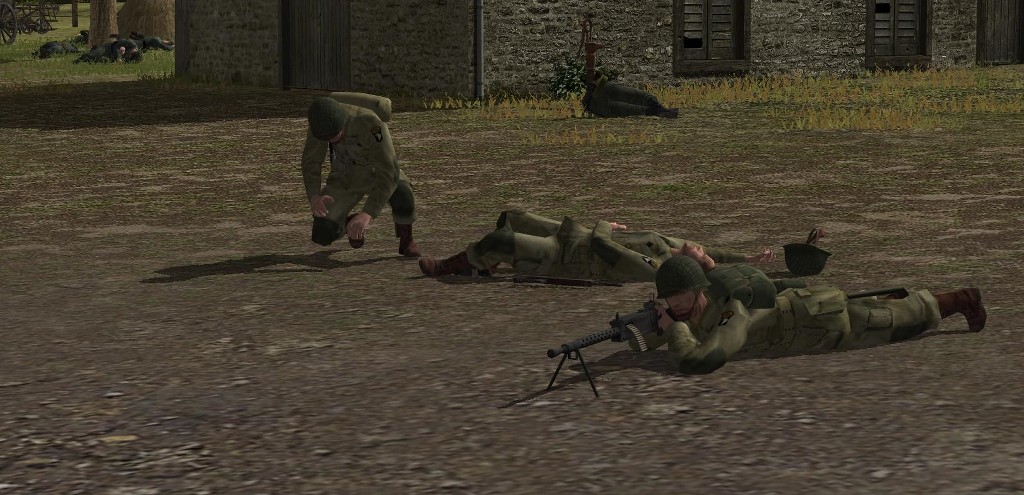
I took out a sizable portion of the Georgian Company's men, with those that are left being seriously impacted. I'll record and reflect these results in PzC before the next turn. Mark one up for the 502nd, another victory in the Getting Started PzC campaign.
With the battle now hotting up I'd started to take casualties, nothing extreme but I was starting to get concerned as the brocage and houses gave more opportunities for ambush and unforeseen lines of fire. An assault group from 1st squad, 2nd Platoon K Coy. had already made a panic dash and taken further unnecessary casualties, and a well placed grenade had taken out 30% of another squad. The German MG fire-team which spooked 1st squad, K Coy., had set themselves up in a tight corner with a great arc of fire. They were difficult to get to, and had now become a stop to the entire 502nd's advance. Meanwhile, from the command units I'd sent south, I ordered Bt. HQ to scout further south, they came across some picket troops and decided they'd get stuck in.
(502nd Bt. HQ ambush German picket forces and take prisoners with zero casualties, way to go Command 07)
With the MG fire-team now stopping any advance across the farm yard it was giving the enemy force time to regroup. I started to lay down as much suppression fire as I could muster and then try and flank their position from either north or south.
(squads lay down fire and try to bound around the farm yard to find a spot to take out the MG team)
Further east, beyond the farm yard and overlooking the church courtyard another German fire-team had started to create a stronghold in one of the buildings. It didn't have a great field of fire, but it was another choke point that was stalling any advance.
(a squad returns fire on the stronghold on the west side of the church)
As squads put down suppression on the MG fire-team covering the farm yard, the MG team became distracted returning fire, and I managed to sneak a small assault team around behind them. It was risky, you never know who will spot who first and it can go wrong very quickly against MG's and MP40's.
The 502nd were still taking the occasional casualty, but in general I'd managed to halt the big scale losses and as I flanked the farm yard I ordered various platoons to pull back together into sight of their command elements, getting back command cohesion.
(teams use smoke to cover any open areas as they continue to work around the farm yard. Squads would lay suppression fire, and pop smoke, then another would dash across)
Finally we were set. Everyone who could remotely see the MG ambush spot opened up on the area, the assault team advanced and took out 3 of the remaining 4 man team. The forth surrendered. The assaulting team did take a casualty, another Para WIA to the backdrop screams of "MEDIC!... MEDIC!"
With the MG spot gone, I now had to focus on the stronghold. More enemy troops had headed that way and it covered my objective so it had to be dealt with. I started working squads in flanking moves, but the stronghold had good cover from most angles and the Para's had to put themselves in the open to return fire.
(not a good spot to try and suppress someone in a stone building)
So the latest sit rep. I'd secured the church, skirted the farm yard and was pushing against the stronghold. This would be a tough nut to crack. I decided to push forces from G Coy. further right and loop around through the orchard to get behind the stronghold. There was brocage on the immediate right of the stronghold, I'd send a squad with demo charges to blow their way through to assault when everything was ready. To try a direct assault across open ground through the farm yard or across the open fields on the left would result in heavy casualties. With a plan set, I ordered the 502nd to execute.
(The Georgian company hold a stronghold where the 3 enemy icons are visible. The single icon below is the surrendering soldier from the MG fire-team that had covered the farm yard)
(squads group up and start advancing into position to suppress and assault the stronghold. An abandoned AT gun looks like a monument to the action)
(the demo charge assault squad take a casualty as they try to maneuver themselves into position. German forces had set themselves up to cover routes to the orchard and the stronghold)
As the demo squad set themselves up they saw a hole in the brocage that I'd failed to spot. They decided to push through...... NOOOOOOO. Almost the entire squad is mowed down from German cross fire.
(6 of the 8 man assault team from 2nd Platoon are taken out, several KIA. The defenders were in both buildings)
(someone from 3rd Platoon screams out "GRENADE...." and the squad watch as the grenade sails over their heads)
(taking out most of their Platoon's 60mm mortar team with one grenade)
With all the 502nd's focus now on the stronghold the suppression fire was withering. The defenders will broke and most of the force held-up in the two houses made a break for it. The streets that had made the stronghold so difficult to assault, now made it a deathtrap to escape.
(the 502nd spray the retreating forces with fire as they try to make a break for it. No mercy was shown after the casualties from 2nd Platoon. Two squads of retreating Germans were decimated, no survivors)
Not everyone had pulled out of the stronghold and it still had to be assaulted. The returning fire was much weaker, allowing the Para's to get in close to fire directly into the houses.
(no mercy)
With the stronghold defeated, resistance from the 4/Georgian, 739th Grenadier Regt. collapsed and the rest of the town was quickly cleared out. I'd taken just over 20% casualties, I was OK with that considering the urban combat.
(Medics do their work as they try to stop my pixeltruppen going from red crosses to dark red skulls, "HOLD ON SAVAGE, HOLD ON!")
(the entire stronghold assault squad was lost. 8 good pixeltruppen from G Coy. wouldn't be joining the future battles)
(defense still needed to be maintained, good field skills and discipline from this pixeltruppen as a medic gives buddy aid to his friend)
I took out a sizable portion of the Georgian Company's men, with those that are left being seriously impacted. I'll record and reflect these results in PzC before the next turn. Mark one up for the 502nd, another victory in the Getting Started PzC campaign.


Excellent account. I am enjoying your AAR.
Thanks for all the positive comments.
Battle 4 is a small engagement between C Coy., 1/501st PIR and 1st Coy. I/GR. 919th (Bicycle Troops). Both companies are at 90% strength, the 501st as per previous battles are fit, extremely motivated, and crack trained troops. The Grenadiers are generally green, poorly motivated and with typical leadership skills. The objective for the 501st is to secure the road to Saint Marie du Mont to assist the US troops landing at Utah beach.
I chose a small QB map and decided to try if I could get a little more sophistication out of the AI rather than use the, frankly terrible, AI plan that was in the QB map. After a chat with Ithikial, I spent a fair few hours trying to get my head around triggers and AI movement orders. I didn't have a great deal of success, I couldn't get the AI to do pretty much any basic tactics I wanted them to do. With one plan they'd do X, a minor tweak and they'd go and do the complete opposite. I wanted a decent challenge, but in the end, out of frustration, I plugged in an AI plan which I didn't expect to present a challenge and thought I'd get this battle over and move on.
Due to the size of the map I set the timer at 35 minutes. We join the battle at just past 10:00 hrs with C Coy. kicking off at point Dog. The battle did not turn out how I expected, I hope you enjoy the AAR as much as I enjoyed the battle.
Looking north, C Coy are attacking directly south. As I'd put the plan together and run a few basic tests I kinda knew where 1st Coy were. I tried to run the battle as if I didn't, so kicked off with sending out scouts and looking to locate where the enemy was. 1st Platoon, green, would take my left flank and look to setup over-watch points at the two x points on their route. They'd go through the copse of trees which would give the best concealment but the toughest terrain to fight in. 2nd Platoon, blue, would take my right flank, setup over-watch at the X's. They had a large open field to advance across with good fire base positions for the Grenadiers. I'd have to secure fire superiority to advance across the fields. 3rd Platoon was to stay in reserve to support whoever was looking to engage the larger force.
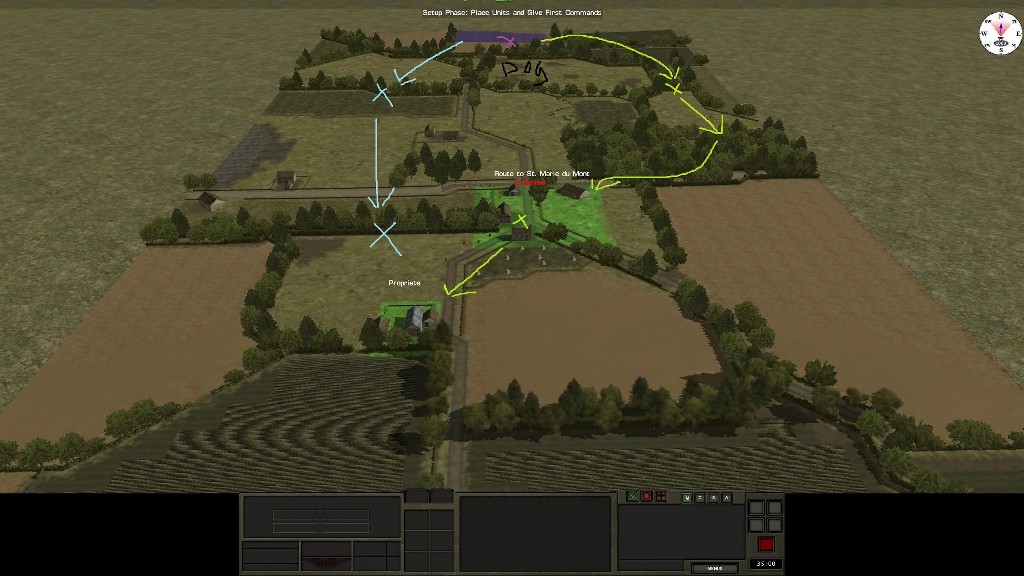
Rather than funnel through the brocage and hedgerow openings at potential ambush points I had the advancing Platoons use demo charges to blow strategic holes to advance through.
(1st Platoon lead blast a hedgerow for the rest of the advancing squads to move through)
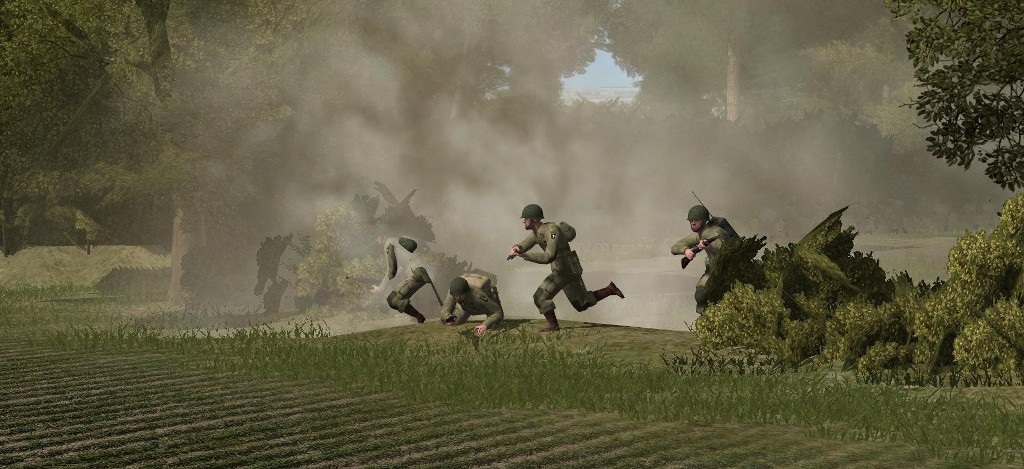
2nd Platoon scouts got sight of the road junction without being engaged. I left them watching as the rest of the Platoon and Btn. and C Coy HQ advanced to their over-watch positions.
(Pvt. Urich scouts the road junction which is the first objective. He's got no movement)
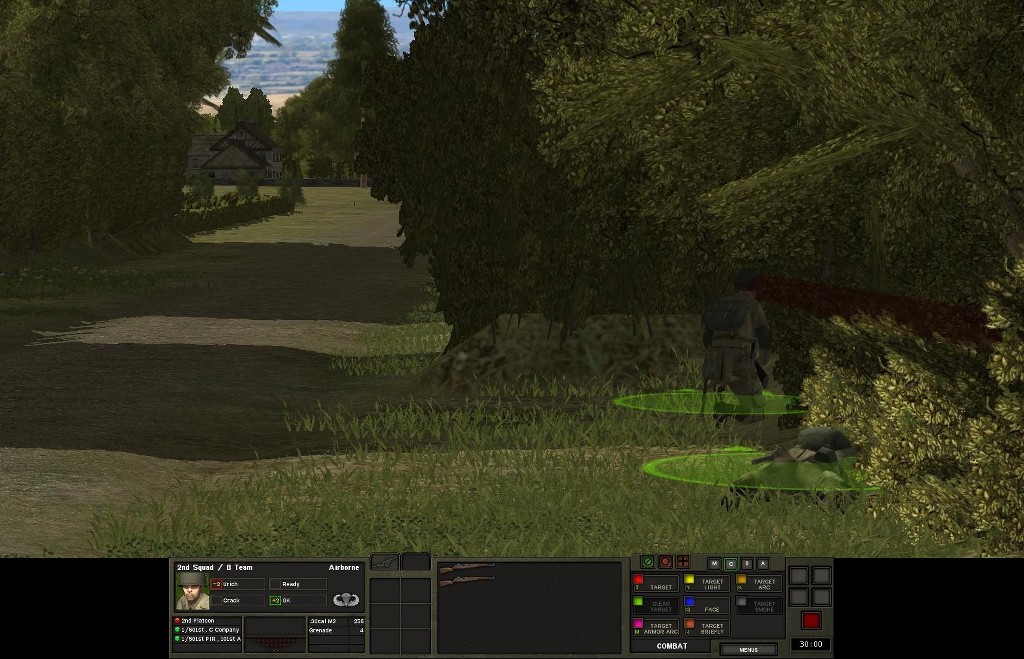
Shortly after, scouts from 1st Platoon get eyes on what looks like a potential picket team. Both team's seem to be on weapons hold as no shots are fired. As the scouts watch I bring up the rest of 1st Platoon in an over-watch position and decide to commit 3rd Platoon to my left flank and the copse attack route. I was nervous about pushing across the open fields.
(I see you, do you see me?)
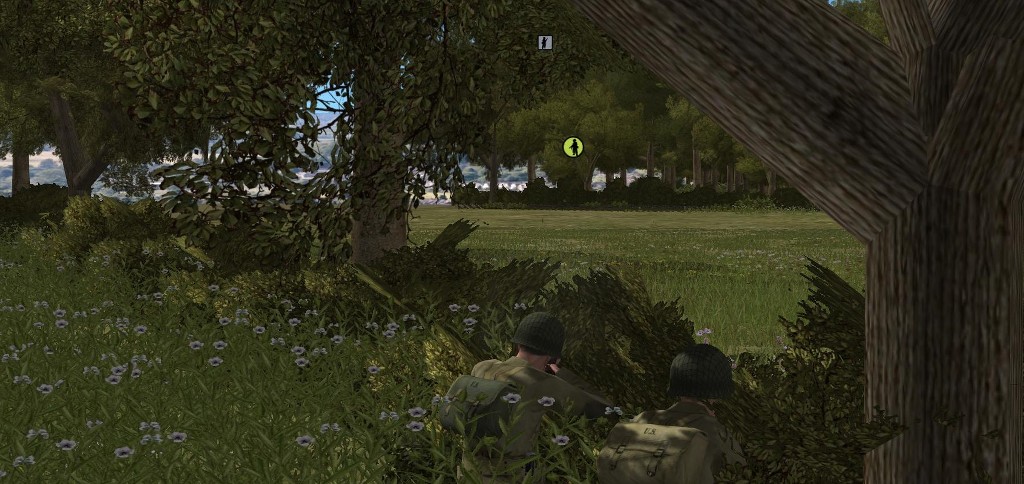
With 2nd Platoon in over-watch on my right flank, I advance the scouts across the field to the first group of buildings. All seemed quiet until they almost reached the building and an MG swept the ground around the scouts. They made it into the cover of the building, just.
(scouts dash forward with Urich in the lead. Not much happening until......)

(the team just get behind, and then inside, the building as the MG opens fire across the open field)
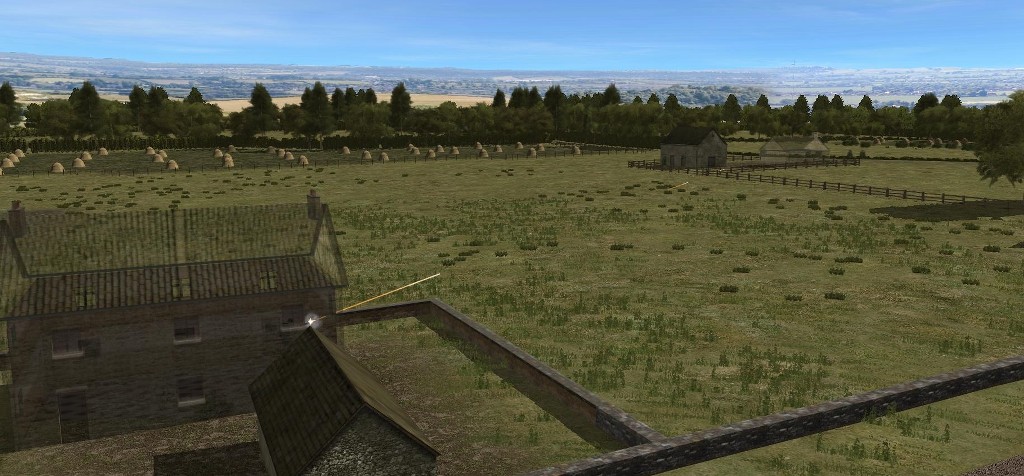
Shortly after the MG opened fire, the scout team in the house was then engaged by rifle fire from the brocage on the western side of the copse of trees. To advance across the open field would be difficult, the scout team was stuck at the house for the time being
(Urich and Malcha were stuck in the house and forced to keep their heads down)
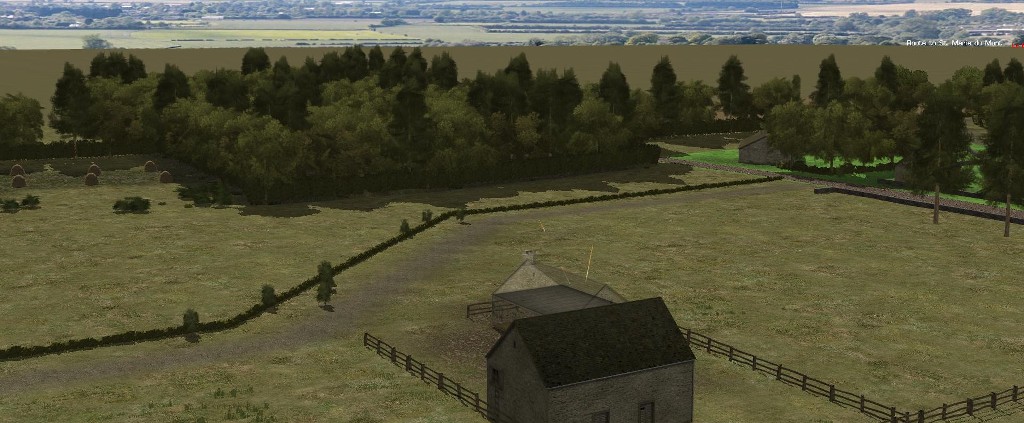
On my left flank, with an over-watch setup I started suppression fire on the picket team and sent forward the scout team to try and eliminate the block. As soon as the scout team broke cover a larger force of Grenadiers opened fire. It seemed it wasn't a picket force, but more an ambush force.
(1st Platoon trade shots with a force from 1st Coy., 919th)
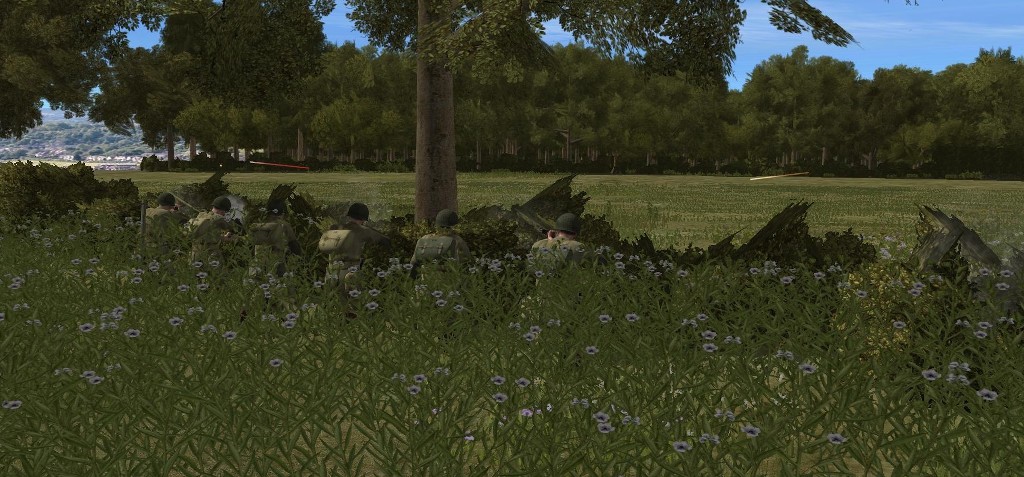
The firepower of the Para's was far heavier than the Grenadiers and almost instantly the Para's opened up, the Grenadier force started to withdraw. I'd lost two troops in the engagement, 1 from the scout party, the other from an over-watch squad.
(Grenadiers withdraw into the copse)
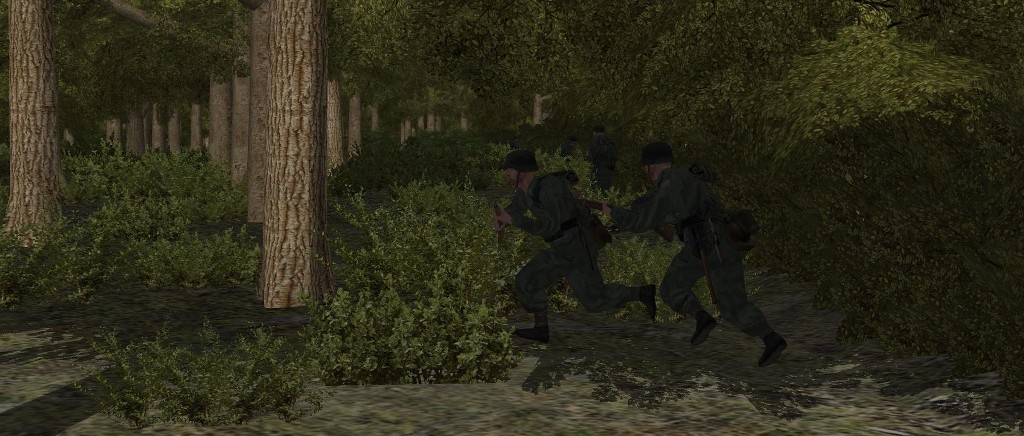
With the clock ticking down I made the choice to make my main line of advance on my left flank through the copse of trees. My stronger force was their and I didn't want to spend time relocating. I also had contacts on the brocage facing my right flank, and was struggling to suppress the force on the western side of the copse. 3rd Platoon would follow 1st and provide support as they assaulted through the copse and onto the objectives. 2nd Platoon would pin whatever force was on my right flank.
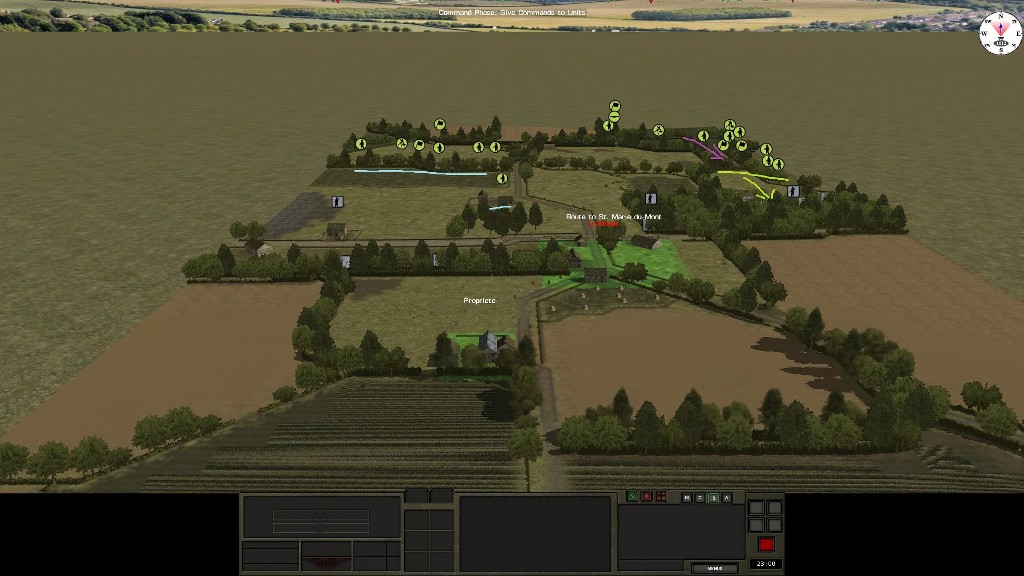
I raced 1st Platoon forward to the German picket line hedgerow on the outskirts of the copse. I'd hoped to catch some of the retreating Grenadiers and cause a few casualties as they retreated.
(1st and 3rd squad from 1st Platoon advance quickly up to the hedgerow looking for Germans to shoot)
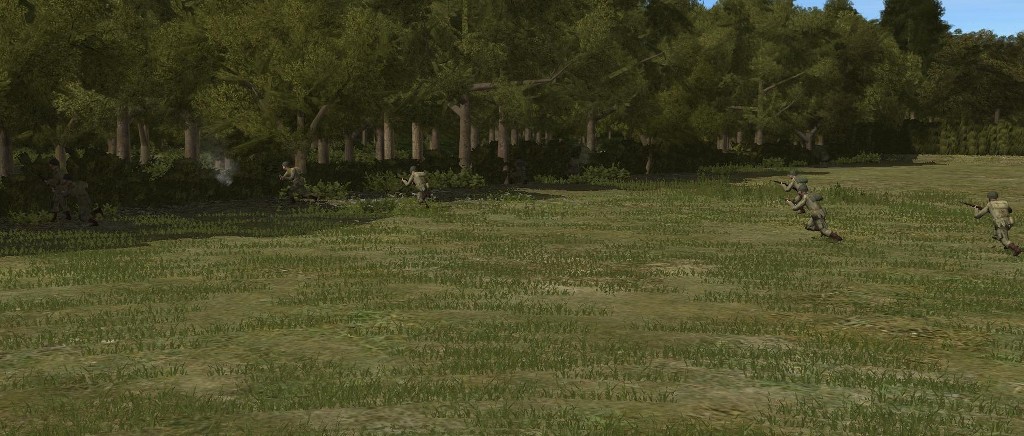
On my right flank I laid down heavy suppression fire on the MG position and the hedgerow and dashed forward a squad. They bounded forward and managed to make it with minimal casualties. I now had a force which was close enough to effectively suppress the troops on the western side of the copse of trees.
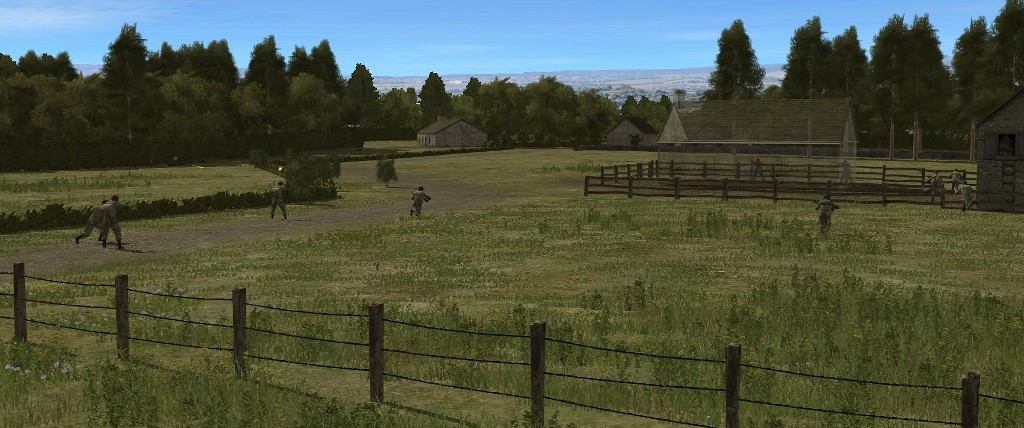
With 1st Platoon now fully in position on the left flank, and no contacts, I moved 3rd Platoon forward to start to setup an over-watch for 1st as they would move into the copse. My advance was taking time, setting up various over-watch and cover teams but I didn't want to rush forward into an ambush.
(men from 1st Platoon prepare to assault, "hail Mary for the grace of God, hail Mary for the grace of God")
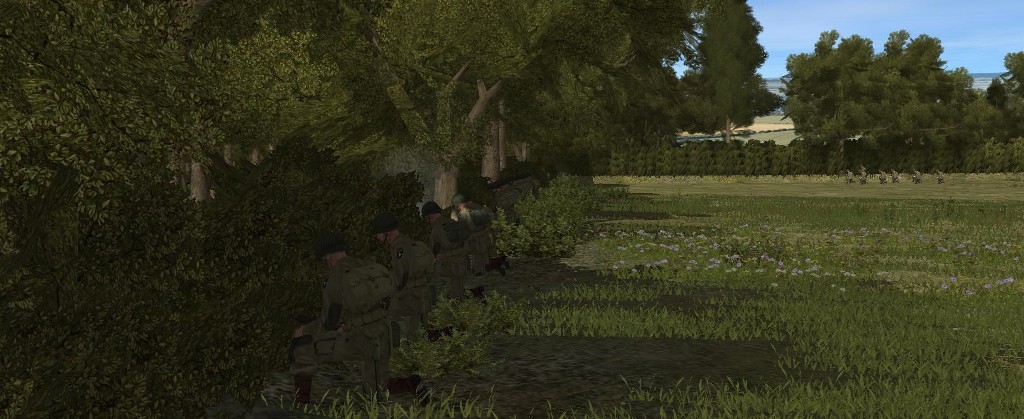
And then I moved forward into an ambush.... The Grenadiers had retreated into the copse, but not out the other side. They'd drawn me into an ambush and a fight in a dense wood.
(the first of several casualties in the fight for the left flank copse)
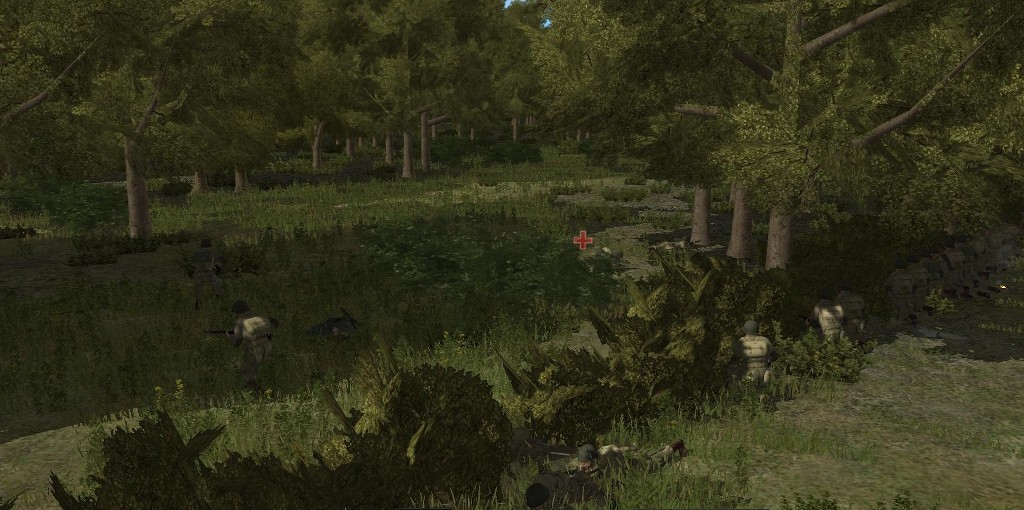
I wasn't sure how many Grenadiers were in the copse, or how they'd set themselves up. I had broken down squads try to advance forward carefully covering each other, but it was very slow and painful.
(two fire-teams trade shots across the copse. It was impossible to judge where the Germans would be)

(3rd Platoon in over-watch try to provide cover fire into the copse to allow 1st to advance. They could only see a limited amount into the copse, so it was all blind area fire)
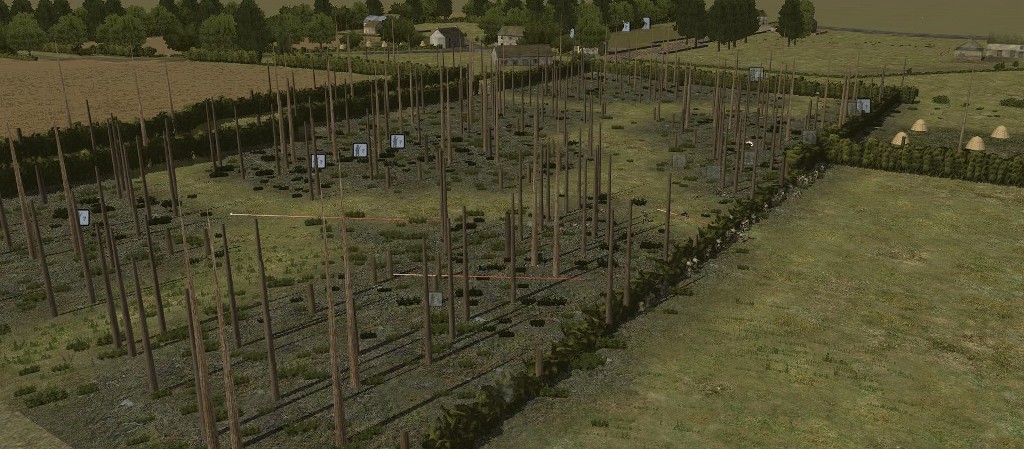
Rather than be funneled through the one entrance into the copse, I got 1st Platoon lead to blow a second entrance. I then brought in broken down elements of 3rd Platoon into the copse to support. I intended to advance under heavy suppression fire to try and route out the Grenadiers.
(1st Platoon lead use the last of their charges on the brocage before following the Platoon into the copse)
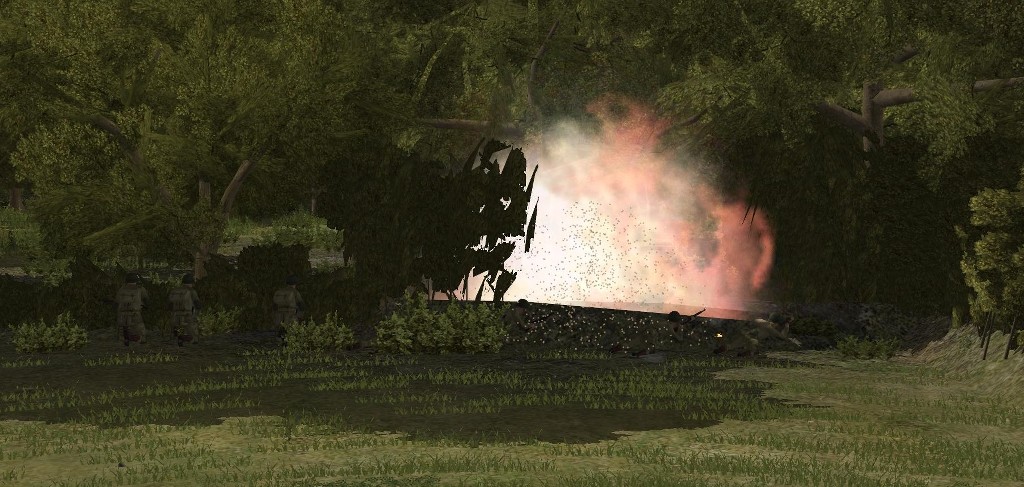
Rest of AAR to follow.
Battle 4 is a small engagement between C Coy., 1/501st PIR and 1st Coy. I/GR. 919th (Bicycle Troops). Both companies are at 90% strength, the 501st as per previous battles are fit, extremely motivated, and crack trained troops. The Grenadiers are generally green, poorly motivated and with typical leadership skills. The objective for the 501st is to secure the road to Saint Marie du Mont to assist the US troops landing at Utah beach.
I chose a small QB map and decided to try if I could get a little more sophistication out of the AI rather than use the, frankly terrible, AI plan that was in the QB map. After a chat with Ithikial, I spent a fair few hours trying to get my head around triggers and AI movement orders. I didn't have a great deal of success, I couldn't get the AI to do pretty much any basic tactics I wanted them to do. With one plan they'd do X, a minor tweak and they'd go and do the complete opposite. I wanted a decent challenge, but in the end, out of frustration, I plugged in an AI plan which I didn't expect to present a challenge and thought I'd get this battle over and move on.
Due to the size of the map I set the timer at 35 minutes. We join the battle at just past 10:00 hrs with C Coy. kicking off at point Dog. The battle did not turn out how I expected, I hope you enjoy the AAR as much as I enjoyed the battle.
Looking north, C Coy are attacking directly south. As I'd put the plan together and run a few basic tests I kinda knew where 1st Coy were. I tried to run the battle as if I didn't, so kicked off with sending out scouts and looking to locate where the enemy was. 1st Platoon, green, would take my left flank and look to setup over-watch points at the two x points on their route. They'd go through the copse of trees which would give the best concealment but the toughest terrain to fight in. 2nd Platoon, blue, would take my right flank, setup over-watch at the X's. They had a large open field to advance across with good fire base positions for the Grenadiers. I'd have to secure fire superiority to advance across the fields. 3rd Platoon was to stay in reserve to support whoever was looking to engage the larger force.
Rather than funnel through the brocage and hedgerow openings at potential ambush points I had the advancing Platoons use demo charges to blow strategic holes to advance through.
(1st Platoon lead blast a hedgerow for the rest of the advancing squads to move through)
2nd Platoon scouts got sight of the road junction without being engaged. I left them watching as the rest of the Platoon and Btn. and C Coy HQ advanced to their over-watch positions.
(Pvt. Urich scouts the road junction which is the first objective. He's got no movement)
Shortly after, scouts from 1st Platoon get eyes on what looks like a potential picket team. Both team's seem to be on weapons hold as no shots are fired. As the scouts watch I bring up the rest of 1st Platoon in an over-watch position and decide to commit 3rd Platoon to my left flank and the copse attack route. I was nervous about pushing across the open fields.
(I see you, do you see me?)
With 2nd Platoon in over-watch on my right flank, I advance the scouts across the field to the first group of buildings. All seemed quiet until they almost reached the building and an MG swept the ground around the scouts. They made it into the cover of the building, just.
(scouts dash forward with Urich in the lead. Not much happening until......)
(the team just get behind, and then inside, the building as the MG opens fire across the open field)
Shortly after the MG opened fire, the scout team in the house was then engaged by rifle fire from the brocage on the western side of the copse of trees. To advance across the open field would be difficult, the scout team was stuck at the house for the time being
(Urich and Malcha were stuck in the house and forced to keep their heads down)
On my left flank, with an over-watch setup I started suppression fire on the picket team and sent forward the scout team to try and eliminate the block. As soon as the scout team broke cover a larger force of Grenadiers opened fire. It seemed it wasn't a picket force, but more an ambush force.
(1st Platoon trade shots with a force from 1st Coy., 919th)
The firepower of the Para's was far heavier than the Grenadiers and almost instantly the Para's opened up, the Grenadier force started to withdraw. I'd lost two troops in the engagement, 1 from the scout party, the other from an over-watch squad.
(Grenadiers withdraw into the copse)
With the clock ticking down I made the choice to make my main line of advance on my left flank through the copse of trees. My stronger force was their and I didn't want to spend time relocating. I also had contacts on the brocage facing my right flank, and was struggling to suppress the force on the western side of the copse. 3rd Platoon would follow 1st and provide support as they assaulted through the copse and onto the objectives. 2nd Platoon would pin whatever force was on my right flank.
I raced 1st Platoon forward to the German picket line hedgerow on the outskirts of the copse. I'd hoped to catch some of the retreating Grenadiers and cause a few casualties as they retreated.
(1st and 3rd squad from 1st Platoon advance quickly up to the hedgerow looking for Germans to shoot)
On my right flank I laid down heavy suppression fire on the MG position and the hedgerow and dashed forward a squad. They bounded forward and managed to make it with minimal casualties. I now had a force which was close enough to effectively suppress the troops on the western side of the copse of trees.
With 1st Platoon now fully in position on the left flank, and no contacts, I moved 3rd Platoon forward to start to setup an over-watch for 1st as they would move into the copse. My advance was taking time, setting up various over-watch and cover teams but I didn't want to rush forward into an ambush.
(men from 1st Platoon prepare to assault, "hail Mary for the grace of God, hail Mary for the grace of God")
And then I moved forward into an ambush.... The Grenadiers had retreated into the copse, but not out the other side. They'd drawn me into an ambush and a fight in a dense wood.
(the first of several casualties in the fight for the left flank copse)
I wasn't sure how many Grenadiers were in the copse, or how they'd set themselves up. I had broken down squads try to advance forward carefully covering each other, but it was very slow and painful.
(two fire-teams trade shots across the copse. It was impossible to judge where the Germans would be)
(3rd Platoon in over-watch try to provide cover fire into the copse to allow 1st to advance. They could only see a limited amount into the copse, so it was all blind area fire)
Rather than be funneled through the one entrance into the copse, I got 1st Platoon lead to blow a second entrance. I then brought in broken down elements of 3rd Platoon into the copse to support. I intended to advance under heavy suppression fire to try and route out the Grenadiers.
(1st Platoon lead use the last of their charges on the brocage before following the Platoon into the copse)
Rest of AAR to follow.
Part 2....
Situation update. I was 20 minutes into the engagement and had 15 minutes left to secure the two objectives. I'd committed my main attack force to my left flank, through a copse which the Grenadiers were defending. On my right flank I'd identified two MG teams and had over-watch suppressing them whilst the squad out front, at the blue X, were putting fire onto the force on the west side of the copse.
(time was ticking down but I was staying calm, I had forces in touching distance of my first objective)
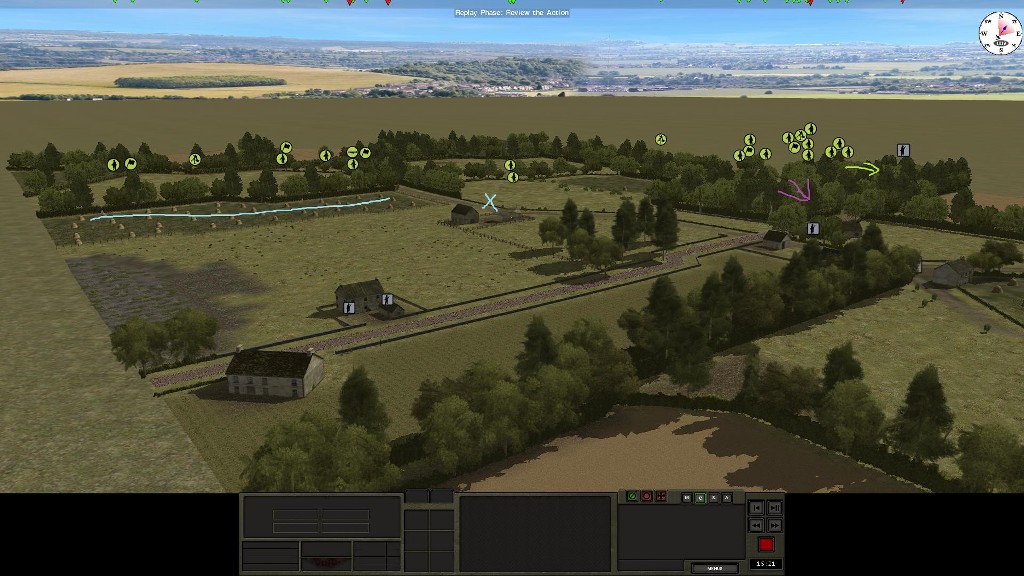
The fighting in the copse was fierce. Grenades, heavy MG fire, a lot of it blind. I tried to move teams forward covering each other with different LOS. Sometimes it worked, others did not and the penalty was casualties.
(1st Platoon take another casualty as fire between 3rd and an unseen enemy crosses in front of them)
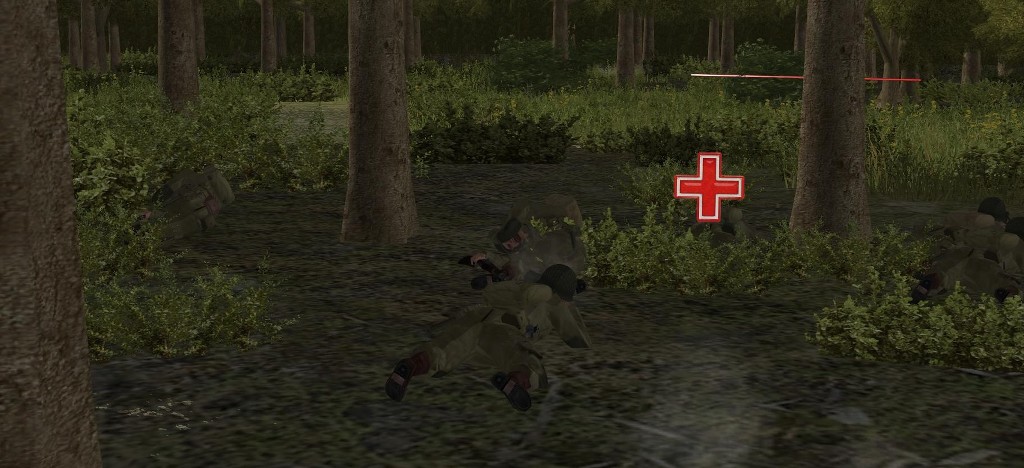
My first thought had been that the Grenadiers in the copse were stragglers from the retreat or from the defense group on the western side, but the Grenadier teams were too well organised and groups to large to be demotivated stragglers. I was going to have to fight all the way through the copse to get to the objective.
(a Grenadier fire-team laying in ambush open up on an advance element of 3rd Platoon)
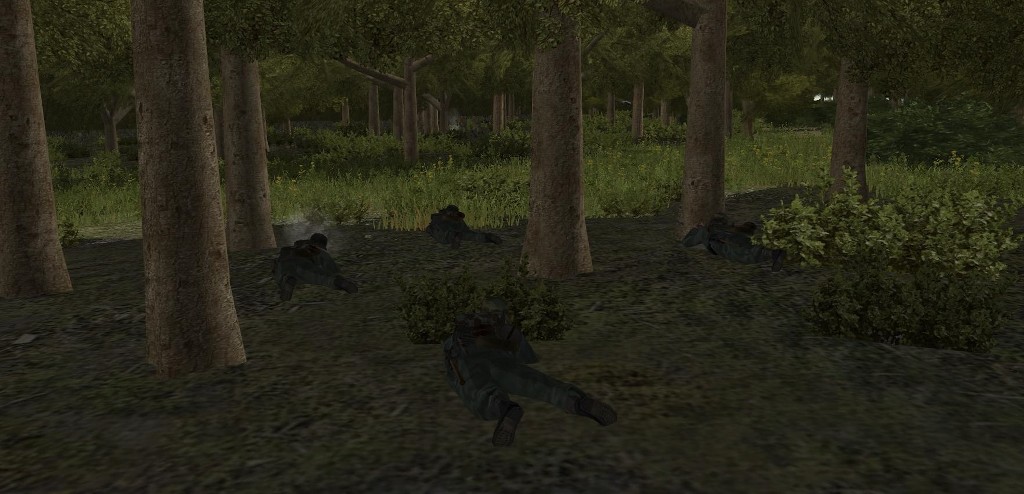
(more casualties, this time 3rd Platoon take a grenade in amongst a fire-team)
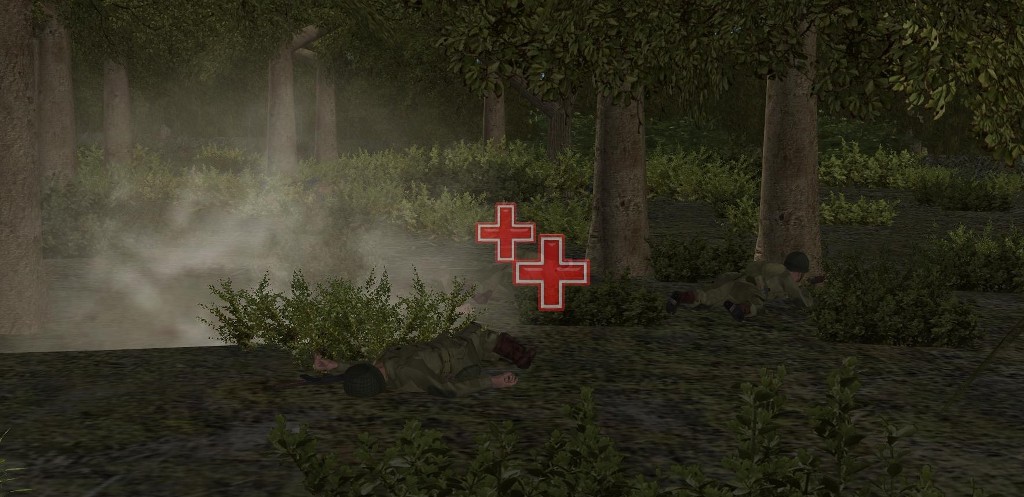
I thought I'd secured my right flank in the copse, when suddenly I saw a long burst of MG fire followed by screams. A fire-team that I'd left as rearguard was hosed with MG fire and most of the team taken out. They'd not moved for several minutes, so the Grenadiers must have moved.
(I lose almost an entire fire-team from 3rd Platoon that had been acting as rearguard and covering the right flank)
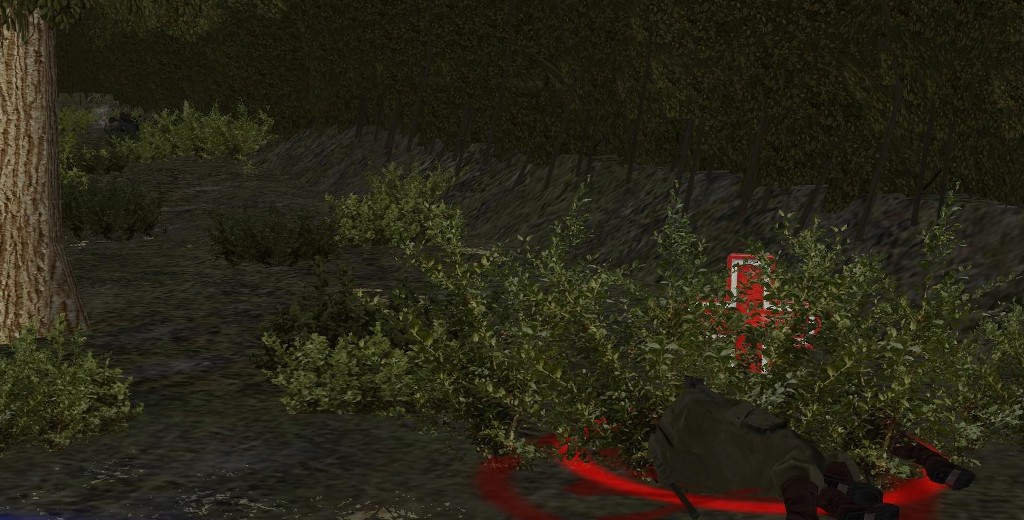
(the Grenadiers had revealed themselves, an MG team from 1st Platoon open up to seek revenge)
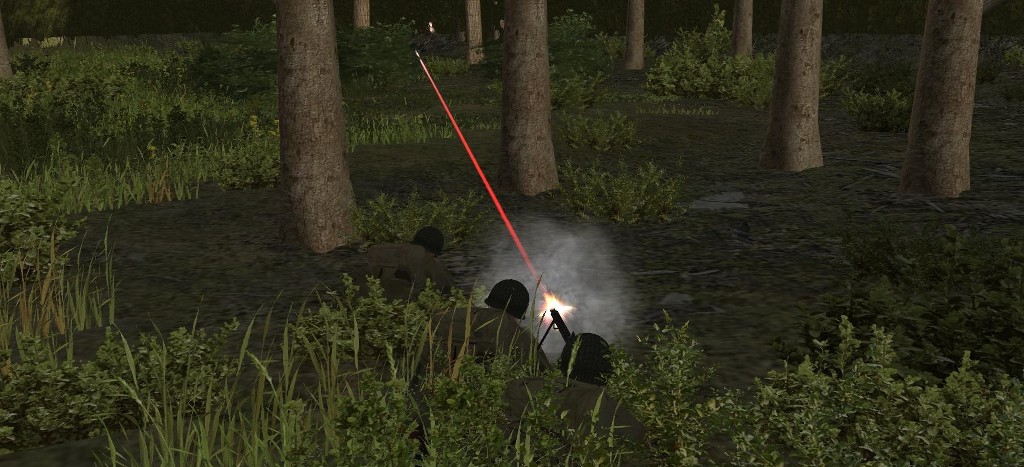
With my advance on the left flank moving so slowly and each time I tried to speed up the pace I paid for it with more casualties, I decided I'd need to start pushing on my right flank as an alternative force to secure at least objective one. The MG teams appeared to have pulled back from the houses or were suppressed, and the forces on the western side of the copse were now engaged with 1st and 3rd Platoon and fire from that area was minimal. I made the decision to advance 2nd Platoon.
(out with the smoke to cover my right flank advance)

Under cover of smoke my teams leapfrogged forward, laying down suppression fire on the brocage and buildings in front of them. Return fire was minimal at this point and I was starting to think that despite the open terrain my right flank might have been a better attack route.
(teams from 2nd Platoon advance through smoke)
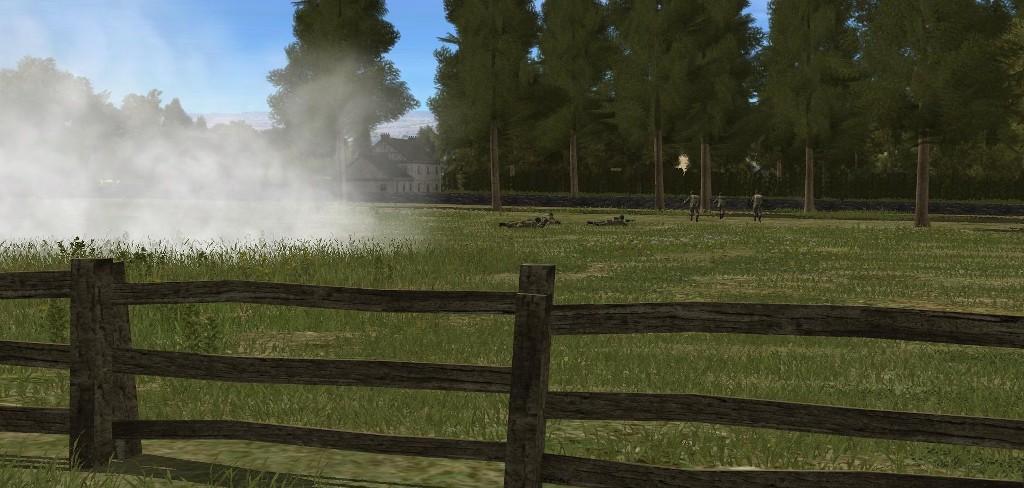
As 2nd got closer they were suddenly under heavy fire from the brocage and the buildings at the first objective. I started to lose men so halted the advance, sought cover or concealment and then tried to gain fire superiority again.
(casualties in 2nd Platoons advance team)
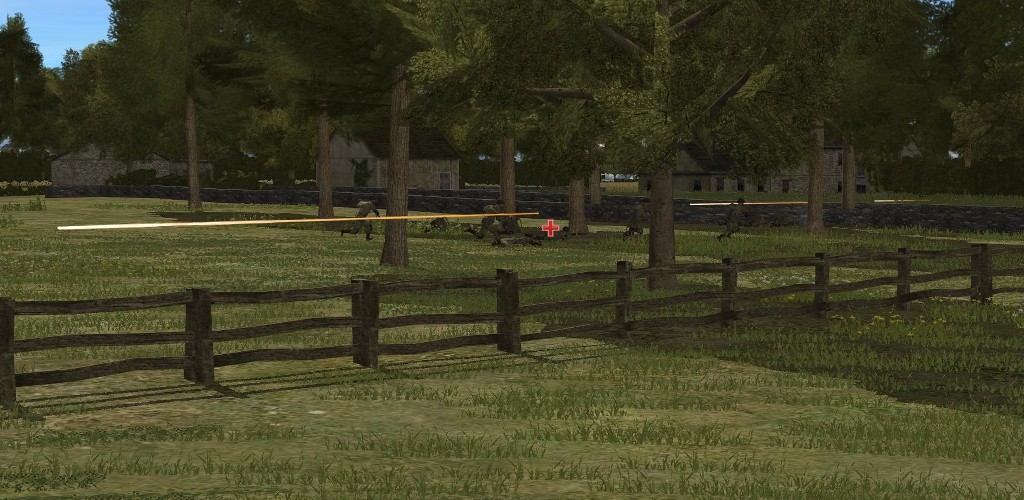
On my left flank I'd taken casualties from Grenadier forces which were behind the brocage leading out of the copse. I got a team against the brocage and blew a hole to get a team through to try and ambush the MG team which had caught and almost wiped out a fire-team. The Germans were gone...., they'd already pulled out before I managed to get a team to flank them.
(a two man team try to flank a Grenadier MG team only to find empty road)
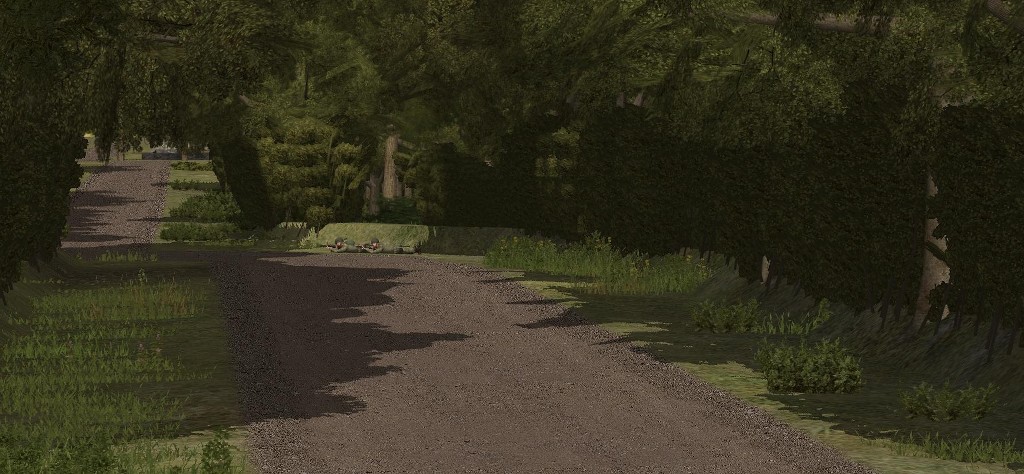
With my forces now having pushed the Grenadiers out of the copse I got them all forward to start to assault the first objective and to take some of the pressure off of 2nd Platoon that was fighting for the right flank. To top it off, I was starting to run low on ammo so blind suppression fire had to be rationed to ensure I could continue to secure both objectives.
(at last, 1st Platoon get eyes on the first objective as the Grenadiers withdraw behind smoke)
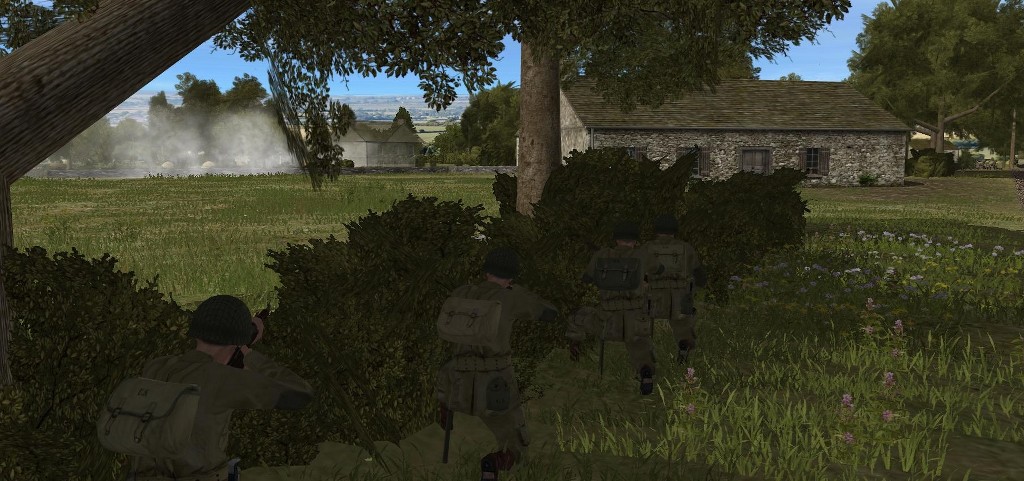
I was running out of time, ammo, and decided that I'd abandon securing the second objective and focus on the first. If I could get that and ensure I didn't suffer too many more casualties I'd maybe secure the victory.
(tick tock, tick tock. Grenadiers hold the first and second objectives but I had to have fire superiority with my automatic weapons and unit strength?)
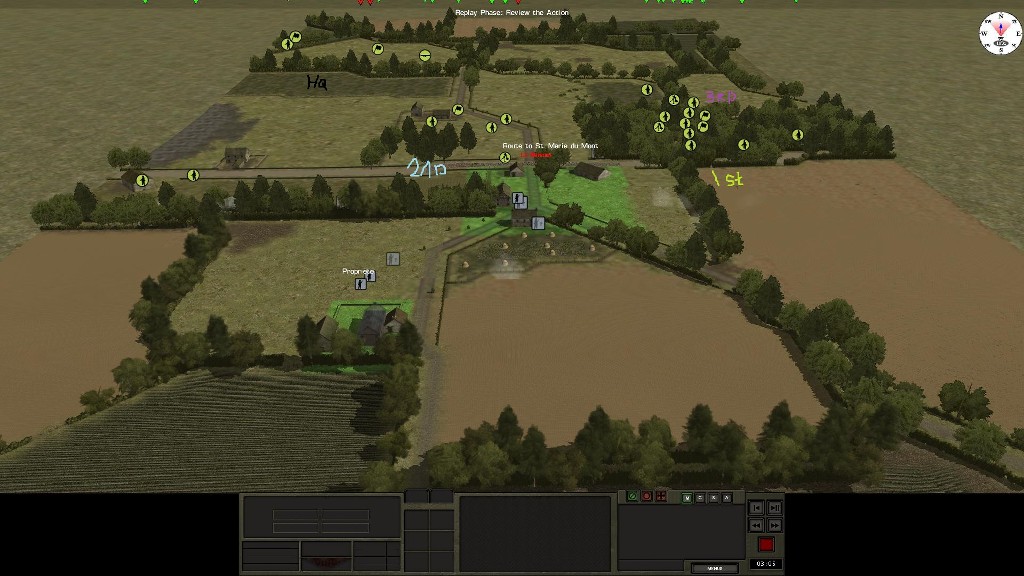
The firefight for the first objective was heavy with no quarter given, but I was getting mixed messages from the Grenadiers. I had guys surrendering whilst right next to them others fought on. I had no choice but to put more fire onto the buildings in an attempt to suppress and break them, so I could advance.
(a Grenadier surrenders whilst his comrade fights on, spitting out lead from his MG)
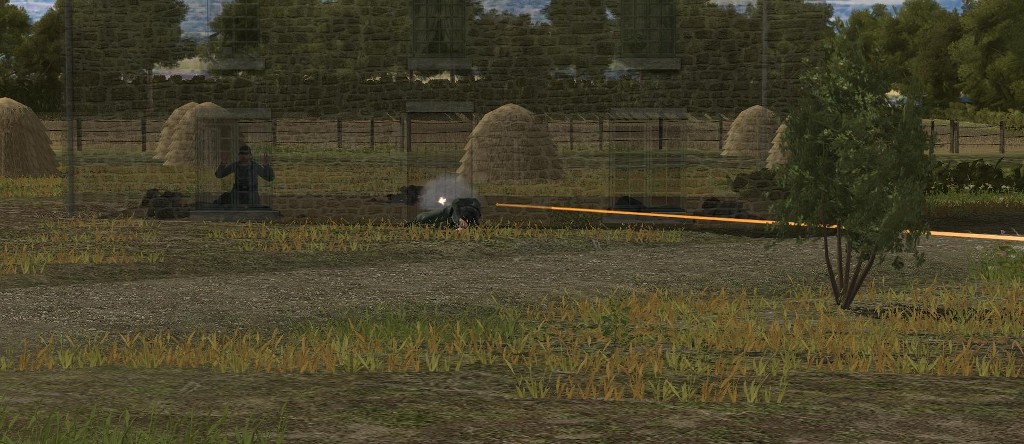
With all of my left and right flank forces in place to assault, with only a couple of minutes left the unthinkable happens. A rattled mortar team I'd left at the exit to the copse to recover was suddenly attacked, shots range out, they bolted for cover and suddenly I had a sizable enemy force right behind my main assault. I thought I'd cleaned out the copse.
(a grenade sails though the air as Dickson bolts away from the rifle fire)
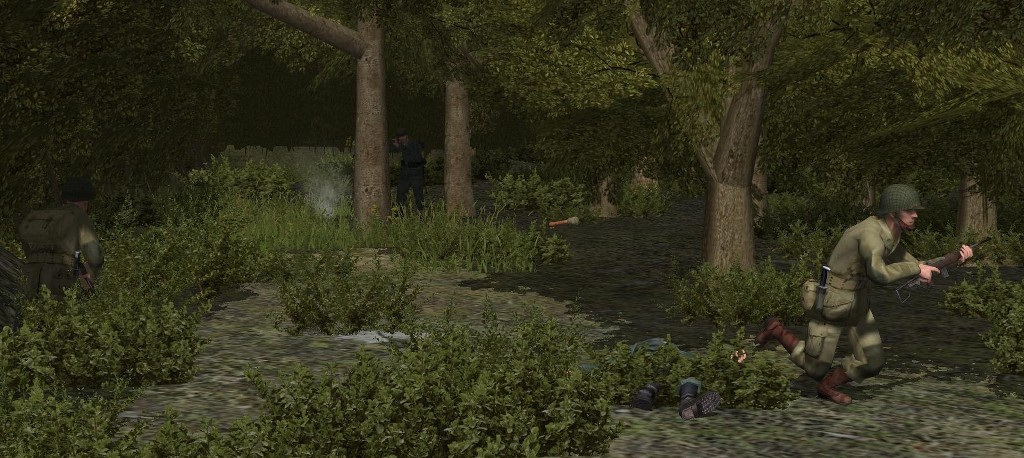
(none of the mortar team escaped the rear assault from the Grenadiers)
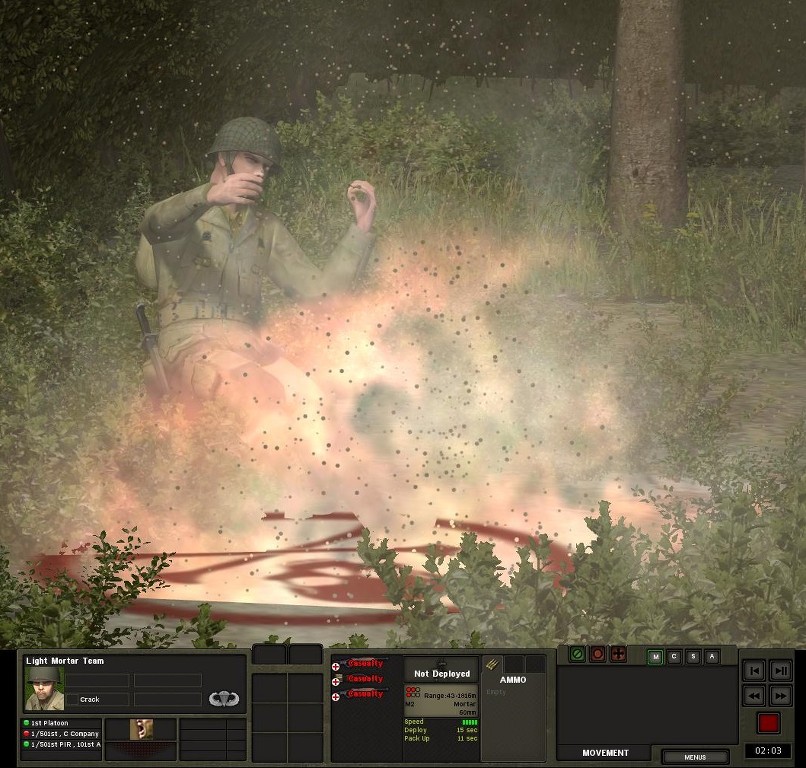
I had no choice but to abandon the left flank assault on the first objective. I didn't know the firepower of the rear assault, plus a number of the teams from 1st and 3rd platoon were nervous. If they got caught in the open from the rear they'd break and scatter, potentially causing serious casualty rates. I ordered everyone from 3rd Platoon and parts of 1st to cover the rear whilst the remaining troops continued to put suppression fire on the first objective
(3rd dash from one side of the road to the other to guard the rear)
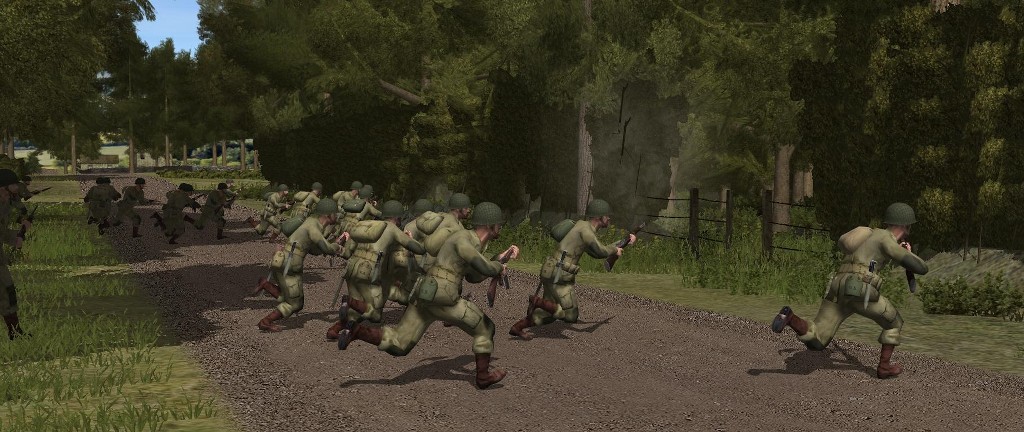
My initial gut feel was that the rear attack was probably a panic team that had recovered enough to try and make a dash for safety and had happened upon the recovering mortar team. I was probably overreacting and sacrificing securing the first objective. Then I realised, this wasn't a team in panic, this was a full squad attacking from my rear. They had laid in wait, hidden in the copse until my force had passed and were now attacking.
(the Grenadier team in mid attack. Thankfully they were only armed with bolt action rifles and an MP40)
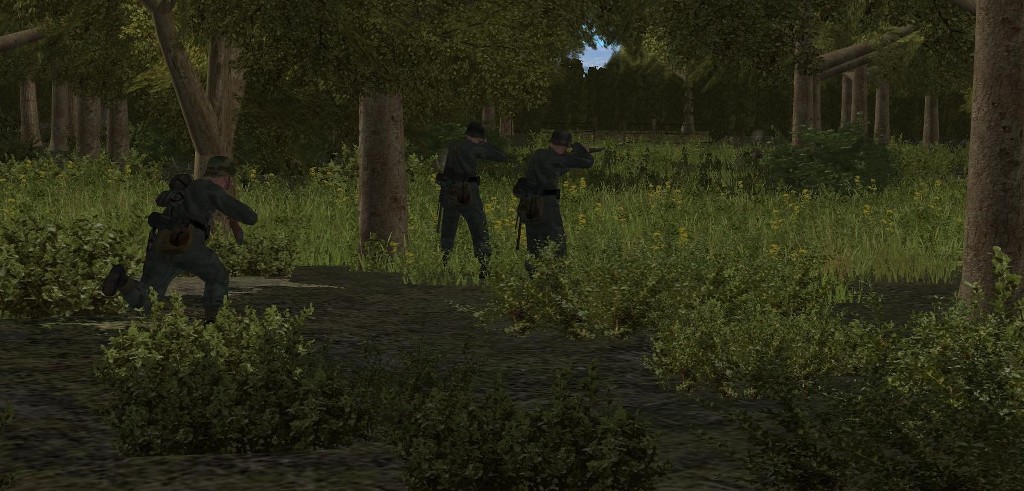
Then as the last minute ticked by and 2nd Platoon secured the enemy brocage on my right flank they got visibility of the forces holding the second objective. Lying in wait were more Grenadiers, fresh and ready to fight with at least one mortar team with direct sight.
(looks like a 81mm mortar team setup to put down direct fire on any attack on the second objective)
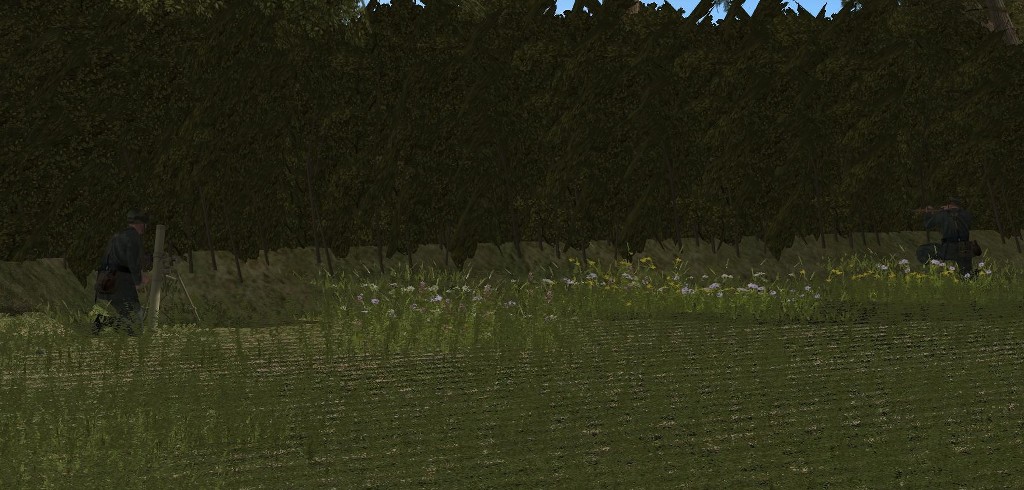
The battle ended with the 501st suffering a minor defeat, I'd run out of time and was almost out of ammo. A different tactic or attack plan would have resulted in a different result, I'm sure. Regarding the Axis battle plan and behaviour, some of it was scripting that had actually worked, some of it was the AI acting in a different way than I'd expected, but in hindsight I understood why they'd done that. Was the rear attack real in the last few minutes, yes. Was it planned no, but it was a result of a script playing out differently than expected because of me and the AI, but with exciting results. The enemies defending the second objective, they weren't supposed to be there, they were supposed to be somewhere else but again, in hindsight, playing the scenario all the way through I realised why they were there.
This small battle was a great learning experience for scripting and was good fun to play, even though I lost. I shall go away and try and digest what and why the AI ended up where it did and I hope it'll mean I can use this to give myself more variety in my player vs. AI battles.
My final battle of this turn is a Utah beach landing, one Company of tanks, a Company of infantry and a Company of Engineers. I have a map and a basic script, I shall use this battle to hopefully give myself a greater challenge.
(a Grenadier gives buddy aid, to the victor the chance to regroup)
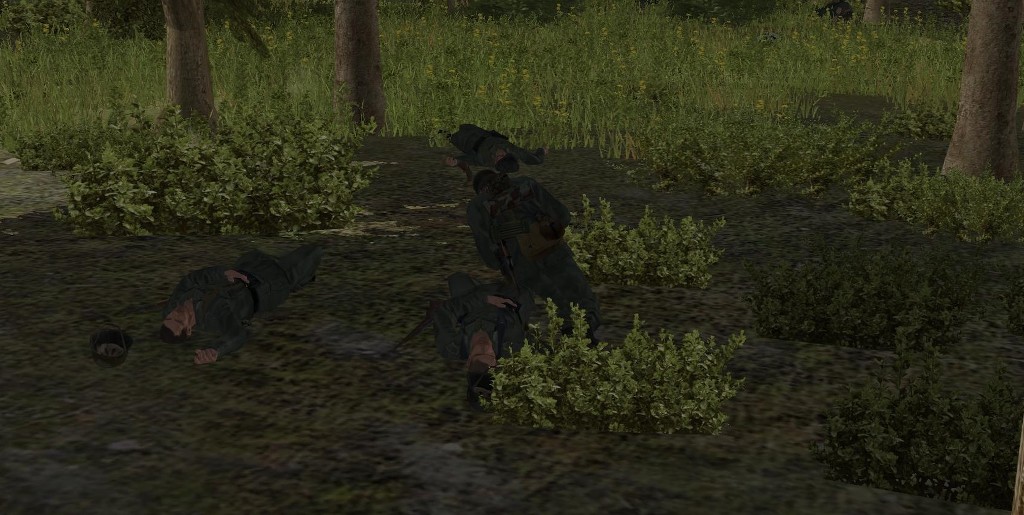
Situation update. I was 20 minutes into the engagement and had 15 minutes left to secure the two objectives. I'd committed my main attack force to my left flank, through a copse which the Grenadiers were defending. On my right flank I'd identified two MG teams and had over-watch suppressing them whilst the squad out front, at the blue X, were putting fire onto the force on the west side of the copse.
(time was ticking down but I was staying calm, I had forces in touching distance of my first objective)
The fighting in the copse was fierce. Grenades, heavy MG fire, a lot of it blind. I tried to move teams forward covering each other with different LOS. Sometimes it worked, others did not and the penalty was casualties.
(1st Platoon take another casualty as fire between 3rd and an unseen enemy crosses in front of them)
My first thought had been that the Grenadiers in the copse were stragglers from the retreat or from the defense group on the western side, but the Grenadier teams were too well organised and groups to large to be demotivated stragglers. I was going to have to fight all the way through the copse to get to the objective.
(a Grenadier fire-team laying in ambush open up on an advance element of 3rd Platoon)
(more casualties, this time 3rd Platoon take a grenade in amongst a fire-team)
I thought I'd secured my right flank in the copse, when suddenly I saw a long burst of MG fire followed by screams. A fire-team that I'd left as rearguard was hosed with MG fire and most of the team taken out. They'd not moved for several minutes, so the Grenadiers must have moved.
(I lose almost an entire fire-team from 3rd Platoon that had been acting as rearguard and covering the right flank)
(the Grenadiers had revealed themselves, an MG team from 1st Platoon open up to seek revenge)
With my advance on the left flank moving so slowly and each time I tried to speed up the pace I paid for it with more casualties, I decided I'd need to start pushing on my right flank as an alternative force to secure at least objective one. The MG teams appeared to have pulled back from the houses or were suppressed, and the forces on the western side of the copse were now engaged with 1st and 3rd Platoon and fire from that area was minimal. I made the decision to advance 2nd Platoon.
(out with the smoke to cover my right flank advance)
Under cover of smoke my teams leapfrogged forward, laying down suppression fire on the brocage and buildings in front of them. Return fire was minimal at this point and I was starting to think that despite the open terrain my right flank might have been a better attack route.
(teams from 2nd Platoon advance through smoke)
As 2nd got closer they were suddenly under heavy fire from the brocage and the buildings at the first objective. I started to lose men so halted the advance, sought cover or concealment and then tried to gain fire superiority again.
(casualties in 2nd Platoons advance team)
On my left flank I'd taken casualties from Grenadier forces which were behind the brocage leading out of the copse. I got a team against the brocage and blew a hole to get a team through to try and ambush the MG team which had caught and almost wiped out a fire-team. The Germans were gone...., they'd already pulled out before I managed to get a team to flank them.
(a two man team try to flank a Grenadier MG team only to find empty road)
With my forces now having pushed the Grenadiers out of the copse I got them all forward to start to assault the first objective and to take some of the pressure off of 2nd Platoon that was fighting for the right flank. To top it off, I was starting to run low on ammo so blind suppression fire had to be rationed to ensure I could continue to secure both objectives.
(at last, 1st Platoon get eyes on the first objective as the Grenadiers withdraw behind smoke)
I was running out of time, ammo, and decided that I'd abandon securing the second objective and focus on the first. If I could get that and ensure I didn't suffer too many more casualties I'd maybe secure the victory.
(tick tock, tick tock. Grenadiers hold the first and second objectives but I had to have fire superiority with my automatic weapons and unit strength?)
The firefight for the first objective was heavy with no quarter given, but I was getting mixed messages from the Grenadiers. I had guys surrendering whilst right next to them others fought on. I had no choice but to put more fire onto the buildings in an attempt to suppress and break them, so I could advance.
(a Grenadier surrenders whilst his comrade fights on, spitting out lead from his MG)
With all of my left and right flank forces in place to assault, with only a couple of minutes left the unthinkable happens. A rattled mortar team I'd left at the exit to the copse to recover was suddenly attacked, shots range out, they bolted for cover and suddenly I had a sizable enemy force right behind my main assault. I thought I'd cleaned out the copse.
(a grenade sails though the air as Dickson bolts away from the rifle fire)
(none of the mortar team escaped the rear assault from the Grenadiers)
I had no choice but to abandon the left flank assault on the first objective. I didn't know the firepower of the rear assault, plus a number of the teams from 1st and 3rd platoon were nervous. If they got caught in the open from the rear they'd break and scatter, potentially causing serious casualty rates. I ordered everyone from 3rd Platoon and parts of 1st to cover the rear whilst the remaining troops continued to put suppression fire on the first objective
(3rd dash from one side of the road to the other to guard the rear)
My initial gut feel was that the rear attack was probably a panic team that had recovered enough to try and make a dash for safety and had happened upon the recovering mortar team. I was probably overreacting and sacrificing securing the first objective. Then I realised, this wasn't a team in panic, this was a full squad attacking from my rear. They had laid in wait, hidden in the copse until my force had passed and were now attacking.
(the Grenadier team in mid attack. Thankfully they were only armed with bolt action rifles and an MP40)
Then as the last minute ticked by and 2nd Platoon secured the enemy brocage on my right flank they got visibility of the forces holding the second objective. Lying in wait were more Grenadiers, fresh and ready to fight with at least one mortar team with direct sight.
(looks like a 81mm mortar team setup to put down direct fire on any attack on the second objective)
The battle ended with the 501st suffering a minor defeat, I'd run out of time and was almost out of ammo. A different tactic or attack plan would have resulted in a different result, I'm sure. Regarding the Axis battle plan and behaviour, some of it was scripting that had actually worked, some of it was the AI acting in a different way than I'd expected, but in hindsight I understood why they'd done that. Was the rear attack real in the last few minutes, yes. Was it planned no, but it was a result of a script playing out differently than expected because of me and the AI, but with exciting results. The enemies defending the second objective, they weren't supposed to be there, they were supposed to be somewhere else but again, in hindsight, playing the scenario all the way through I realised why they were there.
This small battle was a great learning experience for scripting and was good fun to play, even though I lost. I shall go away and try and digest what and why the AI ended up where it did and I hope it'll mean I can use this to give myself more variety in my player vs. AI battles.
My final battle of this turn is a Utah beach landing, one Company of tanks, a Company of infantry and a Company of Engineers. I have a map and a basic script, I shall use this battle to hopefully give myself a greater challenge.
(a Grenadier gives buddy aid, to the victor the chance to regroup)
Z
Zinzan
Guest
Love all these AAR's you are doing. Very interesting battles and a great style - with awesome pics.
Liked the last battle, love it when a battle goes awry - You always learn more from defeat rather than victory. (If this was true I would be a GREAT general)
Liked the last battle, love it when a battle goes awry - You always learn more from defeat rather than victory. (If this was true I would be a GREAT general)
Thanks @Zinzan , I generally win against the AI but that battle was a toughie.
For the next battle the AAR will be a little less detailed. I'm probably going to turn at least the next battle into a scenario, maybe the whole campaign, we'll see how RL gives me time. The next battle is the Utah beach landing, specifically the Tare Green sector. Firstly thanks to @Ithikial and @A Canadian Cat for the map options, I finally went for a scenario map which I edited slightly. I wanted an objective which was more than just 'get your troops off the beach', so it needed to have a little more depth. I plotted out a couple of AI plans, stuck some defenses in which also had the opportunity to be a little random based upon the AI, and away we go.
I have C Company, 70th Tank Btn., B Company, 4th Eng. Com. Btn., and G Company, 8th Inf. Btn., all from the 4th Inf. Div. storming the beach. They are all regular troops, good motivation and typical leadership. They are up against 2nd Company, Gren. Regt. 919th, a Weapons Company with (Pak38 & 40's), arty support from the Gren Regt. 919 guns and Sturm Btn. They have concrete bunkers, trenches, barred wire, tank traps, foxholes and mines.
It's just past 10 am, my objective is to storm the beach and secure a beach head just over a kilometer inland. I have an hour to do this, with a little extra time. There might be some spoilers in here but I've tried to keep it to close up pictures and skipped a large middle portion of the battle.
We open with the main force just landed. I've already taken some armour casualties before the first move, this is intentional to represent the force already out of the landing craft, they wouldn't just sallied forth and been allowed to unload unmolested.
(Looking North, a couple of Shermans burn on the beach)
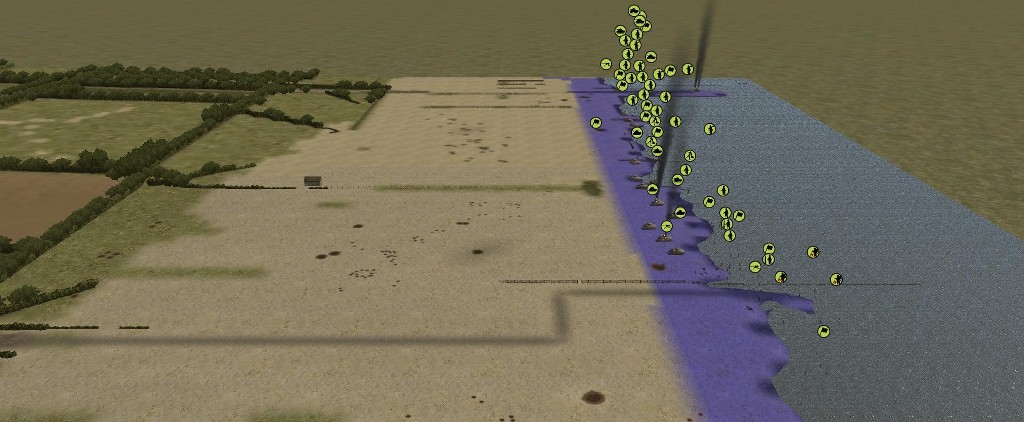
(a view west towards the objective. On start you don't get a intel on the defenses so can't call in pro-active fire. Maybe not everyone's choice, but I wanted to get a feeling like Command just jumped out of the landing craft onto the beach in the first minute of action... a 'WHAT THE F**K!!!' feeling)
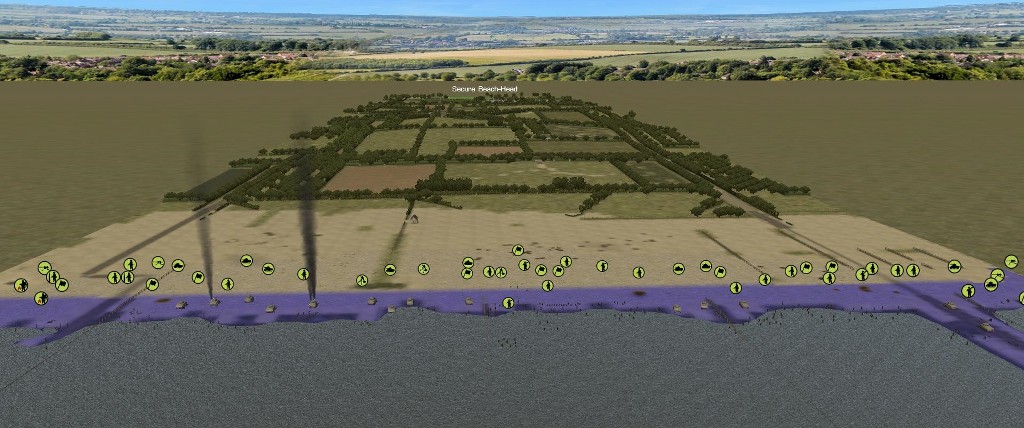
As the action starts, within the first few second a Sherman is hit. HMG fire streams out from bunkers across the beach and I start taking casualties. There are no game tricks to get off the beach, you gotta slug it out.
(a Sherman boils up as an engineer squad return fire against a concrete bunker, yeah, right!, that's gonna work guys)
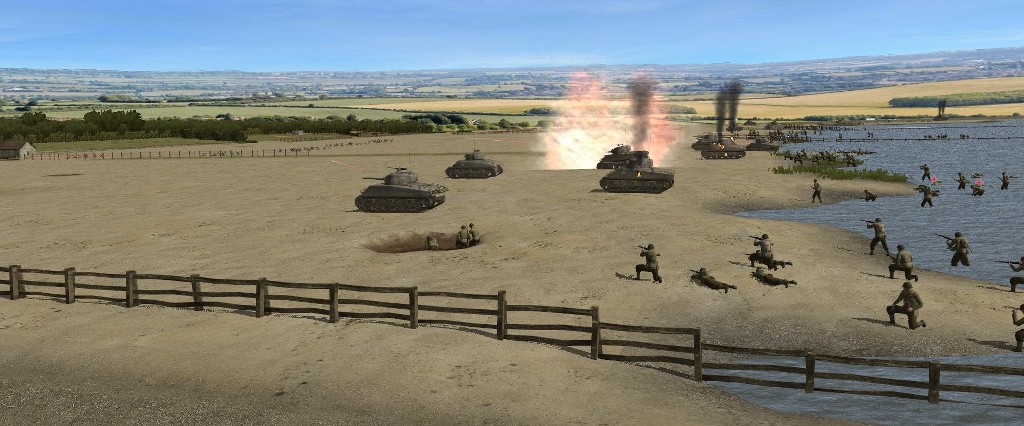
(a HMG defense bunker receives fire, in the foreground you can see the barbed wire and tank defenses)
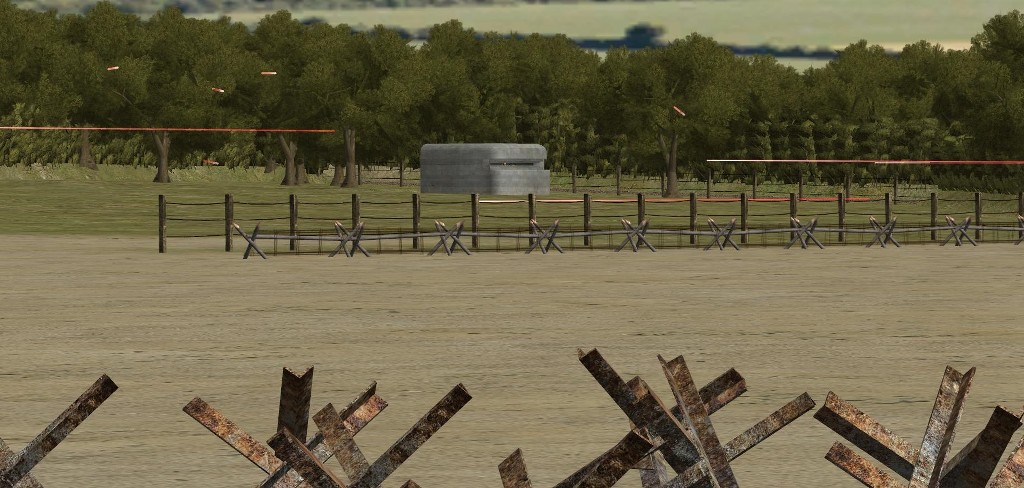
There is no other way to describe the following minutes other than a slug-fest. Sherman's trade blows with Pak guns, and infantry blast away at each other. It was suicide to try and rush forward troops, and they quickly got spooked in the open ground. I had the Sherman's alternate putting down smoke in an attempt to create an opportunity to advance whilst artillery came in from the Germans.
(my right flank try to create a smoke screen to advance under, it was difficult in such a large expanse)
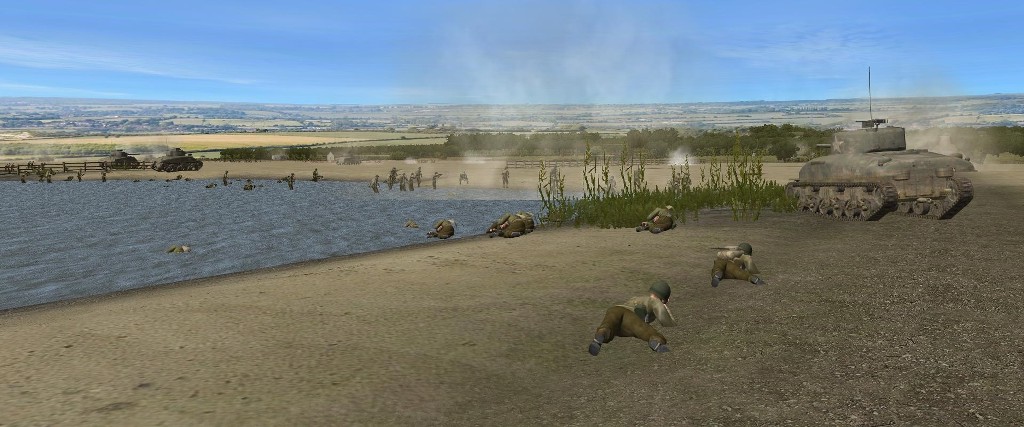
(a Weapons Team from B Coy, Cmb. Eng. setup their HMG and try to lay counter suppression fire and squads advance in the smoke with Sherman's providing support)
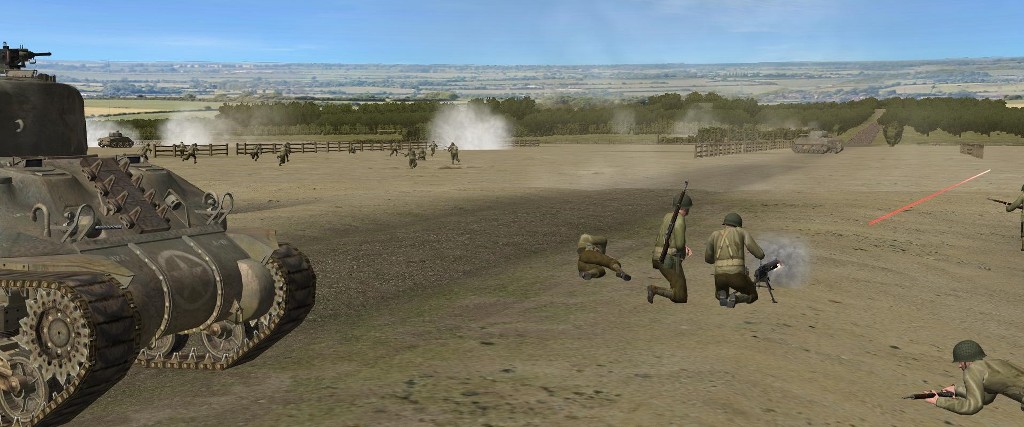
(a Sherman, with the crew already bailed, takes a second hit from a Pak causing more causalities to the crew. A squad advance in the background)
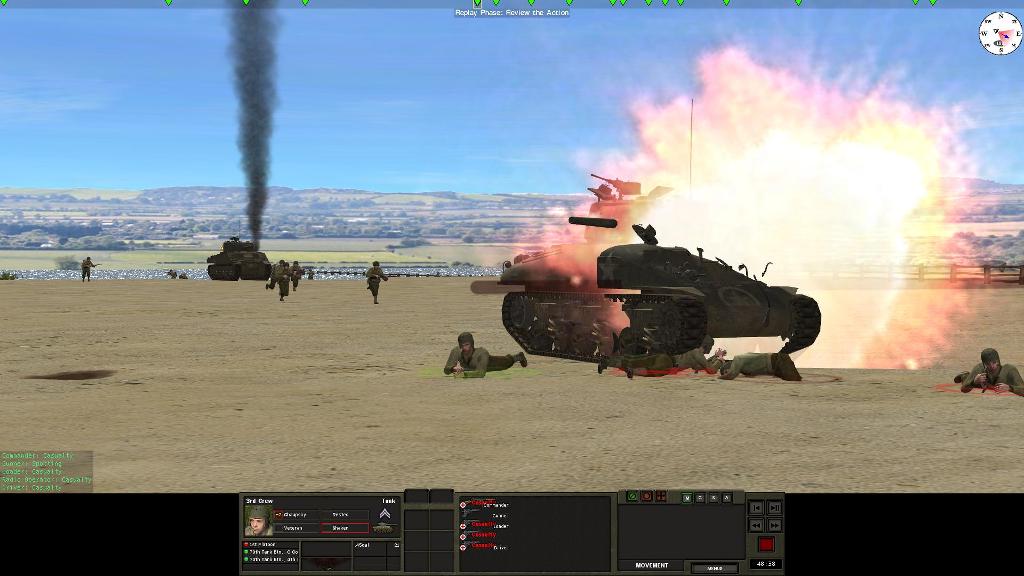
(a staccato of MG42 and MG34 fire sounds out across the beach and tracers streak out, touching squads. The squad in the foreground bunches together, a Pak target delight. Spread out guys, 'SPREAD OUT')
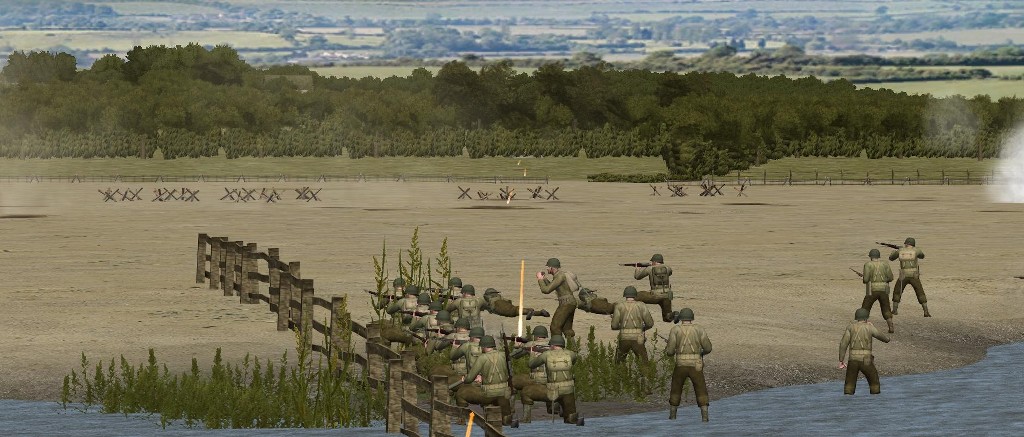
(a Sherman advances though the smoke, spots a Pak bunker and fires.....)
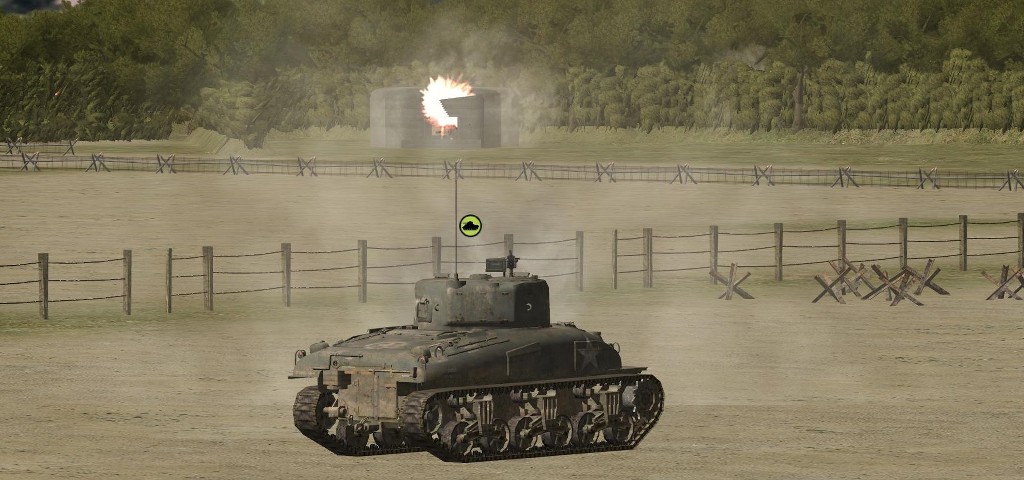
I tried to probe the German beach defenses. There is an element of AI control on what goes where so it should play out differently each time. The centre was a kill-zone, both for infantry and armour. I started to push on the flanks, with some success on both my right and left.
(smoke, fire and dirt as Shermans advance up the beach)
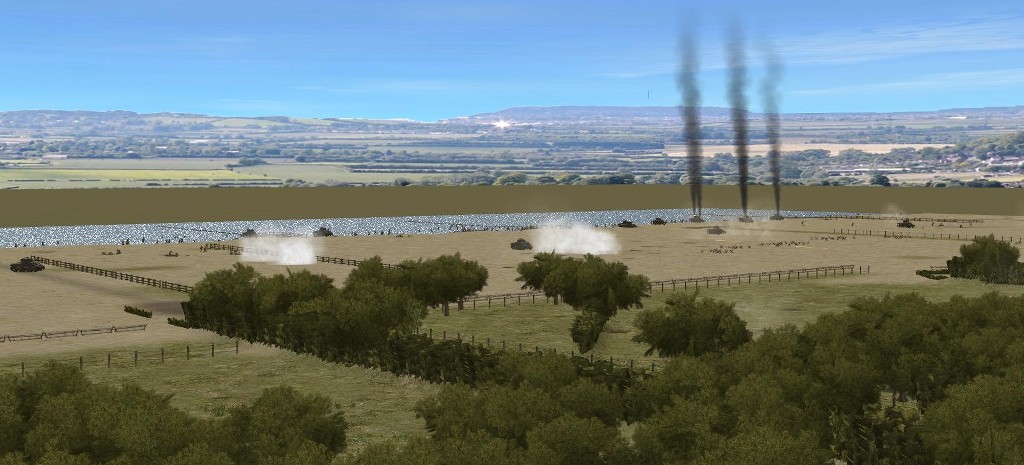
My right flank seemed the best option. With three active Shermans, I had two lay down smoke in-front of the MG bunkers, the third suppressing, and then started to bring Engineer teams up. It was tough going through the water and they got fatigued quickly.
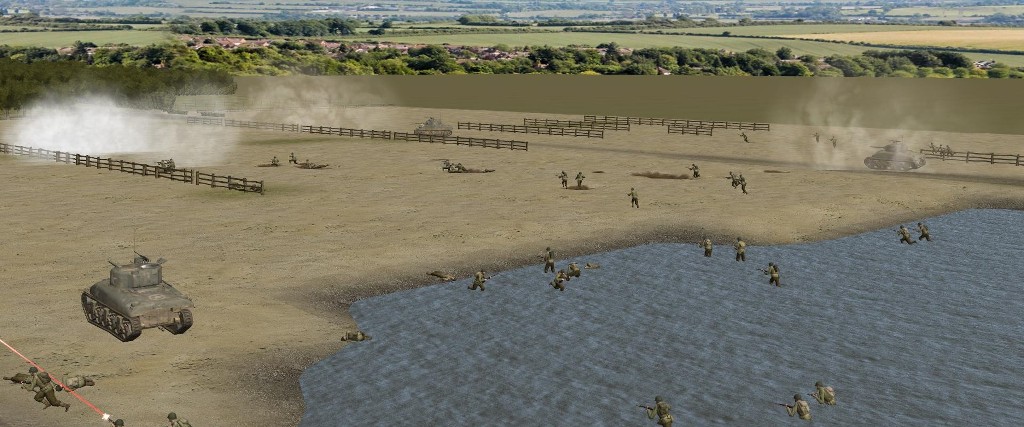
(MG bunkers still spew out fire whilst smoke masks the Sherman's LOS)
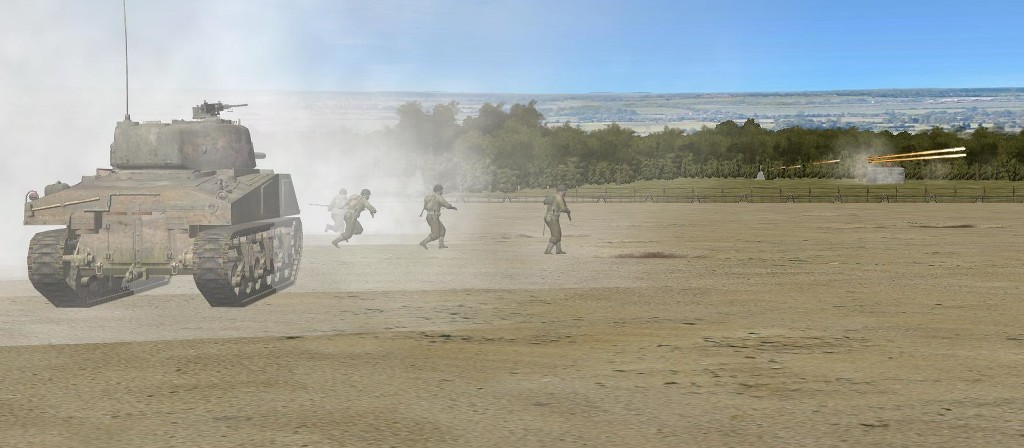
On the left flank my advance stalls. I had limited armour support and the bunkers had excellent fields of fire so I was stuck for a while. Again, I used smoke and HE suppression fire in an attempt to get the troops off the beach.
(3rd Platoon stuck on the beach under heavy HMG fire)

On my right flank I get an Engineer squad at the wire and blast through. A Sherman successfully advanced to the foot of the hedgerow and blasted bunkers at close range.
(1 Squad, 2nd Platoon of CM Eng. take a breath in the cover of trees)
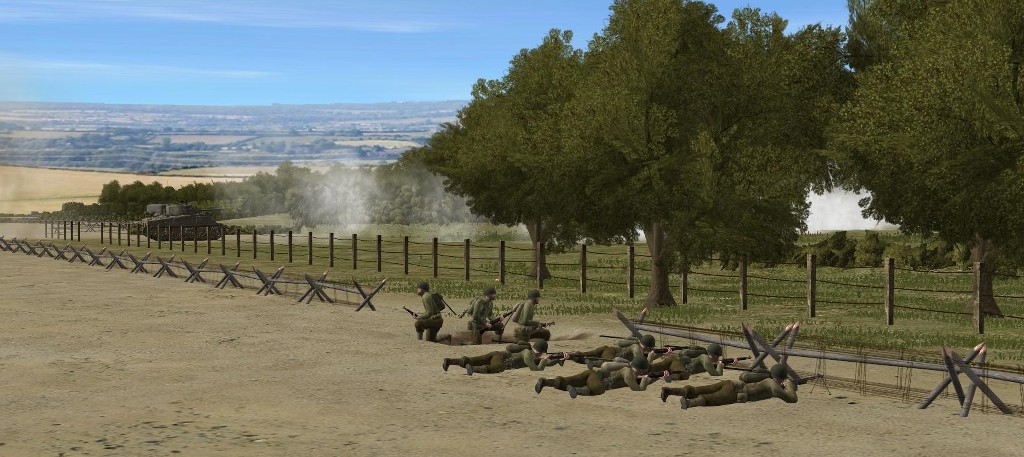
With my right flank making progress I started to get some movement on my left. I'll leave the AAR here, there is still a very long way to go but I'll keep this to the start and end, not much on the middle. It's taken me nearly 10 minutes to get my first feet off the sand and I've lost nearly a 3rd of my infantry and armour. A costly beach.
To be continued........................
For the next battle the AAR will be a little less detailed. I'm probably going to turn at least the next battle into a scenario, maybe the whole campaign, we'll see how RL gives me time. The next battle is the Utah beach landing, specifically the Tare Green sector. Firstly thanks to @Ithikial and @A Canadian Cat for the map options, I finally went for a scenario map which I edited slightly. I wanted an objective which was more than just 'get your troops off the beach', so it needed to have a little more depth. I plotted out a couple of AI plans, stuck some defenses in which also had the opportunity to be a little random based upon the AI, and away we go.
I have C Company, 70th Tank Btn., B Company, 4th Eng. Com. Btn., and G Company, 8th Inf. Btn., all from the 4th Inf. Div. storming the beach. They are all regular troops, good motivation and typical leadership. They are up against 2nd Company, Gren. Regt. 919th, a Weapons Company with (Pak38 & 40's), arty support from the Gren Regt. 919 guns and Sturm Btn. They have concrete bunkers, trenches, barred wire, tank traps, foxholes and mines.
It's just past 10 am, my objective is to storm the beach and secure a beach head just over a kilometer inland. I have an hour to do this, with a little extra time. There might be some spoilers in here but I've tried to keep it to close up pictures and skipped a large middle portion of the battle.
We open with the main force just landed. I've already taken some armour casualties before the first move, this is intentional to represent the force already out of the landing craft, they wouldn't just sallied forth and been allowed to unload unmolested.
(Looking North, a couple of Shermans burn on the beach)
(a view west towards the objective. On start you don't get a intel on the defenses so can't call in pro-active fire. Maybe not everyone's choice, but I wanted to get a feeling like Command just jumped out of the landing craft onto the beach in the first minute of action... a 'WHAT THE F**K!!!' feeling)
As the action starts, within the first few second a Sherman is hit. HMG fire streams out from bunkers across the beach and I start taking casualties. There are no game tricks to get off the beach, you gotta slug it out.
(a Sherman boils up as an engineer squad return fire against a concrete bunker, yeah, right!, that's gonna work guys)
(a HMG defense bunker receives fire, in the foreground you can see the barbed wire and tank defenses)
There is no other way to describe the following minutes other than a slug-fest. Sherman's trade blows with Pak guns, and infantry blast away at each other. It was suicide to try and rush forward troops, and they quickly got spooked in the open ground. I had the Sherman's alternate putting down smoke in an attempt to create an opportunity to advance whilst artillery came in from the Germans.
(my right flank try to create a smoke screen to advance under, it was difficult in such a large expanse)
(a Weapons Team from B Coy, Cmb. Eng. setup their HMG and try to lay counter suppression fire and squads advance in the smoke with Sherman's providing support)
(a Sherman, with the crew already bailed, takes a second hit from a Pak causing more causalities to the crew. A squad advance in the background)
(a staccato of MG42 and MG34 fire sounds out across the beach and tracers streak out, touching squads. The squad in the foreground bunches together, a Pak target delight. Spread out guys, 'SPREAD OUT')
(a Sherman advances though the smoke, spots a Pak bunker and fires.....)
I tried to probe the German beach defenses. There is an element of AI control on what goes where so it should play out differently each time. The centre was a kill-zone, both for infantry and armour. I started to push on the flanks, with some success on both my right and left.
(smoke, fire and dirt as Shermans advance up the beach)
My right flank seemed the best option. With three active Shermans, I had two lay down smoke in-front of the MG bunkers, the third suppressing, and then started to bring Engineer teams up. It was tough going through the water and they got fatigued quickly.
(MG bunkers still spew out fire whilst smoke masks the Sherman's LOS)
On the left flank my advance stalls. I had limited armour support and the bunkers had excellent fields of fire so I was stuck for a while. Again, I used smoke and HE suppression fire in an attempt to get the troops off the beach.
(3rd Platoon stuck on the beach under heavy HMG fire)
On my right flank I get an Engineer squad at the wire and blast through. A Sherman successfully advanced to the foot of the hedgerow and blasted bunkers at close range.
(1 Squad, 2nd Platoon of CM Eng. take a breath in the cover of trees)
With my right flank making progress I started to get some movement on my left. I'll leave the AAR here, there is still a very long way to go but I'll keep this to the start and end, not much on the middle. It's taken me nearly 10 minutes to get my first feet off the sand and I've lost nearly a 3rd of my infantry and armour. A costly beach.
To be continued........................