Welcome to The Few Good Men

Thanks for visiting our club and having a look around, there is a lot to see. Why not consider becoming a member?

Monsaint Manor (Drifter Man vs Bulletpoint DAR)

1521 hrs, Turn 21. One last turn in which I am consolidating my forces. In the north had to make a lateral move by about 150 meters to avoid the fields covered by mortar fire. In the south I maneuvered a carrier scout section into position to assault the last German stronghold in Farine. Not the rifle section as I announced - I'll use scouts again. They have Bren but not the men... you know. Anyway, all this walking cost time.

View attachment 21268

Two German survivors from an originally 5-man team that was driven out of the fields north of Farine are seen running southward along the road. Why does Bulletpoint expose them like this?
  • He is strong in the north and has no use for them there
  • He has no intention to defend the north - the path is open. Possibly leading into a trap.
  • He is weak in the south and wants to reinforce his position there
  • He wants to confuse me.
  • ...
  • Just for the hell of it.
In the next turn, apart from assaulting the southern and of Farine, I plan to begin shelling Hill 312 from tanks and to send a few scouts forward. Time to win a few yards of the Norman soil again.

Can it be that it is the only covered route? Running through the fields isn't that safe, but obviously only Kugelpunkt knows the wisdom behind this moves ;-)
 
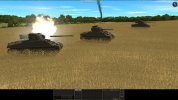
1522 hrs, Turn 22. Three Shermans move into position and begin shelling Hill 312, while a Firefly has its gun pointed at the crest of the hill in case the Marder shows up. The position of the light infantry gun gets nice beating - I think the gun should be dead. The mortar is protected by a terrain wave so probably not much effect there.

022_Shermans.jpg
022_Hill312.jpg
022_Scouts1.jpg

Although the sound of tank guns and the taking of positions held previously by Bulletpoint's men does a bit to restore my shaken confidence, the fact is that I did not make much progress in this turn again. In the south of the Farine objective, Bulletpoint could smell (or hear) the attack coming and exited his last position through the back door. The assaulting scouts only find German casualties from previous fighting. This was neither unexpected nor a disappointment: the terrain of Farine south gives the defenders perfectly covered routes to re-position or retreat at will. I need to ask though - did he retreat or does he want to reappear in another building? The Germans still have a panzerschreck with them...

The first Marder is spotted again, maneuvering in the streets of Ville du Harfleur. I can only watch for a few seconds, but I think I can tell where Bulletpoint wants to position it next.

This scout detachment cheat death (not the first time in this battle) as they dash through a mortar barrage... I thought they had 10 seconds more before the next shell falls. Sorry guys, my bad. Glad you made it.
022_Scouts2.jpg
 
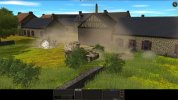
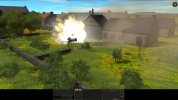
1523 hrs, Turn 23. The shelling of Hill 312 continues and mortars join in. The fighting at Vilage de Farine also continues, but German presence is - hopefully - coming to an end. The last defenders took positions behind a garden fence and only the Panzerschreck is still fighting back.

023_schreck.jpg

Unfortunately, my luck ran out and I lost a man to mortar fire at Farine.
023_Farine.jpg

The Marder at Harfleur is observed in the new position behind a stone wall. From there it can see the access road between hedgerows, one that I must take. Or do I? I can smell mines from that road...

023_Marder.jpg
 
1522 hrs, Turn 22. Three Shermans move into position and begin shelling Hill 312, while a Firefly has its gun pointed at the crest of the hill in case the Marder shows up. The position of the light infantry gun gets nice beating - I think the gun should be dead. The mortar is protected by a terrain wave so probably not much effect there.

View attachment 21269
View attachment 21270
View attachment 21271

Although the sound of tank guns and the taking of positions held previously by Bulletpoint's men does a bit to restore my shaken confidence, the fact is that I did not make much progress in this turn again. In the south of the Farine objective, Bulletpoint could smell (or hear) the attack coming and exited his last position through the back door. The assaulting scouts only find German casualties from previous fighting. This was neither unexpected nor a disappointment: the terrain of Farine south gives the defenders perfectly covered routes to re-position or retreat at will. I need to ask though - did he retreat or does he want to reappear in another building? The Germans still have a panzerschreck with them...

The first Marder is spotted again, maneuvering in the streets of Ville du Harfleur. I can only watch for a few seconds, but I think I can tell where Bulletpoint wants to position it next.

This scout detachment cheat death (not the first time in this battle) as they dash through a mortar barrage... I thought they had 10 seconds more before the next shell falls. Sorry guys, my bad. Glad you made it.
View attachment 21272
Nice shots!
 
1524 hrs, Turn 24. The last Germans packed up their gear, said "auf Wiedersehen" and left Farine, vanishing easily into the wheat field. The objective is finally in my hands - the first of eight on the map and the first of five that I can realistically take. Bulletpoint defended the area with 24 men (two panzergrenadier squads and a tank hunter team), of which he lost 17. Both Panzerschrecks escaped. I lost 20 men - 14 scouts and 6 vehicle crews of three destroyed Humber III armored cars. The ongoing delays and losses make it a tactical victory for Bulletpoint. The going will not be any easier from now on. The hedgerows ahead have few openings - the ground in front of me is shut and approach channelled into two roads, which are going to be mined. I refuse to take these obvious avenues of approach and send pioneers to make more breaches. But this takes time, and I only have two pioneer teams and must use them with caution.

Apart from these thoughts, Turn 24 is unremarkable. My scouts approach a road running from north to south and are stopped by a solid line of low hedge that must be breached. A short exchange of fire between a lone scout and two retreating German soldiers has no outcome as the Germans continue moving towards Hill 312. A fourth enemy mortar - positioned as far back as the church in the Monsaint village - opens fire and shells the southern end of Farine. A scout is lightly wounded by mortar fire - I have too many of those lightly wounded and it will certainly affect their fighting ability. The Marder at Harfleur sits in its waiting position. Approaching it frontally is out of the question - I have run enough simulations to see that the odds are stacked heavily against the attacker. So I am plotting again to get it out of its current position with mortars and area fire.

024_Overview.jpg
 
1525 hrs, Turn 25. The advancing scouts at the road junction in the center of the map force my opponent to withdraw a Panzerschreck - the surviving tube of the team encountered in Turn 12. The Germans also continue their withdrawal away from Farine, using the wheat fields for camouflage. I don't take any casualties, but neither does the opponent. A fifth mortar opens fire, this time from the northern end of Bulletpoint ridge. Another mortar there is confirmed visually, while the mortar on Hill 312 is confirmed destroyed.

In what looks like a bizarre accident, a HE round from an are-firing Sherman blows up a Marder hiding behind Hill 312. It is a complete fluke, but I've seen this happen before and I actually hope to use the same tactic against the Marder at Harfleur. Another tank destroyer, probably another Marder, is spotted in the bocage square east of Hill 312.

025_Marder.jpg
025_Overview.jpg
 
1526 hrs, Turn 26. An interesting turn revealing another bit of my opponent's defenses. I have a lot to chew on before I continue. On the left flank, a detachment from the Carrier Platoon pursuing the retreating Germans runs into a HMG position. They lose a man and hide in the wheat field. So no advance here until I can get rid of that MG.

2 Troop also loses one man, this time to mortar fire that does not stop raining. In return, one retreating German is hit by an explosion of a tank round. Recce mortars are getting into position and will be able to receive orders in the next turn. I sent one mortar ahead (it spent enough ammo to move quick) and this one is already plotting a mission with the FO (against a Marder, see below).

On the south side of Hill 312, a second 7.5cm infantry gun opens fire at a Firefly that is covering my troops against an attack exactly from this direction. The Firefly commander is up and out but sees nothing while 3 HEAT rounds (I assume) whiz by. Sometimes luck is a good thing. In addition, a Marder (?), which is positioned over 1000 meters away and which I had not been aware of, sees the same Firefly after my pioneers make a breach through a low hedgerow, and fires 2 AP rounds that are blocked by a tree. I don't think my opponent planned this "duel" at this distance and it is again a complete accident that I made a breach right there where I made it.

Should I accept the duel? The Firefly does not see the Marder (?) yet, only a tentative icon. The LOS is poor and given the time that elapsed since the Marder (?) last fired, it has lost track of the Firefly. I don't think I will be able to see it and the exchange would be inconclusive. At the same time, the Firefly is under attack from the infantry gun. Quick check: the allocation is 3 HEAT rounds for these guns, so it shouldn't be a serious threat anymore, unless Bulletpoint managed to smuggle an ammo bearer from the second gun through the barrage that was pounding Hill 312. Or unless it fired HE to get range. If so, there is nothing I can do - the Firefly is already in his sights.

So I will move out of LOS of the Marder and area fire the infantry gun.

I am also launching two little operations against the closer two Marders. The one at Harfleur (right) will be targeted with a Quick mortar attack in the next turn: when this last turn ended, the mortar crew was just dropping the first round into the tube. In addition, I will target the stone wall in front of it with area fire from a Sherman (marked as "Sherman V" in the picture). This Sherman is, hopefully, in a position from which the Marder cannot see it. The stone wall, but not the terrain around it, can be targeted. This should suppress the Marder and possibly force it to reverse to seek cover. 30 seconds into the turn I will send two Shermans forward on a hunt, hoping they will catch the suppressed or retreating Marder. It doesn't get much better than this. Fingers crossed.

The plan for the Marder at Hill 312 (left) is less elaborate. Within about a minute, a harassing fire from two mortars should start hitting its position. This may force it to go forward or to reverse out of the bocage box it is hiding in. Shermans are watching the exits but the coverage is not reliable. If Bulletpoint chooses to withdraw the Marder himself, he will be sure to avoid the exposed places. I take the odds.

026_Overview.jpg
 
Last edited:
1527 hrs, Turn 27. The main story of the turn is, of course, the Harfleur Marder hunt. The chaos of war tried hard to intervene in my plans, but this time I had enough safeguards in place for them to result in a success.

First, the Firefly that came under attack last turn moved forward, area-firing the position of the 75mm IG on Hill 312. Just as it stopped near the two tanks that had orders to hunt the Marder later in the turn, it was hit with a HE in turret face. Its hatch was closed and it suffered minimal damage, but the explosion caused minor injury to the Sherman commander next to it. As a result, that Sherman canceled its hunt order and the Firefly in the background (10 Troop commander) proceeded alone. In addition, a fragment of the HE caused a casualty 130 meters away among the deploying recce mortars. The Firefly then continued to hit the 75mm IG position with area fire and the gun did not fire again in this turn.

027_MarderHunt1.jpg

At about the same time, area fire from a tank and a quick mortar barrage hit the position of the Marder. No direct hit was achieved, but towards the end of the turn the Marder started reversing out of the position.

027_MarderHunt2.jpg

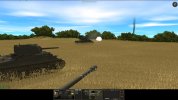
At that point they spotted each other with the Firefly. The Marder fired first but it was already reversing and aimed too high. At 600 meters the Firefly crew did not make a mistake... they earned their salary today.

027_MarderHunt3.jpg

027_MarderHunt4.jpg

The battle continued with moderate intensity elsewhere as well. I lost one pioneer to mortar fire - they were hit just after they made a breach near the crossroads in the middle of the map. Another scout was hit by the HMG from the previous turn. The HMG is well positioned and I cannot attack it with tanks because there is one of Bulletpoint's immortal Panzerschrecks in the wheatfield. Any armor taking position to attack the MG would be immediately taken out. But I have some other plans, now that the Harfleur Marder is out of the picture. The losses have been painful though: 25 26 men already. Bulletpoint has barely spent 1/2 of his mortar ammunition, provided he has got 6 mortars as I am guessing.

Edit: 26 men lost already. I missed one. Mortars...
 
Last edited:
A word regarding that injured Sherman commander, I had a similar situation in a game recently, my tank commander was injured by a nearby mortar round landing. Later in the game I was able to maneuver my Sherman into position to get a clean side shot at a Tiger at no more than 300m with a clear line of sight. The Sherman was unbuttoned. After cresting a slope into LOS of the Tiger and what should have been the easiest kill in CM history, the Sherman sat blind for the next 30 seconds as the Tiger slo-o-o-o-o-o-o-o-owly brought its bigass gun to bear, the Sherman finally spotted the Tiger just in time to see an 88mm round punch clean through the transmission housing and exit out the back.

Many bad words were said.

I can only put it down to the Sherman Commander being injured as to why he didn't see the Tiger until the last moment, so my advice would be keep him in the back and only use him for targeted HE fire missions - don't expect him to spot reliably from now on.
CM should get warning labels like cigarettes... can induce harmful levels of rage.

Thanks, I was wondering about what the effect might be on this tank commander. I'll use his tank as artillery from now on. There should be enough others now to do spotting.

About punching through clean - I found out that after knocking out the Marder, the 17pdr round passed through two buildings before hitting the fields in the western part of Harfleur. Marders were not the opponents I had in mind when I was buying a Firefly troop.

027_17pdr.jpg
 
1528 hrs, Turn 28. Success is often followed with a setback. I was quickly returned to reality after the destruction of the Marder. Mortar fire took out two more scouts. Bulletpoint's mortars - originally five of them, I managed to knock one out, so now four - completely dominate the battlefield, firing on "Target light", typically 3 rounds per minute. My troops are dispersed, so the losses are not catastrophic, but they mount over time and become unsustainable. I can't afford to lose two fighting men every turn. Seven men lost to mortars so far, plus an armored car. This is a battle of attrition and I don't have enough men to absorb these losses indefinitely.

Any time I located a mortar - visually or by sound - I targeted it with an indirect mortar strike. This is ineffective. An occasional hit may temporarily suppress the target, but this produces an effect I don't want: it slows down their rate of fire. I want to either silence them for good or let them to run out of ammo. Two mortars should have only 6-7 rounds left and should run out of ammo in two minutes. So I'll stop targeting them - I am wasting ammunition there. A third one opened fire recently, so I'll try to knock it out with tank fire. The last one is far back at the church and I'll take a look if I can also target it with tank fire. Tank fire is, however, too often blocked by trees.

In the picture below I show the known positions of Bulletpoint's mortars and the ammunition they should have left. I assume there is a sixth but I haven't seen or heard that one yet, so I think Bulletpoint keeps that one in reserve.

In addition, I lost a Humber IV... to a threat I had already known about. So again, an useless casualty that did not give me new information about the enemy. The armored car tried to pass through the breach I made with pioneers. I knew the Marder (or whatever it is) far back covered it, but concluded that the Humber would go through fast before the German crew can react. But the Humber crew decided that the opening is a really cool place to be, stopped there and started driving around until knocked out with an AP shot from 1000 meters. The pioneers will have to make a new breach, or I have to risk the mined (?) road. I can't make a breach because the place is under mortar fire... I can't "check" the road for mines because I'm running out of expendable armored cars... already lost 4 out of 10, of which 3 were lost avoidably and uselessly.

028_overview.jpg
 
1529 hrs, Turn 29. Back to the business of defeating von Kugelpunkt and his impregnable defense! I looked at the hidden Marder that took out my armored car last turn. I think it is parked inside a bocage box, camouflaged among trees. The interesting thing is that it can't see much apart from the narrow line of fire directly up front. So, eventually, Bulletpoint will want to move it elsewhere. And there is only one exit from the bocage - can I cover the exit with a Sherman?

029_Marder.jpg

Bulletpoint's mortars that were getting low on ammo stopped firing at the same time I stopped shelling them. Both sides are trying to conserve ammunition. Bulletpoint wants to keep his last few rounds for worthy targets. On Hill 312 I notice a German soldier from a mortar team giving first aid to his 3 fallen buddies. Normally I wouldn't care, but this guy must die, because he could retrieve 11 rounds this mortar still had when knocked out and carry them to the other mortar of this section.

029_Hill312.jpg

Finally, the headline news of the turn: an ATG, the first of the expected three, opened fire from Bulletpoint Ridge on a Firefly tank at a range of 830 meters. Two rounds went too high, the third was dangerously close. If I manage to reverse the tank before the fourth one comes, I will have found an AT gun without losing a tank, which would be great. Not that I have contact of any kind - but I can hear the gun, and there is only one spot from which he could fire at the Firefly. And guess what, it is next to a TRP. So it will receive a mortar strike, and while the mission is in progress, I will creep back to the same spot with this Firefly and blast the suppressed gun to pieces with direct fire.

029_ATG.jpg
 
1530 hrs, Turn 30. The sound of mortar fire dies down. Only one of Bulletpoint's mortars fires now, the rest is saving ammo. I'm doing the same and the scouts resume their advance. Tanks remain behind - providing overwatch where possible. No need to expose them when they have no targets to shoot at.

The highlight of the turn is a skirmish between 1 Troop scouts and a team of German soldiers who retreated from Farine. They attempted a flanking move at the access road to Hill 312 but their morale was too low and were driven away with a few bursts from the scouts' Brens and Stens... and a few shots from the Webley for good measure. They might still succeed later, so watch out.
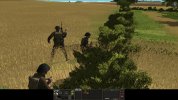
030_Scouts.jpg

A lot of movement at Vilage de Farine. I'm establishing observation in the tall buildings - can be risky with German heavy weapons around but I need intel. A PIAT team is moving forward to assist the scouts fighting their way up Hill 312. Armor is watching the Hill.
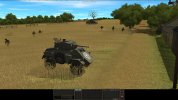
030_VFarine.jpg

Situation update, 1530 hrs. 30 minutes have passed, 1/4 of the allocated time for this battle. I have advanced 500 meters from the starting line. 1 Troop, in spite of taking heavy losses at Farine, continues to lead the way to Hill 312, encountering resistance from German units that retreated from Farine. This flank is defended by a HMG and two Panzerschrecks together with a Marder hiding in a bocage box on the eastern slope. Approach from the south is not viable - covered by the HMG, Panzerschreck and possibly AT guns further in the rear. 2 Troop has been under mortar fire for about 10 minutes and has accumulated some casualties, too. They face no resistance from German infantry but the field is covered by mortars, AT gun(s) and a tank destroyer from long distance. These defenses will take more time, effort, ammunition - and lives - to dismantle.

My assessment of the opponent's forces remains at a Panzergrenadier Battalion (infantry only) with 12x HMG, 6x 81mm Mtr, 2x 75mm IG, 3x ATG, supplemented with 4 Marders. Two Marders, both 75mm IG and one mortar are confirmed as destroyed. The defenders have taken at least 33 casualties. Enemy mortars have fired 109 rounds and I hope that 11 have been irretrievably lost with the destroyed mortar on Hill 312, leaving 72 rounds for Bulletpoint's use against my battered troops. One mortar and two AT guns have not yet been spotted, and only one HMG team has been spotted. Bulletpoint has shown great skill in saving his infantry from destruction, keeping them mobile and withdrawing them just in time.

I haven't seen any mines and if my assessment is correct, Bulletpoint did not have many points left for those.

My side has taken 31 casualties and 4 armored cars (3x Humber III, 1x Humber IV) have been lost. I have spent 45% of my mortar ammunition, leaving 262 rounds. The (numbers) on the map below show for each mortar or group of mortars, friendly or enemy, how much ammunition they have available. I estimate the current score as 117:483 for Bulletpoint, if the points for casualties are proportional to unit points cost value. For me, 50 for objectives + 67 for casualties. For Bulletpoint, 450+33. Overall a decent start.

I will continue pushing towards Hill 312 directly and, in parallel, try to drive an armored wedge between Hill 312 and Ville du Harfleur. The goal is to prevent German retreat from Hill 312 and ensure the destruction of the defending force.
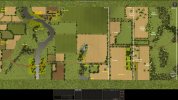
030_Update.jpg

In the near term, I must deal with the Marder defending access to Hill 312. I am playing a dangerous game that may result in a burning Sherman. The goal is to cover all movement options of the Marder but not to attack it directly while the Marder is not moving. Three Shermans participate (1, 2 and 3). I am also moving a 2in mortar into position (would be amazing if I manage to destroy the Marder with such a weapon!). The PIAT will take more time to move up. Meanwhile the bocage square with the Marder is under intermittent mortar fire. I am definitely making use of those TRPs.
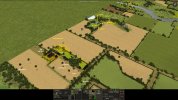
030_MarderHunt.jpg
 
1531 hrs, Turn 31. Two German mortars switched to "Target Briefly", firing only one shell per minute. Only the one back at the church fired 4 rounds at Farine-south. No effect - I don't have anyone there except one surviving armored car crew.

Scouts from the 1 Troop under Hill 312 took the bait and counterattacked the 3 Germans flanking them at the road bend. They ran into the field of fire of a German squad (plus a HMG team) defending the bocage box with the Marder. Two scouts were lost and the rest is suppressed, while the three German soldiers that lured them out are seen running into safety. I will be meeting them at the next line, and the next line, and the next line - this is why I must cut off Hill 312.

I will adjust mortar fire to hit these newfound German positions but something is telling me that in the 2 minutes it will take I will be hitting an empty field again.

031_Hill312.jpg
 
1532 hrs, Turn 32. As expected, as soon as I resumed advance and showed some infantry, mortars returned to their original rate of fire. Good news is that no casualties were taken to mortar fire and that two mortars should now be out of ammo. On the other hand, the "immortal mortar" crew on Hill 312 is seen again giving first aid and potentially retrieving ammo. This guy has received more HE than he deserves but is going to receive some more.

I launched another Marder hunt, against the one at Hill 312. Same script as before: one Sherman area-fires in front of the target (1.), the target retreats (2.), a Firefly moves into position and kills it (3., range 300 meters). But I have failed to consider the amount of foliage between the Firefly and the Marder and two AP shots are intercepted by trees (4.). At the end of the turn the Marder is just out of sight of the Firefly so I may not be able to destroy it in the next one.

032_Marder.jpg

Before retreating, the Marder also fires one HE that kills the 2 Section leader of 2 Troop. The 1 Section leader and another soldier are lightly wounded by friendly fire, when a Firefly area-firing suspected AT gun position on Bulletpoint Ridge hits a nearby tree. I am not happy with the combined indirect mortar fire and tank area fire attack on this gun - most mortar rounds were wasted on the surrounding fields. The tank will continue firing, even if this means risking more friendly casualties - the AT gun must go. Also, a second AT gun is visually confirmed on Bulletpoint Ridge.
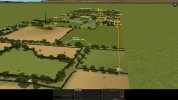
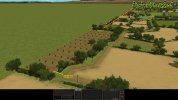
032_FriendlyFire.jpg

032_ATG.jpg
 
1533 hrs, Turn 33. The Marder - on its last legs (tracks?), judging by the speed it was moving - is finally destroyed by a second Sherman (the Firefly did not reacquire the target). Poor Marder did a great job surviving considering it was fighting 1 on 3 and that mortar rounds were falling around it for several turns.

A sniper (?) kills a scout from 2 Troop east of Harfleur. I only get a sound contact and a tracer and the sniper will certainly relocate. How do I fight snipers in a terrain like this? Infantry will die and tanks see nothing.

033_Sniper.jpg

Two post-strike images of two enemy ATG positions. The first one was targeted with an indirect 3in mortar strike. While the strike was in progress, the position was attacked with direct fire from a Firefly. The mortar attack is a disappointment - maybe 2 rounds of the whole lot landed close enough to hurt the gun. The Firefly did a better job but part of its fire was blocked by trees. I feel about 50% confidence that the gun was destroyed. The Firefly must continue firing.

033_ATG2.jpg

The second image shows how effectively can a position be protected by terrain. A tank just out of LOS cannot area fire it (perhaps because it is just out of LOS). I will stop wasting ammo here and move in a 3in mortar for a direct strike.

033_ATG1.jpg
 
Back
Top