Papercraft madness

Z

zaraza

Guest
DSC_0004_zpsa330ed19.jpg


DSC_0003_zps32ec1cf4.jpg


DSC_0005_zps842700fd.jpg


:)

1/100
 
Awesome! Those look great. Nice to see someone else who is into paper modeling. I actually prefer it to plastic modeling. My favorite part of model making is the building process; not the finishing process. With paper modeling all I have to do is build and not worry about painting and all that stuff.
 
I discovered paper modelling just few weeks ago...Didn't have idea what can be made of paper and how good it can look. Some people brushed they skill to the perfection.
Anyway, these models can be useful for table games, and there are lot of them to buy or download for free :)
 
Cool, so you're brand new to the hobby! Yeah, tons of free models out on the net. The only problem is that there isn't enough time to buiId them all! I got into paper modeling about seven years ago myself. I really like to build historical spacecraft from the space race era. I've also done a few random ones too, like a Kiwi bird :)
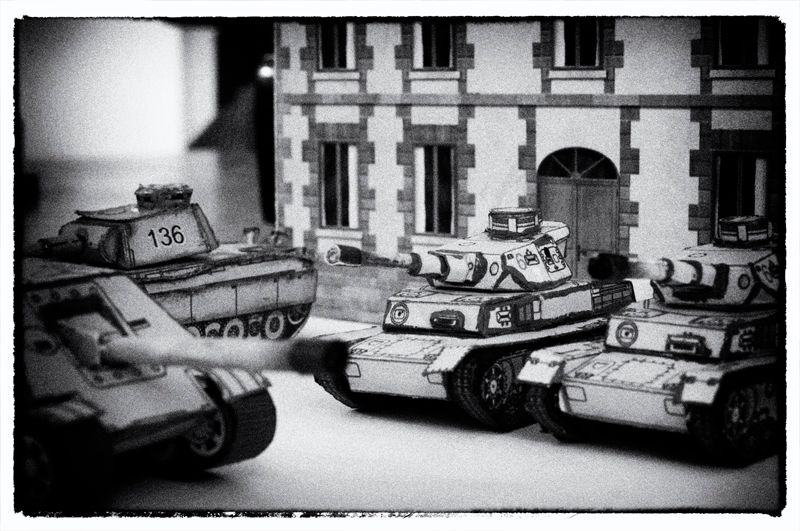
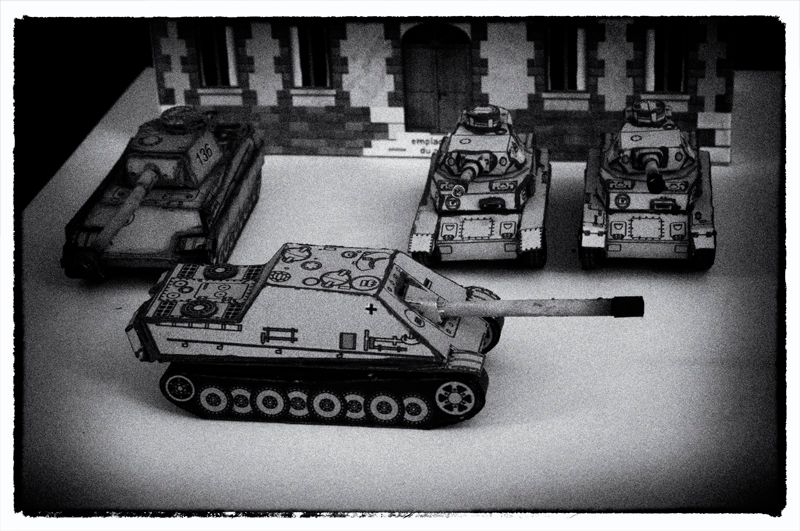
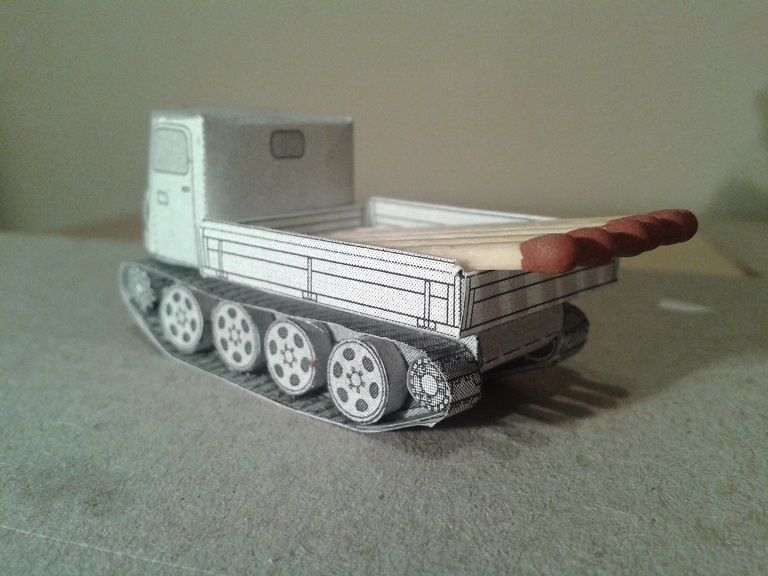
. Anyway, if you don't mind my posting some pictures in your thread, here are some of the rockets I've built:

Saturn 1B (the part in the background is the first stage of a Saturn V I've been working on. They're the same scale - 1:96)
fXzlsGc.jpg


Bunch of rockets and a Gemini capsule. My brother built the Jupiter-C (far left), and I built the rest. All are 1:96 except the Saturn V, which is 1:480. Talk about a pain to build! For a sense of scale, the baseboard in the background is about 3" tall.
AntKCJ3.jpg


If you want any links to other models, I have a bunch bookmarked I can share with you.
 
Those look very nice, you gave me an idea what to build next :) Saturn V could be interesting project (i am interested in astronautics and astronomy too). That vehicle must be very big in that scale, about 1 meter if i'm not wrong.

If you want any links to other models, I have a bunch bookmarked I can share with you.

Sure, why not!
 
Yeah, the Saturn V is just over 1m tall when finished; about 4 feet or 1.2 meters. The place I downloaded the 1:96 Saturn V (first link below) also has an insanely detailed 1:48 version in the works.

Alright, time to link bomb! Here are some of my paper model links. Quite a few good ones here. Should keep you busy for awhile :D.

I'll also let you in on a little tip. If you ever come across a free model you think you might like to build, download it right then and there. Chances are the link will be dead when you come back a few months later, and the model will have disappeared. I can't tell you how many times I've had to use archive.org's Wayback Machine to retrieve old models. Some of the links below are only available that way now. The models can still be downloaded, though.

Lower Hudson Valley Paper Model Gift Shop (Space Galore!) Be sure to check out the 1:48 scale Saturn V parts under Misc/Parts
AXM Space Paper Models
Aries Paper Models
MarsCenter
Precision Paper Space Models
Delta 7 Studios (Payware)
ecardmodels (Payware - Best X-15 by far)
U-Don's Factory His own designs are under downloads.
SF Papercraft
Uhu02's Paper Models
Space Paper Model Link Portal
Currell Graphics
Niels Paper Models
Stahlhart Papercraft
Russian Planes/Tanks Paper Models
Military Aircraft
Mame Craft
PaperCraft
Aircraft & Helicopter Link Portal
Y's Paper Model Workshop
Exclusive Models (Best free Tiger 1 anywhere!)
ICM Modelling (T34/76 & Panzer IV)
Ollis Modelle (StuG IIIG and others)
Olli's Papermodels
Japanese Ships and Miscellaneous
Canon Paper Craft
Paper Replika
Paperhobby
Paperkraft
M5A1 Stuart Model
PWS-10 Model
 
@ Rambler: Thank you very much. I appreciate this link collection as well.

I have never done this paper modeling before but will give it a try. Thumbs up!
 
Y'all are welcome!

Bootie - Not really, since you primarily use card stock or the heavier papers to make these. They're pretty sturdy. Many models also make use of internal support structures or formers, especially the rockets, which greatly aid in durability and strength. My Saturn 1B sruvived a move halfway across the US unscathed :).

Mehlsack - Awesome! I hope you enjoy it. Let us know what you decide to build! If you have any questions about making one, feel free to ask. Also, I'll go ahead and recommend a few tools for the job (you probably have most of this laying around):

Card stock or a heavy paper, preferrably 32lb/120gsm and above. I use the plain old card stock that can be found in office supply or craft stores. Can't remember the specs on it.
Cutting Mat
X-Acto knife with plenty of blades
Scissors
Sobo Glue or Aleene's Tacky Glue - I primarily use Sobo since that's what we used in design school to make our models. Quick setting, dries clear and is pretty flexible. Both are usually available at art/design supply stores.
Toothpicks
Tweezers or small pliers
Different diameter rods to form the card stock - My go-to forming rods are a toothpick, a K98 cleaning rod and a ballpoint pen for small to medium sized parts. For large parts you can usually form them by hand.
Patience - The great thing about paper modeling is that if you mess up, all you have to do is print out another parts sheet. I'm no stranger to doing that :D.
 
I am very proud to present my first paper model!
A "Raupenschlepper Ost (RSO)" with high explosive cargo! ;)

It was really challenging especially with the tiny wheels. They nearly broke my fingers and eyes.
Now I have to admit that I am infected with the papercraft madness too...:eek:
The next project will be an AT-AT from star wars as my 6-yr-old son loves them a lot.

Bootie: Do I deserve a modeler-Ribbon by now?

2013-02-22215134_zps2ded2a10.jpg


2013-02-22215406_zps6e154f47.jpg


2013-02-22215034_zpsf855133c.jpg
 
Good job on your first paper model! Looks great. I like the cargo it's carrying :D Yeah, those tiny parts can be a pain to work with, but the end result is worth it.

Glad to hear we have another convert to paper modeling too. Pretty fun, huh?
 
Hey Rambler, i have 2 questions for you.

First, what kind of paper are you using? I used regular A4 printing paper (Panther, and one of the PzIVs) and heavier (i think 180gr) paper.

Second - how do you make round elements - like rocket bodies? I can form the circle, but it deforms on place where i try to glue it :)
 
I typically use card stock. It's either 65 lb or 110 lb. I can't remember. I threw away the cover sheet that has all that data on it, but I can take a look to confirm which type it is tomorrow since I have to run to the store anyway. I'll let you know. I prefer card stock because it holds its shape really well when forming/curling it, and it also makes the models a little more durable. The thing to be aware of is that sometimes you have to modify the instructions and/or parts of the model you're making to better suit the properties of card stock. It's really just matter of knowing the medium you're working with.

A few questions so I can better answer your second question :). What type of glue are you using? Is the side you're trying to glue down popping off when you complete the cylinder? How is it deforming? What method are you using to join the edges toghether, a tab or overlap?

I think the following will solve your problem, though. The trick to doing cylinders, especially with a heavier paper, is to curl the paper before gluing it. If it's a large diameter cylinder you're making, the way I do it is to run my index finger along the backside of the paper while pulling the paper as you go. Kind of move your hand in a circular motion while doing this. This produces a curl. Keep doing this on the top and bottom edges of the cylinder-to-be so that it will naturally hold a somewhat circular shape before you glue the left and right edges together. If they are smaller diameter cylinders, I use a pen or toothpick to do the curling depending on the size of the part. The same process can be done with cones too. When you glue the edges together, make sure you have something solid on the backside of the seam to press it against. I hope that makes sense! It's hard to describe with words. If I have some time this weekend, I may try to do a little video to show you.
 
I'm using local variant of this one:

uhu-all-purpose-adhesive-20ml-2593-p.jpg


I'm using mixed methods - depending on what looks easier in particular case. I'll take a picture of M24 Grenade i started to work on to show you.

btw, short video would be very nice. Cylinders are general problem for me, you can see how bad my gun barrels are :)
 
Confirmed that the paper I use is 65lb/176gsm card stock at the store today, so the 180gsm you're using is pretty close to it. Yeah, that glue looks fine. I really don't think it's that causing your problem. Sure, post up some pics and I'll take a look at them. That M24 is awesome btw. I see the same guy has a full size Panzerfaust too :D. OK, I'll try put together a little demo video on how to do cylinders and cones for you this weekend :).
 
Didn't picture it last night, i was doing something else, but i will tonight :)
 
Here it is:

How it looks (including cat in inspection)
gr01_zps599d97ce.jpg


How it looks inside:
gr02_zps2717103a.jpg
 
I see your cat is looking into the problem too :D
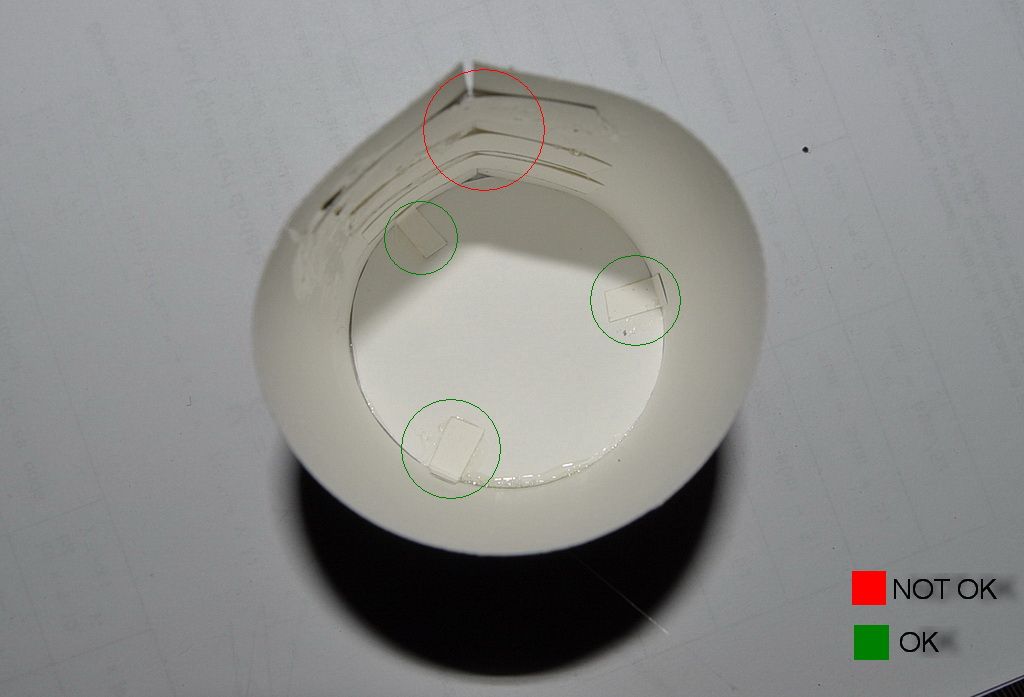
. Thanks for the pics; it helps a lot to see exactly what your problem is. Unfortunately, I wasn't able to sit down and make a video this weekend, but now I can tailor it to your problem now that I know what it is :). Basically, the tabs shouldn't be perpendicular to the seam. You should have one tab that goes along the length of the seam; in other words you need one vertical tab instead of multiple horizontal tabs. The pic below has two ways to do this:

example.jpg


The top method creates an overlap seam. When you cut the grenade head out, you need to cut past the printed edges a little bit, then do an angle cut on the top and bottom on the over cut. Apply glue to this portion, then wrap around the other edge and glue it to the over cut. The bottom method creates a flush seam, but requires you to make a seperate tab. Glue half the tab on the backside of one edge, then wrap around the other edge and glue it to the other half of the tab. It'll make more sense when I show it to you.
 
Back
Top Bottom