Progress screenshots: FGM Competition "1944" (Finished)2010

Yes guys, please post all progress here .... let's keep it all on one thread. That will make it easier for all to see the progression....
Thanks,
razorboy
 
Okay by the awesome powers invested in me by our Lord and Master Bootie while he's at work or down the pub, I've merged all the separate threads into this Group Build 44 Competition thread, below are the competitors and their entries, let me know if I've got it wrong or missed any out-

Razorboy- Stug and Grenadiers 'clearing the trench'
ACSpectre- Opel Blitz truck 'Maquis ambush'
McIvan- Crusader III AA tank
The Fisher King- Panther
Airborne Bob- Infantry defensive position
Willard- Wirbelwind
Zaraza- C-47

(Other non-competition projects remain in their own separate threads)
 
OK, I skipped a few steps of the instructions - just had to get at that quad 20mm main armament. I thought I did OK, until I saw the pictures on my PC. What an awful mess! It's not noticeable as much once I resized them, but blown up, you should see all the stringy gunk left from the old testors model cement. My 45 year old eyes are fading faster than I though I guess. LOL, I had to have my 6 year old daughter find the pieces onthe sprue for me. Anyway, here's a few shots. I'll see if I can start on the hull tonight.

Wirbelwindcanons-001.jpg


Wirbelwindcanons-003.jpg


I did manage to get the guns to elevate and depress as per the instructions - rather cool, how the gun sight moves in unison as the guns move up and down.
 
Nice job! A sharp knife will clean away the gunk no problems.

Know what you mean about eyes....my 43 yr old eyes are starting to have a little trouble focusing on small objects at close range like, oh, half the blimmin pieces of my Crusader.

Thanks Mick for merging the threads....
 
Excellent work Willard. Indeed a cheap pair of reading glasses and a hobby knife will get rid of all the glue "hair". I needed to buy a pair of reading glasses when I got back into the hobby.

Alas, age catches up with us all.
 
Thanks McIvan, ACSpectre. I'm kicking myself for not painting the cannons before assembling the unit. The kit instructions were not much help for the interior, but after checking the internet, it seems the cannons are generally black or gun metal, but the base and mechanisms are the hull colour (ie. "panzer yellow). Its going to be hard to get a crisp separation of the 2 colours.
 
I did a little bit of poking around the net, because everytime I look at it, it looks just like my dusty memories of the Tamiya kit.....and turns out it is a direct copy.

Whic is good news, because I remember that kit going together pretty sweetly, even if it's an old moulding by now...
 
Thanks McIvan, ACSpectre. I'm kicking myself for not painting the cannons before assembling the unit. The kit instructions were not much help for the interior, but after checking the internet, it seems the cannons are generally black or gun metal, but the base and mechanisms are the hull colour (ie. "panzer yellow). Its going to be hard to get a crisp separation of the 2 colours.

I try and paint as much as I can before assembling anything. I pay most parts while still on the sprue. That way after assembly all I have to do is touch up the spots where I cut the parts from the sprue and any blemishes I make with glue.
 
Did you determine if Academy bought the rights to it, or is it an "unauthorized" copy? I realized it was a copy after I made my post, as the figures are exactly as I remember them from the old Tamiya catologue.

I did a little bit of poking around the net, because everytime I look at it, it looks just like my dusty memories of the Tamiya kit.....and turns out it is a direct copy.

Whic is good news, because I remember that kit going together pretty sweetly, even if it's an old moulding by now...
 
No idea. I certainly wouldn't lose any sleep over it. I understand the mouldings aren't as good as Tamiya ones, but hey ho, that goes with the price tag.
 
I'm starting to enter the final stages of my model build. I still have some detail to add to the hull but I couldn't resist have a play around with the pigments. In this picture you can see I've gone to town with the rust pigment. I will be adding mud around the wheels and tracks and so the final look won't be as rusty. I have to say they really give the model chacter. I can't wait to get the full mud effect, along with the dust.

IMG_3741.jpg
 
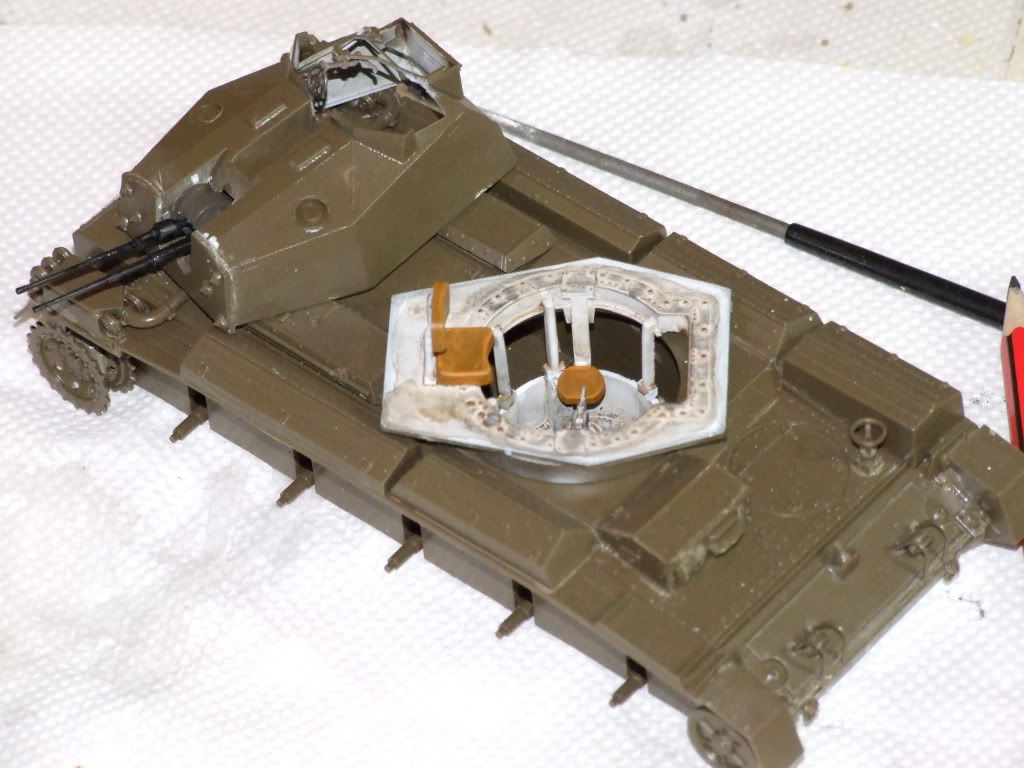
Progress on the Crusader Mk III AA.....first up a shot of the ass-end, with the muffler system in place. Have since added a bunch of grab handles, tools and hooks for the towing cable (which I might leave till last)

DSCF1616.jpg


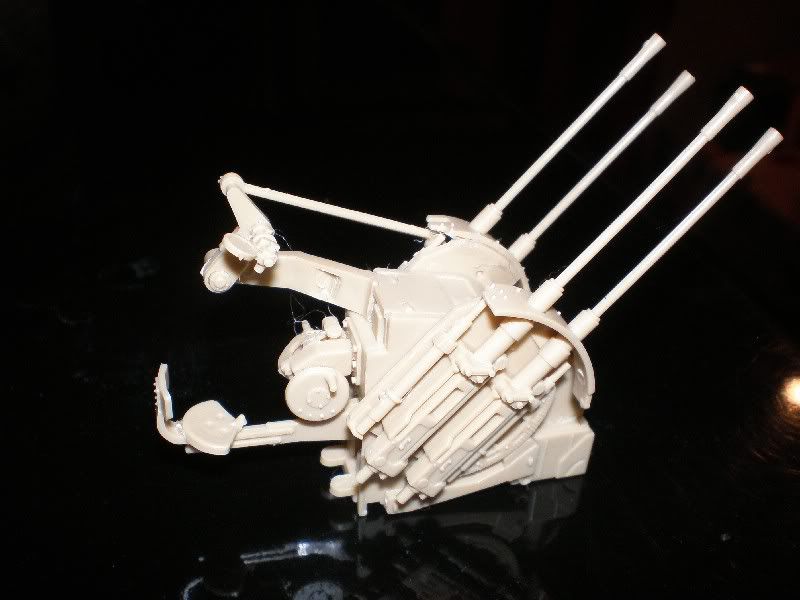
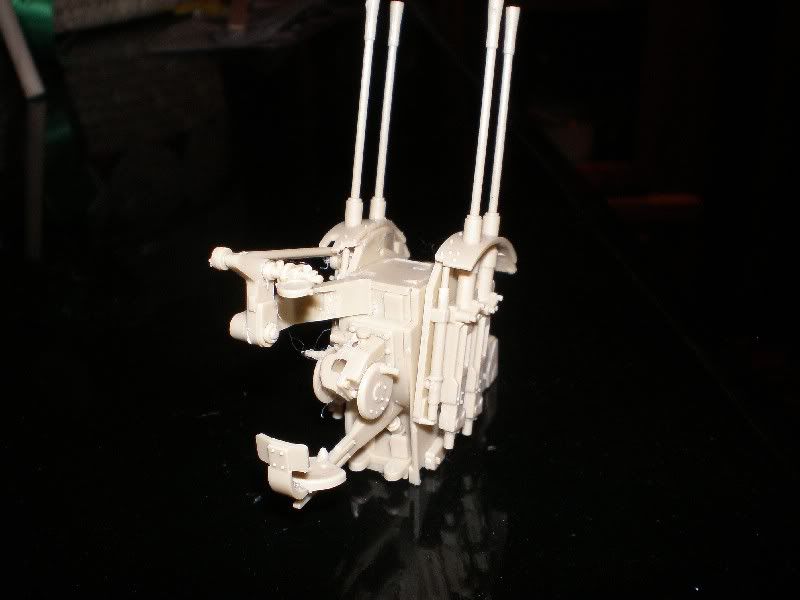
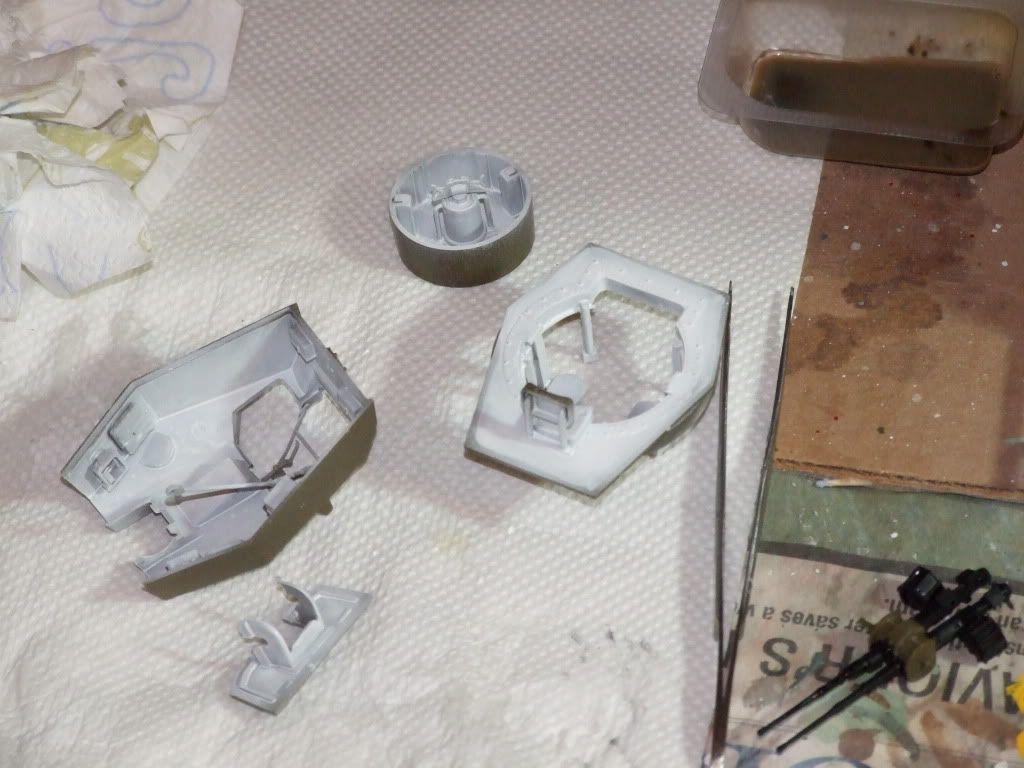
Next we have the turret....and after doing a bit of construction of the interior bin and the guns it was time to do the interior painting. Tried gloss white as per instructions, applied via paintbrush, but my gloss is old and didn't cover well. So I switched to flat white....and I can't imagine anything would have stayed gloss long.....and sprayed it. Guns got a flat black.

DSCF1677.jpg


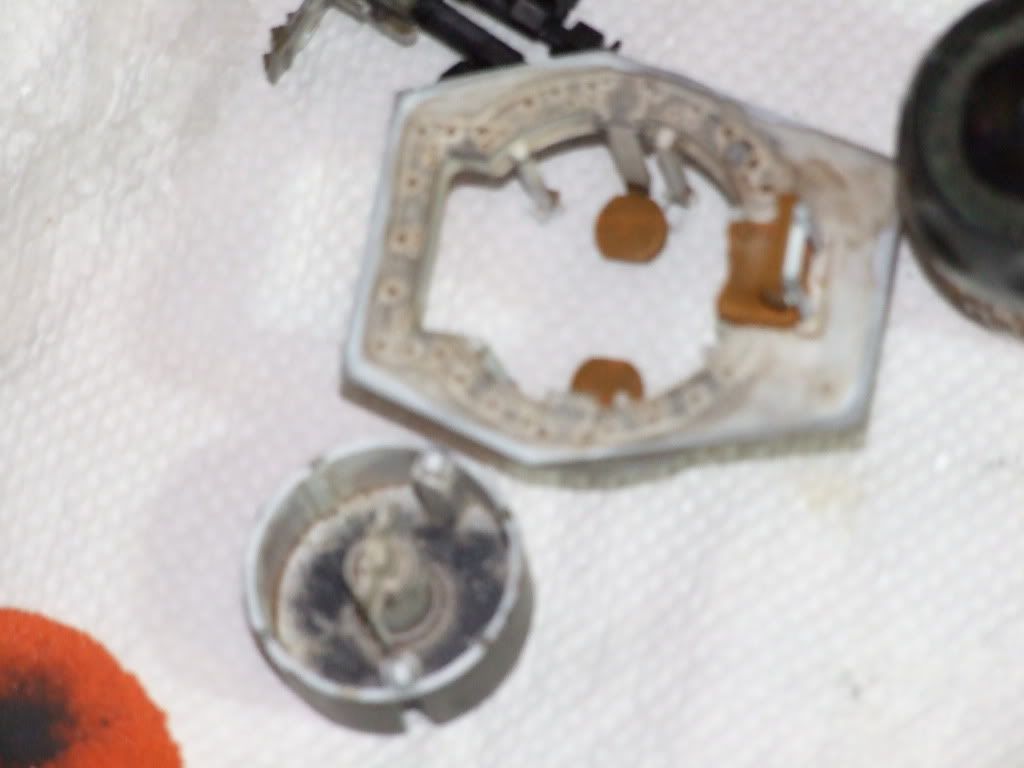
Next came a wash of raw umber. The photo flash makes it look like it puddled a bit in the top of the turret, but it didn't...was quite a nice effect. It's just still wet in the crevices when the photo was taken.

DSCF1679.jpg


Unfortunately the next one is a bit blurred. Firstly I brushed in grime and wear and tear on the bottom of the turret using a spiky painbrush with a small amount of dark grey, stabbing it gradually into the plastic, avoiding the edges where the paint would have stayed intact (the crevices all had the raw umber wash in them to indicate dirt & grime). I then gave a light drybrush of gun-metal to the raised mesh pattern on half the bottom...you can't really see this in the photo.

Next was a technique I hadn't tried before.

I took an ordinary pencil and a bit of sandpaper and rubbed the pencil on the sandpaper to build up a bit of a pile. Getting some on my fingertip, I started to rub down the interior of the model, paying particular attention to the turret ring and to grab handles in the upper turret. Following this the 20mm Oerlikons got the graphite treatment and came up really well....it's a lot more restrained than gun metal or silver/aluminium drybrushing and it is in keeping with what I imagine would be the case for a relatively new vehicle type seeing its first campaign.

DSCF1698.jpg


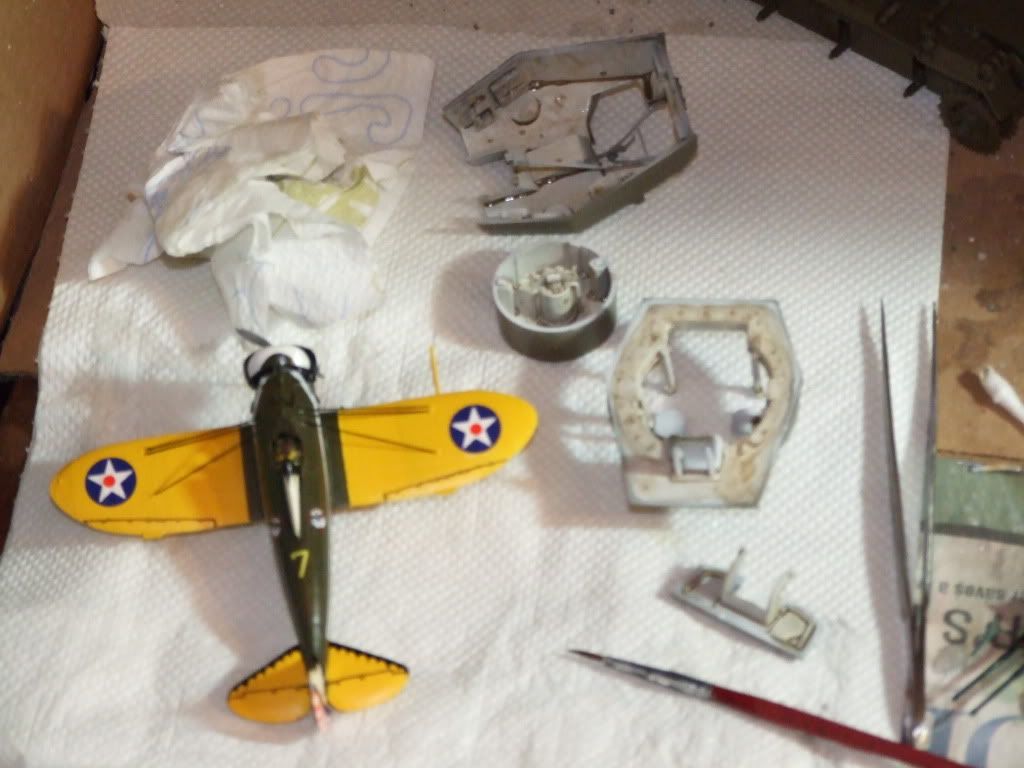
Seats got painted a leather colour, and highlighted with the same paint lightened with some white. Test fitting the turret bin to the hull came next, and the guns got fitted into the turret. This involved a lot of fiddling about as there is a rod that runs from the gun mantlet all the way to the sights on top of the turret, and is supposed to keep the sights frame aligned with the guns as they elevate.

DSCF1699.jpg


I've since joined the pieces of the turret together and added lifting hooks, searchlight and vents to complete it.

Time to do some painting now...think I've done all I can do without getting the base colour on. Still to do is:

tracks
road wheels
towing cables x 2
 
I've made further progress on the wheels and tracks. I still have more detail to add to the Hull as well as the skirts.

IMG_3747.jpg
 
Looking very good, I'm almost on the verge of taking the plunge and seeing if I can recall how to put a model together. Inspiring stuff, especially like the detail with the pigments, and the paint job looks good. Quite a jump in quality from the Halftrack, are you going to mount it?
 
Things in my life have calmed to a point that I will be able to return to my entry for this build. I am hoping to get some work done as early as this evening.

Fresh pictures coming soon.
 
Yes I am thinking of a diaroma, but I want to finish the main model first. The decals have been a bit of a problem, they don't stick to the zimmerit very well, as you can see from the photo. However I think it makes the tank look a little more worn so I can live with it.

I feel I've moved on significantly from my first attempt. I've been much more patient with this one, applying much thinner paint to build up layers. The pigments really help, more pics as I enter the final stage.
 
Back
Top Bottom