Welcome to The Few Good Men

Thanks for visiting our club and having a look around, there is a lot to see. Why not consider becoming a member?

Three Towns (Stafford vs Drifter Man DAR)

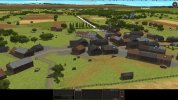
1250 hrs, Turn 1. The German war machine sets into motion. On the right, 2nd and 3rd Companies of the 1st Battalion are moving to claim Wynton and to secure the northern edge of the map, while 1st Company remains in reserve. On the left is the sector of the 2nd Battalion, 5th and 6th Companies are moving with 7th in reserve. 11th Company remains back in the setup zone as regimental reserve.

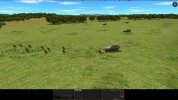
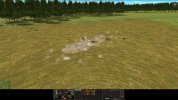
Unexpectedly I get an early tentative contact with light armor from 2 km away, south of Halberg. Spotted by the troops of the 6th Company, mounted on halftracks.

Turn001a.jpg

I can take some pride in my traffic management skills... no collisions, no traffic jams on Turn 1.

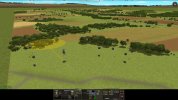
Turn001b.jpg
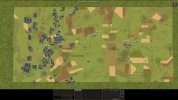
Turn001c.jpg
 
It seems you don't have a very detailed plan yet... advancing over a broad front. Maybe doing more of a "recon pull" than a "command push"? Do you have any key terrain identified or is the map just too big to be able to foresee how things will play out?
 
It seems you don't have a very detailed plan yet... advancing over a broad front. Maybe doing more of a "recon pull" than a "command push"? Do you have any key terrain identified or is the map just too big to be able to foresee how things will play out?
I have a plan - haven't gotten around to marking it on that shiny topo map. But right now - and that will occupy me for the next 10 minutes or so - I'm simply moving my starting line forward by 500-1000 meters. This move has actually a very detailed plan :) but rather boring to describe.
I don't expect Stafford will be able to interfere with this first move much, and before I get there, I will hopefully have gathered some early intel on what he has got and where he is, and then I'll present my grand plan to annihilate him!
 
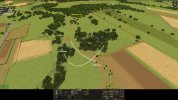
1253 hrs, Turn 3. After an uneventful Turn 2, with no more contacts (just a fence being run down that I noticed on my opponent's side), halftrack-mounted infantry starts to reach its destination and disembark.

Turn003.jpg

Unfortunately, in this turn I also hear two aircraft flying over. I am... disappointed. We have agreed on no pre-planned artillery strikes, the logic being that a meeting engagement is something of a chance encounter for which you cannot plan ahead. I thought it goes without saying that this extends to pre-planned air strikes. Apparently it does not.
Surprise surprise, there are 10,000 points worth of troops in the area the aircraft are going to attack. I hope they do not carry bombs.
Okay, Achtung Jabo. Disperse and hide.
 
We have agreed on no pre-planned artillery strikes, the logic being that a meeting engagement is something of a chance encounter for which you cannot plan ahead.
He could counter that by saying those are roving aircraft operating independently in the sector. However, I am also a bit disappointed.

Seems you now have the unfortunate choice between either pushing forward and accepting high casualties - since moving units are easily spotted by aircraft - or hide and accept five minutes of delay, which he will then use to reach the key terrain and settle in there.
 
Last edited:
You chose this place to debark because it was the last possible place where you could keep the halftracks in defilade? How long are you planning to have the guys run? What kind of position are they hoping to reach?

I'm asking these questions because I have often been thinking about how to better use halftracks more actively. I have my own ideas, but I'm curious about your approach.
 
He could counter that by saying those are roving aircraft operating independently in the sector. However, I am also a bit disappointed.

Seems you now have the unfortunate choice between either pushing forward and accepting high casualties - since moving units are easily spotted by aircraft - or hide and accept five minutes of delay, which he will then use to reach the key terrain and settle in there.
There is another aspect too; if you have no AA the airplane will not be scared off/shot down and will keep roaming around.
There is however also a good chance they'll hit their own troops. I never liked air much, it's always a bit of a game of chance.
 
There is another aspect too; if you have no AA the airplane will not be scared off/shot down and will keep roaming around.
I don't think AA has any effect whatsoever on attacking aircraft in this game.

No effect on aircraft spotting or accuracy.
No effect on how long they hang around.
And virtually no chance of shooting them down.

I'm basing this on several playthroughs of a scenario that had two attacking aircraft against a ridiculous amount of AA.
 
He could counter that by saying those are roving aircraft operating independently in the sector. However, I am also a bit disappointed.

Seems you now have the unfortunate choice between either pushing forward and accepting high casualties - since moving units are easily spotted by aircraft - or hide and accept five minutes of delay, which he will then use to reach the key terrain and settle in there.
It's a plausible explanation and I accept it. War is war... I reacted this way in part because I thought about confirming with Stafford, before the battle, that the no-preplanned-strike rule extends to aircraft, too. But I decided it was not necessary.
I came to the same conclusion and chose to push on. Depending on thay payload and the mode of attack, the airstrikes can go on for 5-10 minutes. I can't afford to wait this long - he could in the meantime advance across the map and catch me unprepared.
In addition, in many cases there is not much I can do. I changed a few quick orders to fast, changed a few waypoints, ordered a few units to hide if they were not important. I withdrew some armor from bunched up troops to avoid collateral damage. I made sure all vehicles are buttoned up. But overall I'm going ahead with the deployment and hope for the best.
As scary as they are, they usually don't cause that much damage. My main concern is that they'll drop a bomb into one of the infantry bunchups. In one place two platoons could go boom just like that.

There is another aspect too; if you have no AA the airplane will not be scared off/shot down and will keep roaming around.
There is however also a good chance they'll hit their own troops. I never liked air much, it's always a bit of a game of chance.
I have no AA, although I knew that Stafford might bring aircraft - I concluded that AA's limited (but not non-existent) effect on aircraft is not worth the points spent on an otherwise useless asset.
Since they have area targets that cannot be larger than 700 m in diameter, it is unlikely that they will score an own goal - our forces are well separated by distance. But we'll see :)

I don't think AA has any effect whatsoever on attacking aircraft in this game.

No effect on aircraft spotting or accuracy.
No effect on how long they hang around.
And virtually no chance of shooting them down.

I'm basing this on several playthroughs of a scenario that had two attacking aircraft against a ridiculous amount of AA.

I ran a few "hotseat" tests myself, never managed to shoot one down, but did drive some away. I was able to call them back for another strike though, as the other player.
As scary as they are, they usually don't cause that much damage. I'll live - and have some confidence for the rest of the game that they're not coming back.
 
You chose this place to debark because it was the last possible place where you could keep the halftracks in defilade? How long are you planning to have the guys run? What kind of position are they hoping to reach?

I'm asking these questions because I have often been thinking about how to better use halftracks more actively. I have my own ideas, but I'm curious about your approach.
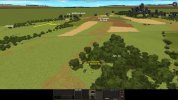
Good questions. Here's another image of the same situation, already with the modified orders to minimize exposure to aircraft (Fast replaced Quick).
The ones on the left should reach the tree line from which they can only see about 100 meters before terrain blocks the view. Their job is to defend the northern edge of the map.
The ones on the right should see the high ground ~200 meters in front of them but not past that, either.
The halftracks could move closer but somehow I think they are less likely to get randomly spotted - so my opponent will not know that I'm there. They are now withdrawing towards the edge of the map, because it is unlikely that my opponent placed the area target over the edge - he is probably targeting Wynton and the central areas of the map. But it doesn't matter - if you manage to hide one target from the aircraft, they will find another.

Turn003b.jpg
 
I ran a few "hotseat" tests myself, never managed to shoot one down, but did drive some away. I was able to call them back for another strike though, as the other player.
I don't think they drive off aircraft. I think the aircraft just sometimes decide to disengage on their own, if they don't manage to spot any enemies for a while.

The scenario I played had more than 25 AA vehicles; about 10 were quad mounts, 10 were triples and the rest smaller ones. Whole sky lit up like Desert Storm. Planes kept attacking and took out several of the AA vehicles by strafing them.
 
1254 hrs, Turn 4. Good news - Stafford doesn't want me to bore you with troop movements for the next 20 minutes of the game and wants to kick off the action early. While my forces are deploying around Wynton, a Humber III armored car with a death wish drives down the road straight towards the town. Several StuGs fail to spot it, but that's not a surprise, I ordered hatches closed in the expectation of the air attack. Which, by the way, did not come. I should have realized that Stafford gave a 5-minute delay, so I should still have one minute to move or take cover.

Anyway, this armored car reaches Wynton and then turns off the road to use buildings as cover. I claimed earlier here, in relation to the risk of friendly fire from aircraft, that we were safely separated by distance - not anymore, we are now 40 meters apart :)

Turn004.jpg

Meanwhile, a Cromwell IV tank is spotted just south of the highest hill on the map. At the end of the turn it just slams the brakes and spots one of my vehicles - probably one of my empty halftracks.
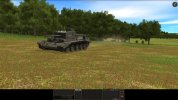
Turn004b.jpg

A further light armor contact is reported in the woods just east of Wynton. No shots are exchanged - everyone on both sides seems too busy getting to their destinations - but that will soon change.

So, what is Stafford up to? It may be just a small probe to cause some losses among exposed troops on the move, to find out what I've got, and buy time for the rest of his troops to catch up. It might also be a more serious attack that hopes to catch me unprepared and disorganized as I have just moved out of the setup zone. The coordination with the airstrike points to the latter, but it could be very risky for him. I don't mind fighting on my half of the map and I am ready for the most part. The main worry is now the position of 1st Platoon, 5th Company, who overextended themselves and could end up under fire by armor from multiple sides. Note - the infantry contact on the road probably isn't real, I think it is a shadow left over by the crew of the armored car, but I may be wrong about that.
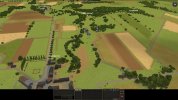
Turn004c.jpg

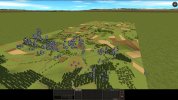
Perhaps this is a good time to show the overall situation and explain my plan. As I said, my first priority is to secure Wynton - the town and the terrain surrounding it. Going forward from there, there are two ridgelines that split the map in two - you can't see to the other side unless you get on top of them, like the Cromwell tank has done just now. The problem with ridges and hilltops is, of course, that the more you can see from them the more you get shot at. The Cromwell is in FOV of a whole StuG platoon and I hope it will stay long enough to get sighted - and lighted. I only want to put scouts on the ridges to gather intel, and infantry behind to defend, but I don't plan to go across. Instead, I want my forces to converge in the center, around Louvoy, which is in a valley and has a fair amount of concealment and cover for infantry. Stafford probably has a similar plan, so Louvoy might become a choke point where we will need to decide the battle. Or maybe not.

The map below this general idea of avoiding the ridges (yellow dashed line). The advance is supposed to be led by the 2nd and 5th Companies. I don't have a more detailed plan past securing Wynton - this is a meeting engagement and as you see, things change fast. I'll start drawing up plans for specific moves once I deal with the current troubles. The approaches to Wynton and the ridgelines are now covered by StuGs and infantry is either in position or getting into position soon. 2nd Company will finish their move to secure the northern flank. 3rd Company, which was originally tasked to take Wynton in full force, gets new orders to minimize damage if the aircraft end up bombing the town. Only 2nd platoon will stay and defend, 1st and 3rd will stay back. I may try splitting off scout teams and let them run around as bait for strafing runs - I observed that the aircraft tend to strike what they can see best.

About Cromwells: they are potentially very dangerous. They are fast and StuGs can't keep up at close range as they have no turrets. This would be the case for any Allied armor but for Cromwells (and Stuarts) in particular. I must keep a safe distance and have a line of assault guns that can cover each other, screened by infantry. 1st StuG Platoon in the south is in a good position, but not a great one - there were absolutely no hull down positions all the way from the setup zone to the southern ridge where the Cromwell is. In the end I found some partial hull down positions for them near the southern edge, but they have nowhere to retreat if they meet something they can't handle.

In the next turn I may lose some empty halftracks but I also hope to get an armor kill, maybe even two... if I am lucky. I will order artillery on the woods in front of me for the eventuality that this is the start of a full-scale attack and the battle will be fought here and now.
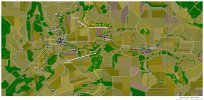
ThreeTowns_TopoMap_Plan.jpg
 
I may try splitting off scout teams and let them run around as bait for strafing runs - I observed that the aircraft tend to strike what they can see best.
I think such a move would be a poor match for your otherwise very sensible and realistic force composition and tactics.

Enjoying the DAR by the way. Especially the overhead situation maps.
 
I think such a move would be a poor match for your otherwise very sensible and realistic force composition and tactics.
True - but I'm just curious to find out if it works :)
Other items that may offend your impression of my adherence to realism are: listening for mortars (and gunfire) in the absence of contacts; listening to enemy tank crews; and watching out for busted fences far out of LOS.

Enjoying the DAR by the way. Especially the overhead situation maps.
Thanks - here is another one, which shows why I need to distil the information into a simpler map... and it is only going to get worse!

Turn004d.jpg
 
What do you mean by this?
"Watch out, enemy vehicle!"

About listening for mortars - I agree it shouldn't be part of the game. Again, one thing that was handled by CMx1 quite well - no sound unless you have a sound contact, and then the sound comes from the sound contact marker - which may be misplaced (generally misplaced enough not to allow targeting).
But it is part of the game, so I play with it...
 
Again, one thing that was handled by CMx1 quite well - no sound unless you have a sound contact, and then the sound comes from the sound contact marker - which may be misplaced (generally misplaced enough not to allow targeting).
I never played CM1, but it's interesting how it was more advanced and superior in some ways.
 
I never played CM1, but it's interesting how it was more advanced and superior in some ways.
In honesty in more then a few ways. I very much liked the mis-identification of units too, sometimes a tiger would turn out to be actually just a pzIV misidentified by your green (scared) infantry. I also very much liked the command delay, where depending on the C&C status of units, it would take a certain time before your command ended up with the unit. And of course, russians were must slower to react then Germans. Commanding a Russian platoon of t-34s without radio was hell as soon as they buttoned up, they'd be more or less cut off from the world then as they were in real life. Just a few things that come to mind.
 
1255 hrs, Turn 5.

Shots were fired. Blood was spilled. Metal was pierced.

The Battle of Three Towns has begun.

20,000 points. 2000 men. 80 vehicles*.

Who will be in control of the three towns when the dust settles?

*If Stafford has got as many as I do.


The radio operator of the heavy platoon, 3rd Company, had the honor to fire the first shot and get the first kill of the battle, hitting the commander of the Humber armored car that had so brazenly driven into Wynton. He also became the first German casualty when the gunner of the vehicle retaliated. Since the armored car reversed out after taking a casualty, the antitank team I ordered to move in arrived just a few seconds later found the target already out of range of their Panzerfaust. I need to bring a bigger rocket :)

In the south we left the last turn with a Cromwell climbing up Hill 36 and sighting an empty halftrack. It may have lost contact, or Stafford ordered it to go on and not waste time on a minor vehicle - in any case it did not open fire and continued on its way. Soon it was joined by another Cromwell IV and another Humber III, while yet another Humber III was spotted moving across Hill 33 towards the positions of the 1st Platoon, 6th Company at the southern edge of the map. No fire exchange occurred here in this turn. At the end of the turn, one of the 1st Platoon StuGs finally spots a Cromwells and is getting ready to open fire at 840 meters. Those cliffhangers!

Turn005a.jpg

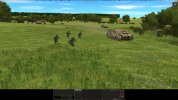
Things happen in the northern sector of the 2nd Company, too. An enemy Stuart V slams into the positions of the 1st Platoon, which has just been delivered by halftracks to protect against such flanking moves. The Stuart is promptly schrecked, but not before it manages to immobilize one of my halftracks: a 37mm AP round kills the engine and the driver, two very important components if the vehicle is supposed to go anywhere. Fortunately the gunner is alive and in good position to provide support to 1/2 if necessary.

Turn005b.jpg

The aircraft - a section of Typhoons - arrived one turn earlier than I expected. Regrettably, they chose targets in the setup zone, where I did not bother to take any precautions - units are reasonably spaced out but squads are not split up and are hiding in open ground. Two squads from the reserve 7th and 11th Companies took 6 casualties each from strafing runs. I complained to Stafford and he apologized, promising to call them off immediately. He had made a mistake when setting up the area of attack - the setup zones are unusually wide on this map. It does not feel good to be hit in the setup zone like this, but I don't think this has put me at a substantial disadvantage. The aircraft would have attacked other units and the result might be just as devastating. I could not hide and disperse everyone, it's a whole panzergrenadier regiment on the move, hundreds of men. However, for the next turn I'm doing my best to disperse the troops in the setup zone as well - splitting teams and running for cover. It may take some time before the pilots receive and act on Stafford's orders.

Turn005c.jpg

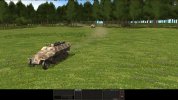
Finally, an interesting situation is setting up ahead in the woods I want my 5th Company pass through at a later stage. The light armor contact materializes as another Humber III (the fifth one I have spotted - there is another one coming in across the northern ridge). It passes unnoticed through an area covered by a StuG and takes position in a small dip in the terrain. It's genius. The car cannot be seen from anywhere farther than ~200 meters, yet it effectively blocks off this avenue of approach for infantry. Its armor proof against small arms fire - even against HMGs - and it is 180 m away from the panzerschreck I sent in with 1st Platoon, 5th Company, that is scouting ahead in this area. Shooting from such distance at a small vehicle in a hull down position does not promise much effect, but the situation draws to my attention that I dropped off the schreck on the wrong side on the road - I need it on the other side, to cover this blind spot my opponent is exploiting. In the meantime, I decide to risk a halftrack and put it against the Humber III face to face at 130 meters. The 7.92mm AP fired by its MG can penetrate frontal armor of the Humber III at short distance. A win is not guaranteed, but it seems preferable to wasting antitank rockets.

Turn005d.jpg

As for my opponent's forces, the appearance of five Humber III armored cars indicates a Recce Regiment - the same formation I used in my probe at Monsaint Manor last year against the forces of Oberstleutnant von Kugelpunkt. Cromwells and Stuarts could be either from a standard Armoured Regiment (which can also have Fireflies mixed in) or an Armoured Recce Regiment (Cromwells and Stuarts only).
 
Back
Top