Welcome to The Few Good Men

Thanks for visiting our club and having a look around, there is a lot to see. Why not consider becoming a member?

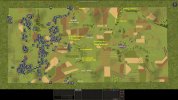
Three Towns (Stafford vs Drifter Man DAR)

In the meantime, I decide to risk a halftrack and put it against the Humber III face to face at 130 meters. The 7.92mm AP fired by its MG can penetrate frontal armor of the Humber III at short distance.
Since you're not the kind of guy leaves things to chance, I'm pretty sure you've already tested this out. But I'll be surprised if a Humber can be penetrated by MG from the front at 130m.

Should be a Humber IV by the way, if it has the 37mm gun?
 
Last edited:
Praise Shregg, and his six sons.
Yes, praise Shregg and his invisible hand that guides unguided rockets to their targets.
Since you're not the kind of guy leaves things to chance, I'm pretty sure you've already tested this out. But I'll be surprised if a Humber can be penetrated by MG from the front at 130m.

Should be a Humber IV by the way, if it has the 37mm gun?
Yes - I tested it a couple of times. It can get anything from armor spalling to full penetration at this distance. Return fire can hit the gunner, otherwise the halftrack is fine. It is a Humber III with the Bren gun mounted in the turret. I have not seen a Humber IV yet - the 37mm was fired by the schrecked Stuart, just before it got schrecked.
We have a rule that limits vehicles armed above 0.50cal to 3000 points. So it makes sense that he chooses a few Humber III cars - unlike Humber IV, they do not count into this limit.

It is a risk for the halftrack because my opponent will clearly understand what I am going to do, and can move in other armor (that I do not see yet) to kill the halftrack.
 
Wow things are starting to heat up. Gripping!
Is Stafford not going to be doing a DAR too? It'd be interesting to see both viewpoints.
Good reports and screen shots @Drifter Man.
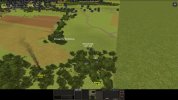
Gripping indeed - a battle of this size has a very different feel from the usual small ones. It is hard to share in a description.
Stafford did not mention making a DAR - but I am sure he will give his comments at the end.
 
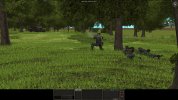
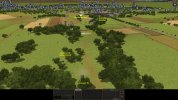
1256 hrs, Turn 6. British light armor continues to press both at the northern and at the southern edge of the map. It is puzzling - my opponent clearly knows I have infantry with panzerschrecks there, but is not afraid to drive right into the woods with hatches open. In the north, a second Stuart V appears from the valley to the east and smashes right into the positions of 1st Platoon, 2nd Company. This time it just drives into the woods as if trying to overrun my platoon. This way it avoids the first panzerschreck, while the second one does not have LOS just on the spot where the tank ends up sitting. My panzergrenadiers, for some reason, do not use grenades, and the one team that has a PF30K also happens not to have LOS. The Stuart (hatches closed after my men tried to hit the commander) has good situational awareness and kills 3 men with close range MG fire.

Turn006f.jpg

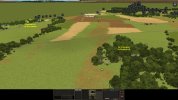
This worries me - although this Stuart shouldn't be able to push through and I think Stafford will reverse out of the woods in the next turn, his willingness to throw away light tanks like this can mean that he very badly wants to drive through here. If he does this with a few tanks, he could succeed and outflank this side of the defenses of Wynton, StuGs would be in trouble. In response, I will move the Marder to an overwatch position back in the setup zone, from where it should be able to help on this northern edge of the map. But for that, the air attacks must first stop. I have tucked the Marder into a gap between buildings and intend to leave it there until I know the Typhoons are gone.

Something similar happens on the South Ridge on Hill 33, in the sector of 1st Platoon, 6th Company, but this time it is just a Humber III. The end of the turn catches two tossed grenades mid-air.

Turn006e.jpg

Meanwhile, one Cromwell at Hill 36 is targeted by two StuGs from the 1st Platoon. They fire 8 AP rounds together, most of which are either too long or hit some trees. One finally hits and penetrates through the gun mount - the Cromwell survives but throws smoke and retreats. I hope the main gun is destroyed. The second Cromwell and a Humber III climb the hill, looking for a new position not covered by my assault guns. I will counter that move by repositioning one StuG and, as an emergency measure, one assault howitzer as well.

Turn006d.jpg

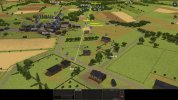
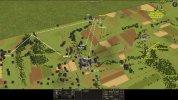
In the center, at Wynton, the Humber III armored car without its commander goes on a suicide ride south of the town. This way it misses its rendezvous with a panzerschreck I was sending, and eventually stops when it meets nose to nose with an assault howtizer. My vehicle responds angrily by firing a 105mm HE, a projectile not very suitable for dealing with this situation, and misses. The Humber III throws smoke... in a very bad place for me. This smoke is going to block a key line of fire for my StuG.

Turn006b.jpg

In the back you can also see the standoff between the halftrack and the other Humber III. I moved the halftrack but did not expose the gunner, otherwise he could get hit by the Humber while on the move. I will give him a target order in the next turn.

To the northeast of Wynton, a Humber III driving carelessly across the North Ridge is taken out by a StuG. At this point Stafford could not have assumed for a second it would survive.

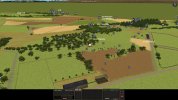
Finally, the Typhoons make their second pass. One attacks the setup zone again - but at least now I have split my squads and dispersed them around. Still, one 4-man team blinks out of existence, showered by 20mm HE. The second Typhoon chooses a mortar halftrack south of Wynton. The carried ammunition detonates in a spectacular explosion, but hurts no one - except the driver of course, who is vaporized. However, three men from an infantry team hiding nearby are lost to 20mm.

Turn006c.jpg
 
e have a rule that limits vehicles armed above 0.50cal to 3000 points. So it makes sense that he chooses a few Humber III cars
Alright, I had misread the rule as limiting anything over 50mm.

Yes, praise Shregg and his invisible hand that guides unguided rockets to their targets.

Indeed, he is the guider of the unguided.
 
Alright, I had misread the rule as limiting anything over 50mm.
I quite like the rule, I've copied it to a "Large" game I'm setting up with @Tchoup. I felt the squeeze when buying, so that can only be good :D

After spending literally several hours buying forces, reconning the map, determining possible routes of attack, key positions, defensive positions and finally setting up, I feel for you @Drifter Man. This was only ~5000 points. Can't even imagine having to manage 20.000 points! :oops:
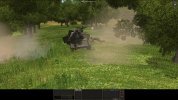
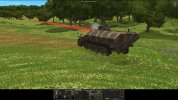
I find the rule acceptable - it is a rule that Stafford likes for ladder games (or a modification of that rule that I requested - I think his version is 10 vehicles per infantry battalion, which I find hard to interpret exactly).
Some games need more vehicles, some need few, and I prefer not having rules unless they are necessary. At the same time, I can see the good side of it - neither player should find themselves terribly outmatched by his opponents' armor.

Also - this battle has 10,000 points per side. Only twice as much as you have :) Enjoy the grind of CM with a huge force! I spend hours on each turn - including documentation for the DAR - so we're going quite slowly here.
 
1257 hrs, Turn 7. The three fights involving enemy armor in the woods were resolved. In the north, the Stuart pulled out before I could bring in anything that could hurt it, and hit two more men on the way. In the south, the Humber III also tried to retreat, but was knocked out by grenades and the crew got machinegunned.

Turn007c.jpg

In the center, the halftrack first proved that 7.92mm AP is a suitable weapon against the Humber III at close range - two British crewmen were hit and the third bailed out. The vehicle can still be reclaimed by Stafford - in fact, any small infantry team can take it. Humber III works like a jeep.

Turn007a.jpg

However, as I feared, my plan was too predictable and a third contender joined the duel uninvited - one of a substantially higher weight category. Taking advantage of the smoke screen inadvertently laid by the suicide Humber at Wynton in the turn before, a Cromwell IV tank took a position previously covered by my StuG, maneuvering carefully to stay out of Panzerschreck range, and annihilated my halftrack with two shots. Fire from another tank, probably another Cromwell, hit the woods held by 1/5, targeting a position that could be taken by a Panzerschreck (but wasn't) and that was just within 200 m of the Cromwell - Stafford did not want to leave anything to chance. While he is willing to risk Humbers and light tanks, he takes proper care of his Cromwells.

Turn007b.jpg

The "Suicide Humber" survived by the way, it will sure create more mayhem in the turns to come.

The Typhoons returned for another pass, targeting the reserve companies once again, but causing little damage this time. One aircraft strafed the bodies of the unfortunate infantry team that had been eliminated the turn before, the other took out two remaining survivors from a squad that was nearly wiped out in the first pass.

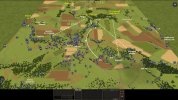
With my positions at Wynton set up, my artillery 6 minutes away, and the air attacks hopefully over or almost over, it is time for the next step forward. 5th Company will lead the way at the center. I want to secure the center first - the flanks are well covered but the center would be a threat if I tried to move the flanks first. The difficulty is to secure artillery support in this area. I will start by smoking the current position of this new Cromwell with a medium mortar (from a rather exposed position - will withdraw it from there as soon as possible) and putting some 105mm HE from a StuH 42 on Hill 36, where enemy armor is hiding in the woods. I have one HQ team (2nd Company 2IC) on my northern flank, in the attic of a two-story building, from where they can see past the high ground north of the Wynton-Louvoy road. This team will direct 120mm mortars on the woods south of Louvoy in 10-15 minutes.

Concurrently I entertain the idea of taking Hill 36 with the 6th Company on halftracks. I have very good observation on the hill and the approach is well covered, so it should be safe. The move would protect the right flank of the 5th Company. But I am not sure if this is necessary as I can blast the hill to pieces with 150mm artillery. Maybe I should keep the 6th and the halftracks for something more important.

Turn007d.jpg
 
In the south, the Humber III also tried to retreat, but was knocked out by grenades and the crew got machinegunned.

Turn007c.jpg
Just a quick note on terminology: I believe this is not a Humber III, but a Humber LRC (Mk III).

Now I better understand why you could knock out the other Humber LRC with MG fire. Maybe you remember I tried to do the same in our recent game. Unfortunately, I did not have AP available, so it didn't work.
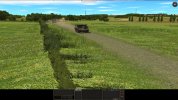

And I believe you are right - CMBN calls it Humber III but the abbreviation LRC is in the details tab.
I remember. I noticed it because you have to give a direct target order to a MG unit to open fire at these armored cars. They will not open fire of their own volition. So when the bullets started hitting my Humber LRC, I knew you were trying.
 
1258 hrs, Turn 8. The aircraft are gone, leaving behind 22 casualties and one burning wreck. I am starting to aid the wounded. There aren't many: 20mm cannons don't mess around. But I am going to recover all equipment - MG42, radios, binoculars. I'm not leaving these things in the setup zone.

Not much fighting in this turn, but there is some movement. In the northern part of the map, my scouts on the North Ridge observe a convoy of three Universal Carriers and one jeep, plus possibly some other light armor and truck contacts, driving north from Halberg to the northern edge of the map. They carry no passengers, so they are probably on the way to pick something up. The place they are heading towards is high ground that could be useful for deployment of mortars to bombard North Ridge. But since I am not holding the ridge, I speculate that Stafford decided to relocate them. With this many vehicles it should be at least a two sections, possibly whole platoon of 3in mortars.

At the center, the suicide Humber LRC tries to make the run back for Louvoy, and is finally terminated by a StuG. Meanwhile, two Cromwells in the wood gap southwest of Louvoy shell the positions of 1/5. Two lightly wounded on my side. More vehicle contacts are reported heading towards that area - a recce platoon on its way? On Hill 36, the crew of the enemy Humber LRC disembarks and scouts forward on foot. My 105mm Howitzer fires two shells at Hill 36, but both are too long and explode in the fields to the east of the hill.

Turn008a.jpg

Turn008b.jpg
 
1259 hrs, Turn 9. Another turn without much fighting and with no casualties. While I am moving the 5th Company forward, I am also working to secure the positions of my most exposed platoons - 1/2 on the North Ridge and 1/6 at Hill 33. 1/6 is harder to support - I am only able to deploy one mortar to help them out - and they could end up getting overrun by tanks on the hilltop they are defending. In addition, Hill 33 is turning out to be a poor vantage point. I will pull them back towards the western foot of the hill. Nothing to gain here, only lose.

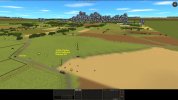
North Ridge could soon become interesting. Scouts report that the convoy on the road north of Halberg has stopped to give way to higher priority traffic:

Turn009a.jpg

This is a British rifle platoon - I can see a PIAT and three Stens - in the truck, with HQ, light mortar team and probably a small detachment in the halftrack, plus some other HQ team also in the halftrack. They are heading west - maybe just to take the group of buildings east of the ridge, but more likely to try another attack where the Stuarts started the work several turns ago causing 5 casualties among the 1st Platoon. As I said back then, a breakthrough at this point could be dangerous, so I'll spare no effort securing this point. I expect my opponent to attack frontally, because that is where it is most difficult to get support fire from Wynton. The attack will receive close support of the Stuart, and possibly of other forces I don't know about yet. In response to this sighting, I am deploying two mortar teams to be able to fire directly in front of the positions of the 1st Platoon. A StuG is already in position and a Marder is being deployed to pick off any armor that gets through. Mortars are to start ranging in using Target Light orders as soon as they deploy.

Turn009b.jpg
 
This is a British rifle platoon - I can see a PIAT and three Stens - in the truck, with HQ, light mortar team and probably a small detachment in the halftrack, plus some other HQ team also in the halftrack.
This always irked me. How the hell are you able to positively identify everything inside the truck? It's an engine limitation to do with the fact the HT is positively identified, and thus everything in it. But really, your men should only see that the truck is loaded with a few people at most (depending on vantage point) and if it's towing anything. But to determine exactly what is in the HT should be a bit more difficult really....
 
It's an engine limitation
There are many of these "engine limitations" that would probably not be too hard to fix:

Make it so that you can..

only hear fences crushed by your own vehicles.
only hear mortars when you actively spot them
only hear your own vehicle crewmen talking
only spot passengers in open trucks (not covered like the Bedford)

Notice how you can only hear tank engines while actively spotting the tank. It's not anything impossible to code.
 
On topic, I must say I'm a bit puzzled by the British redeployment maneuvers in the north. Maybe Stafford changed his mind about what he wants to do with those troops, but it still seems risky to redeploy them mounted like that in full view of North Ridge.
I have some ideas about what he might be trying to do, but I will keep quiet to not interfer.
 
On topic, I must say I'm a bit puzzled by the British redeployment maneuvers in the north. Maybe Stafford changed his mind about what he wants to do with those troops, but it still seems risky to redeploy them mounted like that in full view of North Ridge.
I doubt he's re-deploying. I think it's his deployment. He probably send in his AFVs and scout cars in first to meet up with @Drifter Man's forces. If you look at the overview map, you see they're not meeting in the middle, they're meeting more to @Drifter Man 's side of the map. It explains the suicidal behavior of the scout cars, they are meant to tie up his forces, even if temporarily, to figure out what @Drifter Man is up to and slowing him down where possible.

Now that you guys have met up, he's starting to deploy infantry. He's likely not even aware that it's in view (or doesn't care), since it's the infantry spotting him, not the tanks. So my guess is that the british are using the reverse of the German tactic here. where the Germans are going infantry first, then armour, the British are going for an armoured thrust, followed up by infantry. That can be to either consolidate the territory covered by the armor, press the weak spots for advancement or to defend furiously where needed. Most likely a combination of all of these.
 
Back
Top