Welcome to The Few Good Men

Thanks for visiting our club and having a look around, there is a lot to see. Why not consider becoming a member?

Monsaint Manor (Drifter Man vs Bulletpoint DAR)

1605 hrs, Turn 65. Harfleur is now shrouded in smoke. Most of it was made by Bulletpoint to (successfully) cover the move of his mortar and ATG crews, ammo bearers and a HQ team across the bridge to Harfleur. Since there already is so much smoke, I added a little with a Sherman to further cover my deployment. Unfortunately those 75mm smoke shells only make a few feeble puffs compared to the thick smoke screen generated by mortars.

So far I'm quite happy that my opponent moved these forces here - I should get good points for the kills once I clear the village. Of course, I would prefer to kill them in the open. I'll wait for the smoke to dissipate before I renew the attack on this front. Meanwhile, Bulletpoint's mortars at the church lay smoke screen on Hill 312 again to further frustrate my support fire. No worries. We'll keep deploying and attack on the right flank instead.

Nevertheless, I suffer more random casualties... Marder 5 area fires Hill 312 in an attempt to destroy my armored car shelling the Bridge. The Humber IV takes a direct hit with a HE, but again it's a tough car and survives with moderate damage - although gets nearly immobilized. The real problem is that I sent a 2IC team to take a peek at that very Marder, and it happened to be passing around the armored car at that time. Three men down. With this hit, 2 Troop is reduced to 8 men and 2 armored cars, while 1 Troop has only 2 men and one armored car left.
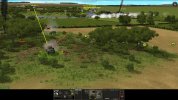
065_Hill312.jpg

There is another way I can use the smoke screen at Harfleur - I can move tanks into positions to engage Marder 5 at long range. It may or may not go well once the smoke dissipates, but at least they will be stationary when LOS is restored. This could help fix the spotting disadvantage.
 
1606 hrs, Turn 66. With so much smoke blocking LOS for both sides, the battlefield becomes very quiet. My troops line up at the eastern edge of Harfleur, waiting for the smoke to dissipate, to engage German infantry on the other end. I don't know what my chances are here, because Germans are in buildings and will spot me first. The first burst from the MG42 will probably be painful.

A scout section from the carrier platoon combs through the southern slope of Hill 312 but so far only find dead Germans left behind.

I move a Sherman towards Harfleur and order it to area fire a known German infantry position on the western slope of Hill 312. This works well - four shells explode near the enemy position and contacts indicate that the Germans are withdrawing fast. What I didn't expect is that the Sherman could acquire LOS on Marder 6. This wasn't supposed to happen - and the crew keeps area firing German infantry as ordered, although they are aware of this deadly threat! Fortunately, Marder 6 shows no indication it has spotted the Sherman - no voice cues and the gun does not move. I'll give direct target order for the next turn. The range is 532 meters, I am hull down, Marder is partial hull down. Infantry in the field around the Sherman is ordered to hide, because... APHE.

066_Overview.jpg
 
1607 hrs, Turn 67. The Sherman does not disappoint me and takes out Marder 6 with two accurate shots. Bulletpoint's defenses do not disappoint, either. Three LMG's completely pin down the attacking force at Harfleur as soon as the smoke is blown away by wind. One MG - apparently the last survivor from an infantry team decimated by shelling - stands at a corner of a building, two others - not seen - fire from inside buildings. Nobody gets hurt but my men hardly get a chance to shoot back.

067_Harfleur.jpg

On Hill 312 I eliminate one man that was left behind (and, as a bonus find four more bodies of enemy soldiers I didn't know about - probably killed by mortar shells), but then lose two men to HMG and sniper fire from the other side. Hopefully mortars will help me.

067_Hill312.jpg
 
1608 hrs, Turn 68. At Harfleur I order all infantry to hide next to the low stone wall to let a Sherman do the heavy lifting. I cannot area fire the building from which the Germans are shooting, but I can area fire a sliver of an action square in front of the building, which should be enough. I'll be firing over the heads of my own infantry, but what can go wrong? It's a Veteran crew firing at 200 m, just out of Panzerschreck range, sure they can avoid hitting the stone wall. Right? Right.

068_Support1.jpg

They avoid hitting the stone wall but something - probably some low brush - triggers the first HE nonetheless. 3 casualties lost to friendly fire. After that the Sherman digs its way through more brush and trees until it finally hits the place I wanted to hit:

068_Support2.jpg

That was costly, but I have no regrets. The infantry is impotent. They can't see any targets, they just serve as targets themselves. I don't have enough space to deploy a force that would take on the target from more directions and without getting suppressed en masse by a single burst from an MG42. So, their role shall be to find targets for tanks and mortars. If they die, others will take their place.

Meanwhile the smoke over Harfleur dissipates. I have four Shermans, all four commanders out to watch, waiting to see Marder 5. Sure they can outspot and outgun one Marder, Right? Right.

068_Duel2.jpg

Well, no. Marder 5 finds a target quickly - it chooses Sherman 2 - and opens fire at ~1250-1300 meters. And its accuracy is scary at this range. The first one is a miss, the second one is a glancing hit deflected by the side armor of Sherman 1, although it doesn't look that way:

068_Duel1.jpg

The third hit is on the upper hull plate of Sherman 2. Upper hull is strong enough to protect the tank at this distance, but the next one could be the turret face - and that's usually the end. A fourth shot is fired by the Marder in the last second of the turn and the end of the turn catches it somewhere mid-flight. Cliffhanger :(

None of the four Shermans gets a solid contact on the Marder, so the Marder is miles ahead in terms of spotting and ranging. I may lose a tank in the first second of the next turn. There's a chance that the other Shermans will eventually spot the Marder and kill it, but the situation is not developing in my favor. I'll try to minimize losses by popping smoke. There will be another opportunity to engage Marder 5, but once a tank is lost, it is lost.
 
Last edited:
1609 hrs, Turn 69. The cliffhanger is resolved, to my relief, with the 4th and 5th round of the Marder aimed too high. A quickly deployed smoke screen saves my Shermans from further damage and humiliation, while the Marder is allowed to cool down the gun barrel for the next shooting exercise. It would not be advisable to reengage from the same position until the Marder has fired at some other target. I will have to come up with another plan.

I lose one man to a sniper at Harfleur and another to LMG fire on Hill 312. For the first time I get a solid contact on the sniper, although I still can't find a place from where I could shoot. The HMG+sniper combo I suspected on the southwestern slope of Hill 312 is actually a PzG team (but they do have a sniper rifle with them). I can see several teams retreating from my mortar and tank fire but the situation is far from being under control. Invisible German units farther down the slope continue to fire MGs at everything that moves on the Hill.

069_Hill312.jpg
 
1610 hrs, Turn 70. My opponent used has reestablished his line of defense at the first hedgerow after Hill 312. The crest of the Hill is still an unhealthy place because of intense fire from LMGs and HMGs from the other side, so I keep my troops hidden or out of sight. Meanwhile, advance into Harlfeur is not possible due to sniper fire from the flank and good covered positions of enemy infantry in the buildings that are out of sight for area fire. I am shelling Marder 4 with a 3in Mortar and plan to attack both Marder 4 and Marder 5 again in the next turn.

070_Marder4.jpg
 
1611 hrs, Turn 71. In this turn, the superior spotting ability of the Marders - and the fact that I simply didn't come to the battle equipped to deal with them - decided the winner of this battle. I will try to salvage from the result what I can, but the losses are now excessive and I am out of good options to deal with Marders at this range. I did what I could.

First, I crawled with a Sherman Firefly on Hill 312 to target Marder 5 with area fire at 930 meters. I knew the Firefly would not be able to see the Marder, so area firing was supposed to give it an ability to shoot back. However, Marder 5 spotted it immediately - by immediately I do mean immediately: it fired before the Firefly did. Two rounds, two hits, one deflected by upper hull armor, second on weapon mount - K.O.

071_Marder5.jpg

A second Firefly crawled on the Hill just afterwards. It is supposed to have LOS on Marder 5 but does not see it. I lost contact with Marder 5 after the first Firefly was destroyed, as the surrounding infantry took a hit and got suppressed, so I don't know if the Marder can see it. I will try to area fire in the next turn. A third Sherman - one of the three that engaged Marder 5 three minutes ago - also moved forward, but made no solid contact.

Marder 4 has been receiving intense mortar fire but stood its ground while I dispatched two Shermans to attack it. Again, no contact by the Shermans. Marder fired back at one as soon as it entered the view. Two misses, the third shot is a partial penetration of upper hull at 680 meters. No casualties but the tank is K.O. Seconds after this the mortar fire finally forced the Marder to reverse out of its firing position. Had it happened a few seconds earlier, my tank would be spared.

071_Marder4.jpg

At no point in the engagement did any of my tanks see any of the tank destroyers, although their commanders were out watching.

On the south-western slope of Hill 312, German infantry is retreating. The retreat is organised well, although I can finally see some casualties were inflicted. I will continue pushing to secure Hill 312 against a counterattack, but unless I am able to deploy armor against Harfleur, I am unable to take either Harfleur or the river crossings - which equals defeat.
 
1611 hrs, Turn 71. In this turn, the superior spotting ability of the Marders - and the fact that I simply didn't come to the battle equipped to deal with them - decided the winner of this battle. I will try to salvage from the result what I can, but the losses are now excessive and I am out of good options to deal with Marders at this range. I did what I could.

First, I crawled with a Sherman Firefly on Hill 312 to target Marder 5 with area fire at 930 meters. I knew the Firefly would not be able to see the Marder, so area firing was supposed to give it an ability to shoot back. However, Marder 5 spotted it immediately - by immediately I do mean immediately: it fired before the Firefly did. Two rounds, two hits, one deflected by upper hull armor, second on weapon mount - K.O.

View attachment 21536

A second Firefly crawled on the Hill just afterwards. It is supposed to have LOS on Marder 5 but does not see it. I lost contact with Marder 5 after the first Firefly was destroyed, as the surrounding infantry took a hit and got suppressed, so I don't know if the Marder can see it. I will try to area fire in the next turn. A third Sherman - one of the three that engaged Marder 5 three minutes ago - also moved forward, but made no solid contact.

Marder 4 has been receiving intense mortar fire but stood its ground while I dispatched two Shermans to attack it. Again, no contact by the Shermans. Marder fired back at one as soon as it entered the view. Two misses, the third shot is a partial penetration of upper hull at 680 meters. No casualties but the tank is K.O. Seconds after this the mortar fire finally forced the Marder to reverse out of its firing position. Had it happened a few seconds earlier, my tank would be spared.

View attachment 21534

At no point in the engagement did any of my tanks see any of the tank destroyers, although their commanders were out watching.

On the south-western slope of Hill 312, German infantry is retreating. The retreat is organised well, although I can finally see some casualties were inflicted. I will continue pushing to secure Hill 312 against a counterattack, but unless I am able to deploy armor against Harfleur, I am unable to take either Harfleur or the river crossings - which equals defeat.

Losing 2 tanks is a bummer!

Did you tanks have a tentative contact for the Marder?

My experience playing the game there is no massive spotting advantage for open topped vehicles like the Marder (and M10, etc). Yes they have better situational awareness but not so much that they'll win a 4-1 duel. Of course it is important to try to have all 4 tanks move up at the same time so the Marder can't take them out piecemeal fashion.

I guess the bocage position makes a big difference too.
Bummer - definitely! I've been treading so carefully all this time, but in the end I had no choice but to engage them head on with tanks. The first Firefly got a dark grey tentative contact before it died. The others only had or have old transparent contacts from C2 links.

In the second case it is bocage and trees, too, but I was hoping to compensate by getting the Marder under a mortar attack at the same time. Apparently with no effect - at best I threw off their aim. Another thing that may play a role is the long distance (1 km or more), which is somewhat unusual in CM. It is the Marders' best play. At shorter ranges I've been able to defeat them.

I should have brought Churchills, their armor is strong enough to defeat the PaK40. But they don't combine well with Fireflies, OOB-wise.

Also a big thing of course is the fact that your moving and he is stationary. If I really must fight a 'duke it out' duel like that head on, I try to evade it by popping smoke or whatever. Than if I really must fight it I try to crest the hill at exactly same time with at least a pair of tanks while using armored arcs. Although cresting a platoon of tanks (let's say 4) is much better yet of course. Depending on context, scoot after 30sec.

When you get hit, usually at least one of your other tanks can at least spot the muzzle flash and return fire.

And yet sometimes a unit just has a great position that works for it. How many tanks do you have left?
True. I've observed (mainly in tests) that either moving or shooting increases the chance of being spotted. In some cases a vehicle would only be seen when firing - once it ceased fire, it would vanish from sight as well. I am not convinced though that armor arcs increase the chance of spotting a target - they just reduce the chance of shooting at something you don't want to shoot at.

I still have lots - 7 tanks, although 3 are low on HE and 2 are Fireflies that have fewer HE to start with. The reason of my disappointment is that I proceeded very slowly and carefully to capture 50% of objectives with reasonable losses - this has been my strategy for this battle. With good amount of luck, this had been successful until this last turn. But now I am on track to lose at least half of my force by the end of the game. From now on my best hope is for a draw if things go well.
 
1612 hrs, Turn 72. I have lost contact with both Marders. I order the second Firefly on Hill 312 to area fire the ground in front of the position of Marder 5. It seems that the Marder cannot see my tank (and vice versa, of course). One shell lands close, the rest is either too high or blocked by trees on the way. I expect Bulletpoint to withdraw Marder 5 in the next turn.

072_Marder5.jpg

German pullback from Hill 312 continues and this time it seems that even the northwest slope is being abandoned. I don't mind - it makes a very difficult position to attack, it cannot be area fired from anywhere except directly from the German side. Honestly, I think pullback from the northwest this is premature and my opponent is showing a bit of a penchant for tactical retreats - but it could also be a trap. I'll try to fill in the vacuum as soon as possible to keep the pressure. This may even allow me to squeeze some armor through to support further advance from places the Marders cannot see.

072_Hill312.jpg
 
1613 hrs, Turn 73. German retreat from Hill 312 continues. In the south, scouts from the Carrier Platoon reach the next hedgerow after Hill 312 and together with mortar fire eliminate 4 panzergrenadiers who were not fast enough. More German troops retreat along the road towards the river and seem to be reestablishing defense on the next hedgerow behind the rectangular bocage hedge - the last line before the Crossing. German MGs cover the road and I cannot interfere - I lose one scout when trying. But I have another mortar mission, using a TRP, aimed at the rear of the bocage rectangle, scheduled for delivery in less than a minute.

At Harfleur there is another smoke screen, produced by enemy mortars, blocking the view for the supporting tank. No, I am not going through it into schreck range, thank you Herr Kugelpunkt :) I am waiting for it to dissipate before I continue. Meanwhile another tank (B Squadron HQ) is shelling a building in Harfleur where German infantry was heard firing from.

I let the Firefly area fire the Marder 5 position for 15 more seconds because I expect that Bulletpoint will withdraw it to safety. But this is not the case as, at the end of the turn, another Sherman overwatching the field gets back a dark grey tentative contact - an upgrade from a transparent one. So the Marder is still there and perhaps the Firefly is keeping the commander inside, so it cannot spot so effectively. Maybe I have a chance here.

073_Overview.jpg
 
1614 hrs, Turn 74. Not much new to report - I continue moving troops forward around the southern edge of the map while more Germans are seen retreating. An armored car keeps a MG team suppressed in the bocage rectangle, and mortar fire starts falling on the last line of bocage where I suspect a concentration of German troops. I also get some observation on the road to the crossing - should have done that earlier - and take out a MG42 gunner retreating. This is one of the supercharged rifle teams (1x Sten, 2x Bren), which has taken position formerly occupied by a German infantry gun:

074_Hill312.jpg

Still no sign of Marder 5, in fact the contact icon has gone transparent again. Although I don't have a solid contact on Marder 4 either, my FO appears to have caught a glimpse of it an opening in the same hedgerow behind which it was hiding earlier. Good move by my opponent - avoids exposing the Marder and gives it the same control of the area between Harfleur and Hill 312 as before. However, it no longer covers the northern edge of the map, and I think I can use it.
 
1615 hrs, Turn 75. Marder 4 is confirmed in the new position - see below. I will make some comments on this new position in the situation update. Apart from this one I have almost no contacts in this turn. I test the northern part of the western slope of Hill 312 but it is still covered by an infantry in a building by the roadside, so I can only push on the southern side. I am area firing a HMG position on the Bulletpoint Ridge from a Firefly tank. It is my most exposed tank at this time so I want to spend the HE before something kills it.

075_Marder4.jpg

Situation update, 1615 hrs. 75 minutes have passed, 5/8 of the allocated time for this battle. I have not gained much ground since the last update 15 minutes ago, but the advance on the southern edge of the map is significant - it can lead to a collapse of German defense on my left flank up to the river, and possibly enable me to take the Crossing soon as well as to cover the attack on Harfleur. Harfleur is difficult to get into - sniper fire from the south - but with the repositioned Marder 4 I may be able to attack it from the north.

Marder 5 has vanished from my sight for now, but Marder 4 is still very dangerous. It completely controls the Bridge objective (together with 2 HMGs) and can fire on a few other important places as well - the dent in the center of my line of advance below reflects this. I don't plan to attack it with Shermans again - the experience I made plus a few trials were enough to persuade me that it is practically invisible to Shermans there behind bocage. If I get into view, the Marder will see first, and the Sherman will not see before it dies. Always. Always. Also, since the position behind bocage cannot be area fired, the only remaining way to attack Marder 4 is with mortars. A direct hit is relatively rare but not impossible at this range with a TRP, as the trials have told me. So a mortar attack remains my only hope.

075_Overview.jpg

No changes to my estimate of Bulletpoint's forces. Between 6 and 8 platoons of motorized Panzergrenadiers, most having schrecks, with all or most support weapons of the Panzergrenadier battalion: 6 mortars, up to 12 HMGs plus the Heavy Company (2x 75mm IG, 3x 75mm PaK40) plus 6 Marders. Four Marders, the entire Heavy Company, one mortar and one HMG team, and approx. one platoon EDIT: 1 platoon + 2 squads of infantry have been destroyed. The remaining mortars are out of ammo and my opponent uses some of them as infantry at Harfleur. The defenders have taken at least 113 casualties.

My side has taken 82 casualties. 4 tanks (2 Sherman V and 2 Sherman VC Firefly) and 7 armored cars (3 x Humber III, 4 x Humber IV) have been lost. I have spent 77% of my mortar ammunition, leaving 110 rounds. Counting Hill 312 as mine, I estimate the current score as 315:561 for Bulletpoint (100 for objectives + 215 for casualties for me, 400+161 for my opponent).
 
Last edited:
1616 hrs, Turn 76. Another disaster strikes. Marder 5, which has apparently not changed position, catches a Sherman moving far in my rear and knocks it out with the first shot at 1350 meters. My mistake - I should have pushed that Sherman ever farther back, but I had no idea the Marder can see there. The Sherman was moving behind a small hill and was covered by another Sherman, which you can see in the line of fire about 100 meters away. No, that Sherman does not see a thing - not even a tentative contact, just an old transparent one. I have several other units watching that space but the Marder is invisible at this distance.

The only consolation here is that the Sherman was nearly out of HE ammo. The tank of the 6 Troop commander with full ammo has moved through the same place just a minute ago...

076_Sherman.jpg

Marder 4 has reversed out of its new position. I am not sure why, but I hope it will appear at the exit from the bocage box in which it has been hiding since the start of the battle. The exit has been watched by the 10 Troop commander, a veteran crew in a Firefly, for about 40 minutes, waiting for this opportunity. I just hope they can spot a moving Marder at this distance before they die.

All in all, it looks that after a fairly successful first hour of fighting, my opponent will defeat me with his remaining two Marders. Can't fight an enemy you don't see. My opponent's score is rapidly increasing to levels I won't be able to match by taking half of the objectives.

Another, much less significant, fail unfolds on Hill 312. I ordered the B company HQ to take a position on the Hill to provide some more eyes with binoculars. They choose both the longest possible and the most exposed way to get there, and immediately get under LMG fire from the building by the roadside. They are on "Hunt", but you know how "Hunt" works... it means "keep calm and carry on until you take a casualty". So they carry on. No casualties in this turn, I hope I can get them go down to ground and escape in the next turn. A sniper and several infantry teams are watching the building but see nothing at 180-200 meters. Can't fight an enemy you don't see...

076_BCoHQ.jpg
 
1617 hrs, Turn 77. The shooting exercise of the invisible Marder 5 continues. This turn's victim is the Sherman in the covering position in the image above. A shot through the turret face kills 1 crew and disables the main gun (fortunately only 11 HE left). But CM gods are gracious to me this time and allow the tank to retreat behind a quickly laid smoke screen. I may still be able to use its hull MG. Did I mention that no one can see the Marder? The Firefly on Hill 312 is area firing it and has a dark grey tentative contact again. That's all.

Marder 5 still has 5 AP left, but at this rate I run out of armor before he runs out of AP. And there is Marder 4, too, which still has 9 AP. No, my opponent is not withdrawing it, he would not abandon such a great position so easily. He is still trying to push it into the opening in the hedgerow so that it can see more and do more invisible killing. I just hope he will not be satisfied and eventually pull back.

At Harfleur a British rifle section with unusually large number of Brens eliminates an MG42 in a building while covering my second push to take the village - this time from the north.

077_Harfleur.jpg

And near the Crossing, a lone Panzerschreck - apparently an acquired weapon from a casualty, judging from the rifle the guy is carrying on the back - escapes volleys of automatic fire and is seen running towards the river.

077_Crossing.jpg
 
1617 hrs, Turn 77. The shooting exercise of the invisible Marder 5 continues. This turn's victim is the Sherman in the covering position in the image above. A shot through the turret face kills 1 crew and disables the main gun (fortunately only 11 HE left). But CM gods are gracious to me this time and allow the tank to retreat behind a quickly laid smoke screen. I may still be able to use its hull MG. Did I mention that no one can see the Marder? The Firefly on Hill 312 is area firing it and has a dark grey tentative contact again. That's all.

Seems you were right about Kugelpunkt making offerings to the gods, something about Shermans you was saying before?

The dark grey tentative contact does mean they see (or hear) something there, so they might be close to a spot. Hold still!, do some praying and might as well bring some offerings to appease the gods :) I guess some Marders tainted with Bocage camouflage might do.

One thing he might be doing, explaining the moving around a position: he might be reversing them after shooting, breaking LOS. Although I'm not sure whether that's a pro or con in such a good position behind hedgerows.

--
One thing occurred to me: you seem to be attacking (or probing ;-) ) over the full width of the map. Now that you have reached the river, will you choose to go for both the bridge and the crossing or rather focus on one of the two?
Focusing (or choosing main effort) might help evade some of his defenses / Marders.

On the same note: do your Shermans have smoke rounds? (they should have m I think). If you can area fire in front of it, you can smoke in front of it and block it's sight. You could use those smokes to create a window of opportunity for a combined push, with the goal of reaching somewhere his Marders can't fire at or are at a less advantaged position.

Basically he is keyholing a mobile PaK40 with only the barrel sticking out of the 'shrubbery', taking potshots at 1000+m. From that far away it is going to be very difficult to spot something behind the bocage.
 
@Lethaface When it comes to Panzerschreck survival, I'd argue there are some religious, or maybe occult practices involved. But with these two Marders I think it is just my underestimation of their capabilities. As long as they were in open terrain and at medium ranges up to 600 meters, I could spot them and eliminate them by concentrating firepower from tanks and mortars. I did not realize that the same may not work for a Marder behind bocage (Marder 4 at 700-900 meters, killed 1 Sherman) and especially Marder in the open at long range (Marder 5 at 1000-1300 meters, killed 2 Shermans and disabled a third). I am pretty sure he is just looking for a good spot for Marder 4 behind bocage, while Marder 5 has not moved at all. Marder 5 has been firing for several turns and only now some infantry has spotted it. No tank has ever spotted any of the two as a solid contact - not before they died.

Anyway, my mistake was that I underestimated especially Marder 5 - it is protected by its invisibility in its current position. I did not have to take on it, but I was confident I could and that it would both improve my score and remove one potential adversary. So very good point about evading his defenses. While Marder 4 needs to go before I can take some objectives (certainly Bridge), Marder 5 is essentially harmless. I did not have to attack it. I was just too confident it will be easy with my superior numbers.

About the direction of the attack - I am moving in bounds, usually leaping forward on one flank, then catching up on the other, depending on the situation in front of me. Right now it seems I can take the Crossing (ford) where the Marders can't see and I can even deploy armor in support. I expect that Harfleur will see some heavy infantry fighting - I have plenty of firepower but can't deploy it against a village that is oriented from east to west, and it is a dangerous country for tanks due to panzerschrecks and Marders. If I succeed at the Crossing, I could continue to the north from there and take the Bridge from the south, instead from the east (from Harfleur). But these plans can change every minute.

75mm Shermans (but not Fireflies) have smoke rounds but if I decide to lay smoke, I'll probably use mortars. Their smoke rounds are more effective.
 
1618 hrs, Turn 78. The invincible Marder 5 again turns its big bad gun around, this time picking up a Firefly that has been area firing it from Hill 312. The first shot is deflected by upper hull armor, the second one is high. A third one will be fired in the first second of the next turn. I will retreat and hope for the best. Regardless of the outcome, the unorthodox tactic of running an enemy AFV out of ammo might work here. I still have some minor armored vehicles that I could feed to this Marder.

My infantry enters Harfleur and takes the first building. It seems that the defenders are all in the back of the village where they cannot be hit by tanks or from my base of fire position in the eastern part of the village. Some reinforcements - apparently an ammo bearer team with two rifles - are seen moving in the rear towards the village.

At the Crossing I also continue my advance. After reaching the last hedgerow, my infantry can now see the Crossing at 120 meters and the Bulletpoint Ridge at 250 meters. The Germans can no longer withdraw through there. The lone Panzerschreck and a suppressed HMG team cowering in the bocage are eliminated. I estimate the remaining German forces in the area as one depleted HMG team (2 men), a sniper, a Platoon HQ and the equivalent of an infantry squad with 1-2 panzerschrecks. I should be able to eliminate them all, opening another avenue of attack on Harfleur from the south.

078_Crossing.jpg
 
Back
Top