Welcome to The Few Good Men

Thanks for visiting our club and having a look around, there is a lot to see. Why not consider becoming a member?

Monsaint Manor (Drifter Man vs Bulletpoint DAR)

1650 hrs, Turn 110. By some standards an unremarkable turn. One of the undead HMGs is finally eliminated and I am progressing to secure the Bridge objective as well as moving in one more section at the Crossing. I reinforce my position at the first hedgerow after the Bridge ("Lots of Brens") a coordinate this move with a short mortar strike on a TRP, using the last 4 HE shells of one mortar section. But I also see a fair amount of movement this time - tentative contacts in openings in hedgerows. There is no reason for Bulletpoint to move unless he wants to use the final minutes of the game to test how I secured the objective. If I am right, the mortar and tank ammo I saved for this eventuality will soon be put to good use. I hope von Kugelpunkt's men will soon meet too many Brens to handle.

110_Overview.jpg
 
1651 hrs, Turn 111. "Lots of Brens" - 1 and 2 Sections of 4 Platoon, together with what is left of a carrier platoon scout section, engage some German troops in the hedgerows. At the same time I am sending some scouts forward from Harfleur to check the last low hedgerow before the Bridge before I attempt to cross the Bridge. At the Crossing in the south, a section from the 5 Platoon climbs towards the top of Bulletpoint Ridge. No counterattack is coming - yet - and movement is still visible on the German side, but it seems to be like repositioning rather than counterattacking. Maybe Bulletpoint just wants to offer the strongest resistance where I appear to be advancing.

There are two casualties at the river. Not only there is one Bren I can recover, I also don't like leaving the wounded and killed on the battlefield, so I clean up whenever things are safe and when I have troops and time I can spare for the task. This time there is an infantry team, low on morale, nearby. I'll send it to take care of these two.

111_Bridge.jpg

111_River.jpg
 
Maybe a silly question, but you do have guys sitting on all the objectives behind you? I'm sure you have enough vehicle crews for the job. :p
 
Maybe a silly question, but you do have guys sitting on all the objectives behind you? I'm sure you have enough vehicle crews for the job. :p
I definitely have more vehicle crews without vehicles than I would like :)
Yes - I have Battalion HQ at Farine, a tank and mortar position on Hill 312 and some light forces including a PIAT team on the Crossing (the actual defense of the Crossing is in the terrain around). Harfleur is too crowded at this time and I've just entered the Bridge objective.
 
1652 hrs, Turn 112. German infantry tries to put some pressure on my "Lots of Brens" line but for now my guys have the upper hand. Bulletpoint might want to bring in more MG42s, so I am ordering another mortar strike on his line there, delivery time 3 minutes. I also reach the last hedgerow before the Bridge, confirming that there are no more Germans on this side of the river. The Bridge objective is mine.

1653 hrs, Turn 113. An infantry team from the 5 Platoon reaches the southern end of Bulletpoint Ridge, only to walk into an ambush set up by two knocked out MG teams and a HQ unit. They manage to take down one German but lose two men (Sten and Bren), the remaining two useless rifles run away. Ouch.

113_Ambush.jpg

1654 hrs, Turn 114. A second team that avoided the ambush at Bulletpoint Ridge eliminates one German soldier, but they get under some MG fire and I am going to withdraw them. I don't need to hold this part of the ridge and should not lose any more men for this. However, I am also sending a team across the Bridge, which is still covered by German infantry. I am not motivated to take great risks - the battle is nearly over and I can't take any more objectives - but I want to advance until the end and see how far I can still get. The Marder is becoming a problem again: any place where I might want to deploy a tank is also within LOS of the Marder. I will lay some smoke in an attempt to remove the Marder from the equation for the final turns, allowing me to make use of my remaining tank HE.

My spreadsheet tells me it is 600:417 for me with the Bridge. Let's finish this without any major blunders.
 
Last edited:
1655 hrs, Turn 115. I attempt to withdraw the second team from the southern part of Bulletpoint Ridge - away from the ambush site - but as soon as they stand up, two are cut down by HMG fire. This whole thing was a very unwise, very expensive undertaking. I left behind four casualties and I didn't even need to go there.

115_Ambush.jpg

On the northern side of the river, two men cross the Bridge under light MG fire. Here I would like to close in on the HMGs (two HMGs, three men) and try to take them out for some extra points. I called off a mortar attack on the bocage south of the road (not enough enemies seen there to justify it) and ordered another one on a PzG squad to the north of the road, further in the back, delivery in 2-3 minutes from now.

115_Bridge.jpg
 
1656 hrs, Turn 116. Things continue to be very quiet, neither of us wants to make any major moves but I want to end this battle when the time runs out. I cover the Marder with smoke - curious if this will make Bulletpoint find a new place for it - and continue moving troops across the Bridge. Some infantry movement is registered in the fields beyond Bulletpoint Ridge. A Humber III armored car covering the Bridge, with crew assembled from two cars and all Rattled, suddenly pops smoke and reverses although it only has one distant contact. These guys are very fragile in their state of mind.

116_Bridge.jpg

1657 hrs, Turn 117. I still have LOS on the Marder for a few seconds before the smoke covers everything, and I see him move. So Bulletpoint is going to find him a new thing to do. I think he will be conservative and will just try to find a new distant safe position from which it could pick off my tanks.

Near the ambush site at the Crossing I see some infantry movement. I see a LMG and think a counterattack might be afoot after all, then I notice the type of the gun: MG34, not used by Panzergrenadier squads. So it is my lone old friend ATG ammo bearer. Bulletpoint just reinforces the position with an expendable unit. I could area fire the place with a Sherman, but I won't unless I must. I had to leave two wounded nearby. So this guy is safe.

117_MG34.jpg

1658 hrs, Turn 118. Still no sign of the Marder, I order all tanks to keep their hatches open. I move additional troops across the Bridge - the undead HMG was finally shot dead and will bugger no more. A mortar strike hits the German infantry position behind him but most rounds fall too long, so I don't expect much effect. The German side is quiet.

1659 hrs, Turn 119. I now have enough men on the other side of the Bridge to resume advance. I hope. The battle could end as soon as in the next minute, though. Marder still out of sight and I am laying more smoke to keep it that way.
 
Last edited:
1700 hrs, Turn 120. End of battle. I expected some extra time but apparently the game does not give extra time if there are no contested objectives. The battle ended at the time limit of 2 hours. In the last minute I launched an attack on a HMG position held by 2 men – they were driven away into the field but survived.

Grey indicates destroyed German units. Yellow means alive.
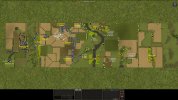
120_FinalOverview.jpg

120_AAR.jpg

The battle came to its conclusion. I achieved a minor victory 603:371. It feels about right – I inflicted heavy losses on my opponent and advanced more than a kilometer, securing crossings over the river, but a difficult second battle would still await me on the way to the western edge of the map and its outcome was far from certain. I received 275 out of possible 500 points for five objectives (Farine, Hill 312, Harfleur, Bridge and Crossing), my opponent held the remaining three for 225 points (Three intersections, Village centre and Suspected Regimental HQ).

I lost 114 men, 5 tanks and 7 armored cars, which gave my opponent 146 points for casualties – less than my estimate of 194 points. Possible reasons for the discrepancy are that I recovered valuable weapons and equipment from my casualties by giving buddy aid to almost everyone and that my tank crews only suffered light to moderate losses – many were able to bail out from the destroyed vehicles. The casualties had the following causes:
  • Small arms: 48
    • 2 Pistol, 11 SMG, 11 Rifle, 7 Sniper, 15 LMG, 2 unknown
  • HMG: 18
  • Mortars: 12
  • AT guns: 14
  • Infantry guns: 1
  • Marders: 11
  • Panzerschreck: 1
  • Panzerfaust: 3
  • Friendly fire: 6
The 5 tanks lost were 3 Sherman Vs and two Fireflies. Two were lost to one AT gun and three to two Marders, plus one was disabled by hit from a Marder. Of the 7 armored cars, two were lost to Panzerschrecks, one to a Panzerfaust, one to an ATG, one to a mortar and two to Marders.

My opponent lost 292 men, 5 tank destroyers and 5 guns, which gave me 328 points – almost exactly as my estimate told me (330 points), but my estimate included only 251 casualties. I do not think buddy aid played a major role there – as far as I know, no Germans survived east of the river and none escaped to the west. Mortars scored 62 kills, tanks scored 111, armored cars scored 10, leaving 109 for infantry (including 3 for the battalion’s sniper). All 5 Marders were knocked out by tanks – three by direct hits and two with area fire, including one accidental kill early in the battle.

Why did I win? From one perspective, Bulletpoint did everything right. He spent his points efficiently and produced a layered, deep defense. He found excellent covered positions for his infantry that were hard or impossible to area fire. He continuously managed to extract his forces from trouble and, under covering fire of his next line of defense, to take them to safety to fight at the next defensible feature. Even the map could be considered favorable for the defender, being narrow, with little room to maneuver, with bocage, villages and hills. And my opponent, again, used the terrain well – I was learning from him all the time. He judged my force composition correctly and his defense had a strong anti-armor aspect – and surprised me with a tank destroyer type that I had underestimated until this battle. So how the heck did I win?

One mistake perhaps was the strength, composition and deployment of his infantry force. Two of his six rifle platoon saw almost no combat on the other side of the river. They would play a role if I aimed for the rearmost objectives, but I did not. So his Panzergrenadiers ended up fighting even more outnumbered than they normally would in a defense. Not that you should cram more infantry forward – that would result mainly in heavier losses – but perhaps two platoons could have been removed and replaced with additional heavy weapons to support the frontline. One Panzerschreck per squad was too much, in the end only two of the 18 schrecks were actually used, and I assume I got a lot of points for killing the tubes. Four Marders placed in the near field proved quite vulnerable – in contrast to the two remaining ones that mostly stayed in distant, well covered positions, enjoying their spotting advantage at long ranges. Perhaps keeping the Marders in the rear and putting some tougher armor up front would have been of better service to my opponent. Heavy mortars (with TRPs?) would be more useful than a pair of infantry guns. Of course, those are just my thoughts when I review the battle in my head. Bulletpoint may see things differently.

On my side, except for a few blunders that resulted in preventable casualties, I advanced slowly – maybe too slowly – but consistently. The combination of mortars and tanks for support with TRPs and armored cars as heavy scouts/bait was effective. So was the mix of scout infantry with Brens that were subsequently inherited by rifle sections – I completely eliminated, and maybe turned around, the firepower advantage of the Panzergrenadiers, by being able to reuse automatic weapons. Having two mortar platoons and 476 rounds of HE was key - I don't think I would get very far with just one platoon. However, I wasted a great amount initially by shelling empty fields – Bulletpoint held the frontline with just two squads and let me spend my mortar ammunition for nothing. I had too many TRPs: they are too effective for how cheap they are and should be regulated in battles. Mortar fire on TRPs opened my way again and again and again. Tanks did an amazing job against positions on hilltops and in villages – I underestimated their effect initially, but they killed about 2/3 of all defenders in Harfleur. Two troops of Churchills with one Firefly added to each troop would serve better that the all-Sherman force though – Churchill VII would shrug off 75mm PaK40 hits and fire back unimpeded. I suspect I would just waltz over my opponent if I had Churchills instead. It probably wouldn't be much fun.

Anyway, these are my thoughts right after the battle. Thanks everyone for following this thread. Biggest thanks to von Kugelpunkt, I mean @Bulletpoint , whom I hereby invite to come here. Beautiful map (we cratered it a bit and I razed a few buildings, but it still looks good) and an amazing turn rate for 2 months. Sorry for the TRPs. Yes - too many. Two or three would do.
 
Thank you very much for an excellent DAR, I have thoroughly enjoyed it. I have learned a lot about Combat Mission by reading it.
 

"It Ain’t What You Don’t Know That Gets You Into Trouble. It’s What You Know for Sure That Just Ain’t So"


Thank you for the game, and for this very impressive AAR, which I just finished reading - all 10 meticulous pages. I really enjoyed reading it, even though I knew how it would end.

The reason why I challenged Drifter Man was because I was sure he would be a challenge, and he did not disappoint. I found him an excellent opponent, which should also be more than apparent if you read just a single page of this after action report. Tactically, he read the situation very well, and struck a good balance between cautious recon and pushing forward in a way that made his units work together.

In addition, his running estimates of my forces and dispositions were impressive and in many cases eerily accurate based on very limited intel - even down to how many mortar bombs I had remaining or how many shots my MGs fired during one turn.

I could write pages about my own plans, some of which worked, and some of which didn't, and about various blunders I made along the way, but I'd like to highlight just one main thing:

I made a huge fundamental mistake during unit purchase which - in my view - cost me the game before it even got started.

And that mistake was that I did not realise that TRPs only cost 30 points each. I was absolutely convinced they cost 150 pts.

This meant that I was certain that if Drifter Man bought any TRPs, they would be quite few. Or, if he bought many, then he would not have that many points for the rest of his force. I thought maybe he'd buy two or three at most. I realised he would be able to use these to take out some key points of the defense, but I was sure he couldn't put a TRP on every single piece of important defensive terrain.

Well, it turns out I was wrong. After about 15 turns, I started to wonder how he could keep firing mortars so accurately even against troops that should be well hidden. When I looked up the cost of TRPs in the editor, I suddenly realised that the battle was lost.

The AAR doesn't really show just how deadly the TRPs were. Any place I decided to make a stand and set up a clever system of interlocking fires, I'd get my units smashed three minutes later. As TRPs don't involve spotting rounds, I didn't have the chance to pull back, or even order my troops to take cover in foxholes (and since CM is the most realistic sim ever, you have to manually order your troops to hide, or they won't get much benefit from their foxholes).

Apart from repeatedly shattering my positions with fast and very accurate mortars, the harassing fire also meant that in several cases, I couldn't be flexible and shift troops from one firing position to the next - there would be a mortar coming in and the whole team would go to ground. An example of this was the team I tried to pull back from the very first hedgerow. They got interrupted in their retreat by a mortar and then gunned down in the following turn. (You wondered why did I retreat it at all? Because they were sitting on a TRP and about to get flanked).

The result of all this was that in many cases, I completely lost control of units, protected flanks would suddenly be wide open, and after first the bocage box, it all turned into a big rout behind Hill 312, with Drifter Man in many cases just having to move in to mop up and gun down shellshocked survivors fleeing through the fields. I was picking off a couple of his troops once in a while - he eliminated whole teams each turn.

Now, I must admit I was a bit disappointed with this, because I would have preferred to see how things would have turned out if he had had to use more conventional combined arms tactics. If my troops were able to actually stand and fight in any position for more than a couple of turns.

I still expected artillery to come down, but at least I would have a bit of warning from the spotting rounds, and I was hoping to be able to dynamically use my foxholes as bomb shelters.

Drifter Man might still very well have won without the TRPs, because he played well. I don't want to diminish this in any way. But in this game, I often felt like I was playing Monopoly against someone who had an endless supply of "get out of jail" cards. It didn't do justice to his otherwise very good tactics that often had me nodding along in approval even while cursing.

So, in closing, I would like to thank Drifter Man once again for the battle and the really great AAR - one of the best I've read. I hope we'll have a rematch!
 
"It Ain’t What You Don’t Know That Gets You Into Trouble. It’s What You Know for Sure That Just Ain’t So"
Well said, applies to numerous situations, in and out of CM.
It takes being on the receiving end to fully recognize the value the TRPs had. Once they were on the map, I took them for granted - I sort of forgot they were there and kept dropping bombs at my discretion. About 7 of the 20 TRPs were never used.
Thanks again for a good battle. A rematch - sure thing!
 
Well said, applies to numerous situations, in and out of CM.
It takes being on the receiving end to fully recognize the value the TRPs.

I'm wondering what would have happened if you had gone for the Typhoons or Spitfires you were considering. They might have been very useful against the Marders. If a Spitfire costs around 100 points, and it just takes out one Marder, it paid for itself.
 
I'm wondering what would have happened if you had gone for the Typhoons or Spitfires you were considering. They might have been very useful against the Marders. If a Spitfire costs around 100 points, and it just takes out one Marder, it paid for itself.
Yes, they would have easily paid for themselves (72 points Spit, 92 points Typhoon). But I don't think they would change the battle by much. My plan was to have one Typhoon and send it on a free hunt on the near side of the river on turn 1. It could have destroyed 2, maybe 3 Marders with strafing runs - the same 3 Marders that I was able to take out without own casualties. The Marders on the far side, which turned out to be the real problem, would not have been hit.

Plus, I would've learned less about Marders!
 
It could have destroyed 2, maybe 3 Marders with strafing runs - the same 3 Marders that I was able to take out without own casualties. The Marders on the far side, which turned out to be the real problem, would not have been hit.

To be fair though, you only knocked out 1 of those 3 Marders through deliberate tactics - then one was hit by random chance by area fire, and the other fell victim to a strange LOS glitch.

I'm not sure it was a mistake to deploy them on the far side of the river. They could have caused much more trouble than they did. In fact, the ones farther back often failed to hit or penetrate at those long ranges, saving your tanks several times and making me swear in German.

But maybe the river Marders would have been taken out by air power. I haven't tested exactly how effective aircraft are against open topped vehicles.
 
Last edited:
Indeed great AAR!, also nice to read how @Bulletpoint thought about it. The minor victory seemed appropriate from having followed the AAR (although only from one side).

I can imagine the struggle of being on a defacto massive TRP :D. At the start of the round I imagined all those points in TRPs will hurt @Drifter Man 's ability to sustain casualties. Had Bulletpoint got some TRPs of himself it might have made some difference too, although with mortars in direct fire position TRPs make less difference compared to indirect fire.

Bulletpoint: what was your planned 'main line' of defense if I may ask?
 
Had Bulletpoint got some TRPs of himself it might have made some difference too, although with mortars in direct fire position TRPs make less difference compared to indirect fire.

Actually I did not use my mortars well. They were quite limited in direct fire, due to trees and hills, so just a couple of TRPs would have helped immensely. Also they could have served as ambush markers to help me land more AT hits at long range. There were some turns where I missed three shots in a row.

Bulletpoint: what was your planned 'main line' of defense if I may ask?

Since I also designed/re-edited the map, I got into a kind of mindset where I had to defend all of it. But eventually we settled on weighting the objectives on the first half of the map in a way that if Drifter Man could take those, he'd get a tactical victory (assuming roughly equal casualties).

This effectively meant that the main battle was going to be all about the first half of the map. We both knew this (we discussed it), but I was still a bit in the mindset that "I spent eight hours designing all this great stuff all over the map, so I'm going to defend it all". And I wanted to defend in depth, so that's part of the reason why I got so much infantry and so many Panzerschreks.

Once the battle started, I began to fully realise that I had to hold the river. That's why I decided to hold on longer to the hill and Harfleur than I would have done otherwise. At one point, I made a smokescreen to reinforce Harfleur - in a real tactical situation, I would use the smoke to evacuate it, because at that point, it was clear it would fall. The AT defenses had been knocked out.

So, the main line of defense was along the river, hinged on Harfleur and Hill 312. It had to be. Even though it's not actually that good defensive terrain. At least not for the infantry-heavy force I brought.

All terrain in front of Hill 312 I knew I would lose for sure, so I only manned it with a skirmish line. Farinne was to act as a wavebreaker, delaying and annoying the enemy for as long as possible, making him waste as much artillery as possible, but I wanted to conduct a fighting retreat if at all possible. I think I generally succeeded in this. I had something like 24 guys there, facing the full fresh force of something like 5600 points of enemies. I knew Drifter Man is highly analytical, so I was hoping that would also make him hesitant to apply pressure. In this, I was wrong. He generally kept up a good pressure throughout.

The reason why I didn't decide to defend Farinne and the adjoining heavy bocage was that I assumed that it would likely be hit by a pre-planned barrage, so I didn't want to put too many eggs in that basket.

Unfortunately, since TRPs are so cheap, I think there's really no reason to use pre-planned missions at all. I consider this a balance issue that I hope they will address. There should be pros and cons to everything.
 
Last edited:
I think I read someone in the AAR say that I wasted a lot of points buying infantry that was never really engaged. I disagree though. The final platoon after the ridge was my last line of defense, and without them Drifter Man would have broken through to Monsaint. Also, I kept them back for a potential counterattack. But there is no point in counterattacking with infantry into terrain with TRPs and overwatched by tanks. And I'm not the type of player who does last minute suicide rushes.
 
To be fair though, you only knocked out 1 of those 3 Marders through deliberate tactics - then one was hit by random chance by area fire, and the other fell victim to a strange LOS glitch.

I'm not sure it was a mistake to deploy them on the far side of the river. They could have caused much more trouble than they did. In fact, the ones farther back often failed to hit or penetrate at those long ranges, saving your tanks several times and making me swear in German.

But maybe the river Marders would have been taken out by air power. I haven't tested exactly how effective aircraft are against open topped vehicles.
Yes - my the point is that the Typhoon would target Marders that did not end up doing much damage. Of course, the presence of a Typhoon could split off an new timeline in the multiverse where the Marders would be more effective :)
The four near-field Marders were unlucky, but I observed a clear difference: my Sherman crews could see them. They could not see the other two that were at greater distance, no matter what. They never got a solid contact. Area fire was the only tool I had.

About random chances - I had no agency in the destruction of those two Marders, but my takeaway from the first one is that it is dangerous to keep a Marder in a position that receives heavy fire. For the second one, I managed to recreate the situation in the linked game save (no passwords). The Marder in this setup can see some Shermans it cannot fire at including one that can see and fire at the Marder. I think it is the result of the difference in elevation above ground of their guns and the eyes of the crews. It is extremely finicky though - move it by an inch and it's gone. I don't think you could use it deliberately in a battle. Obviously it was a matter of pure chance that I put the Sherman in a position of such advantage.
https://dl.dropboxusercontent.com/s/fxyxf76k01fbr9r/Spotting test.bts

I think I read someone in the AAR say that I wasted a lot of points buying infantry that was never really engaged. I disagree though. The final platoon after the ridge was my last line of defense, and without them Drifter Man would have broken through to Monsaint. Also, I kept them back for a potential counterattack. But there is no point in counterattacking with infantry into terrain with TRPs and overwatched by tanks. And I'm not the type of player who does last minute suicide rushes.

Yes - that was me. Let's say I did not mind I did not have to deal with them to capture the objectives :). But I approve that you did not commit them to an attack that you saw as unlikely to succeed (a.k.a. "palinka push"). I really liked about this battle that casualties mattered for the final score (vs. assaults) and that we had a deep map.

All terrain in front of Hill 312 I knew I would lose for sure, so I only manned it with a skirmish line. Farinne was to act as a wavebreaker, delaying and annoying the enemy for as long as possible, making him waste as much artillery as possible, but I wanted to conduct a fighting retreat if at all possible. I think I generally succeeded in this.
You did succeed in this - 100%.
 
Yes - my the point is that the Typhoon would target Marders that did not end up doing much damage. Of course, the presence of a Typhoon could split off an new timeline in the multiverse where the Marders would be more effective

I understood your point. I just like to consider not only what actually worked in the battle, but what would have been the optimal decisions. Sometimes, you can do something right, and still lose (my Marder successfully ambushed your Sherman but could not fire because of the rare LOS issue), other times you can do something stupid and still succeed.

Me deploying the Marders in the open might be an example of that. Because I had actually not considered that they could have been taken out easily by air support. That was a mistake that didn't show itself - but I still try to learn from it.

Also, trying to be too clever with the Marders is probably not a good idea either. Moving them around makes them vulnerable. Trying to sneak a Marder up on the hill mid-battle was an example of that. The Marder got knocked out by random area fire, which made it seem like just bad luck, but it could have easily been lost to direct overwatch fire too. At that point, you had tanks covering the top of the hill. That was a mistake on my part.

You also commented on my Marder in Harfleur, and if it was deployed in a too visible and exposed position. I don't think it was. I intended to use it to stall your advance, but if you started ranging in with mortars, I would withdraw it. My mistake was redeploying it in an even more exposed position inside Harfleur, instead of pulling it back across the river as I had originally planned.
 
Last edited:
Back
Top