DIVES RIVER BRIDGE – D-DAYB Company of the 1st Canadian Parachute Battalion attempts to take the bridge over the Dives River, east of Ouistreham at dawn on D-Day, after dropping in overnight. This is a key bridge that will assist in permitting the allies a rapid breakout with their armour from the landings on Juno and Sword Beaches. PLAY CANADIANS VS GERMANY AI ONLY; SMALL; DURATION 50 MIN +/- 5; WX COOL, WET GROUND, HEAVY WINDS
Copyright © 2025

Spoilers below…
*
*
*
*
Having mostly short range automatic weapons and but a few long range weapons I decided on trying to get as close as possible and rush the bridge.
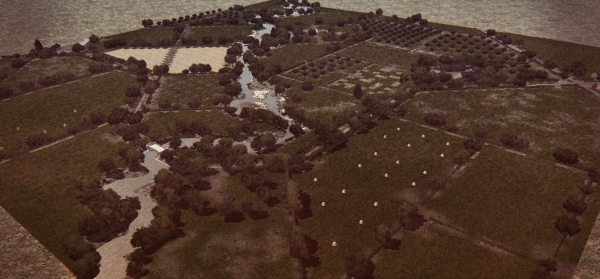
I sent one platoon up the middle to the hedges at the first bend in the road and waited for 2nd and 3rd to move up on the right to the sand pit.
After reaching the sandpit 2nd platoon formed up at the edge of the pit just out of sight and facing towards the bridge. 3rd platoon continued to move forward in to the woods on the right my right flank and turned left towards through the woods and towards the bridge.
So far not a shot was fired but foxholes were spotted on our side and near the bridge.
In the center I moved up 1st platoons mortars to be able to area fire the foxholes.
I moved mortars and Bren’s to the lip of the sandpit to prepare area fire on the foxholes when defensive fire started killing a Bren gunner.
At that point I “Quick” moved all three platoons towards the bridge.
There was an eruption of fire from both sides.
3rd platoon started taking casualties but still were moving forward.
2nd platoon took less casualties and was moving quickly towards the bridge also.
German units in the foxhole started taking quite a few casualties from the Para’s automatic weapons and the mortar and Bren’s area firing.
In a minute the left of the German line broke and started running in to and across the river where most were KIA’d as 2nd and 3rd platoon started to occupy their foxholes.
A heavy amount of firing was now going across the river to the units there,
The Germans in the foxholes on our side of the river and to the right of the road were under heavy automatic fire from their front by 1st platoon and their left from 2nd platoon. They broke quickly and routed towards the other side of the river taking heavy casualties as they did so.
Now that 1st, 2nd and 3rd platoons occupied the foxholes on our side of the river heavy fire poured across to the other side of the bridge and within 2 minutes causing heavy casualties and routing all of the the Germans there.
Within about 5 minutes from the start of the rush the battle was over with 34 minutes left in the scenario.
Allies – 77 men OK, 13 KIA, 11 Wounded. German – 11 OK, 33KIA, 30 Wounded, 1 Missing (surrendered). An Allied Total Victory.
I enjoyed the scenario, setting up for the rush and then the rush. The sounds of all the automatic fire was very cool (I use Audgisil_WWII_Sounds mod).
Maybe something as simple as increasing the quality of the German troops may make the scenario less lopsided from rush tactics.
Good stuff Ted 🙂 . You did much better than I. One thing I’m noticing as I get deeper into this scenario making, is that if one isn’t a particularly strong player (i.e. ME ), then scenarios can be a little less than challenging for good players. That may be vice versa as well. I’m not sure how to get around that, but your comments and thoughts really do help in that regard. I had a lot of trouble attacking the position, but I tended to stand back and pound them first for quite a while, while moving other units as close as I could prior to attacking. While I didn’t run out of time, I took a lot longer than you to get to the Germans and they had a little surprise waiting for me at that time. I did prevail but it was a lot closer than I would have liked.
Your point about making the Germans a higher calibre is a very good one, and I will be paying more attention to that as I go forward with new scenarios. In this case, my logic is that this was a rearward (more or less) position and was not expected to be a point of attack by the Germans, especially given that it was back from the coast by a fair bit (and nowhere near Pais-de-Calais ). Also, while important, this is a minor bridge compared with the Pegasus Bridge, where I figured the Germans would be in better shape. As such, I figured they would not have top end troops there. That, however, doesn’t necessarily make for a better game of course, and ultimately, that should be the goal.
I really appreciate the write up and your comments. Look for those to be implemented going forward and probably (hopefully) better balancing of the forces. Thanks very much Ted 🙂 .
Canuck21
In my opinion the quality of canadian troops is way to high. I finished the szenario with 5 KIA and 3 wounded while occupying the bridge just in time to kill the german reinforcements out of german foxholes as they appeared. I decided to leave the long range weapons on the first wood line while moving two platoons through the sandpit with one platoon in reserve. I managed to open fire simultaniously and croosed the open ground without any real trouble.
A whole company of Elite troops is just way to strong. CM Manual states: Elite: the best of the best. Superb training, frequent combat experience, and generally all around tough guys. When i remember correctly there would not appear one or two Elite squads per company even for the most combat hardened troops. Also the german side is way to weak to even offer small resistance. Only real asset is the one MG42 they have.